Seabuilt fuel tank access plate

The friendliest place on the web for anyone who enjoys boating.
If you have answers, please help by responding to the unanswered posts.

Bilgewater

Senior Member
Joined
Jun 20, 2011
Messages
276
Location
USA
Vessel Name
Sunset Lady
Vessel Make
1975 Chris Craft 35 Aft Cabin
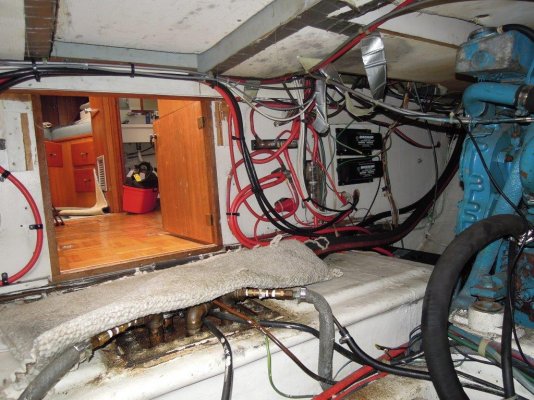
I installed a Seabuilt tank access system on my 36 trawler last week. As often happens, a 4 hour job turned into 4 days. I cut an access panel in the deck of the galley below the steps from the salon. Then I used a jig saw and cut an 8” opening in the top of the tank. Unfortunately, I ran into a stringer. I had to move the hole about 4” forward. I then cut a crescent shaped piece from the original cut-out to epoxy in place over the stringer. When that was finished, I discovered that the thickness of the tank (fiberglass, plywood, fiberglass) was equal to the length of the studs that hold the cover plate. I had to cut a ¾ inch rabbet around the rim of the opening to make everything work. With a vibrating cutting tool in one hand, and a shop vac nozzle in the other, I cut out short segments, then undercut the plywood to take the chunks out in one piece. I wanted to keep as much debris out of the tank as possible. When I made the first cut, I was surprised to discover the tank was full, 250 gallons of 3 year old diesel. I hope that after a thorough polishing, it will still be usable. After smoothing the rabbet as much as possible with a chisel, I spread some thickened epoxy around it. I then covered the cover plate with plastic, and pressed it in place to make a smooth mating surface for the seals. After the epoxy set, I used the cover plate as a template and drilled holes for the mounting studs, again using the shop vac to catch the debris. It was a simple matter to install the hinged bottom piece with the studs and gasket, then add the top gasket and cover plate. The Seabuilt website shows the process quite clearly. They also have great customer service. I had ordered an aluminum kit by phone. Within an hour, they called back to apologize that they were out of stock of that kit, but would I accept a stainless steel kit at the same price? Wow, twist my arm!!!!
 

Attachments

  • IMG_0304.jpg
    IMG_0304.jpg
    105.7 KB · Views: 233
  • IMG_0306.jpg
    IMG_0306.jpg
    98.8 KB · Views: 225
Great post, are you thinking of installing fuel gauge. The previous owner on our 43 Mk1 Trawler installed something similar but it's only a fuel intake. Not sure why, but it also serves as a fuel measurement area, complete with a old broom stick with markings to indicate the fuel level. Gotta love an engineer.
 
Not thinking about a fuel gauge at this time. Lifting an access panel in the galley deck forward of the tank reveals a somewhat opaque vertical strip of fiberglass. I'm guessing that fuel quantity can be seen in this area. The water tank is forward of this, with the same unpainted strip to see quantity. Real old school, but it works. If starting with an empty tank, one could add a specific amount of fuel and make marks on the side of the tank. Since I'm starting full, I'll have to do something else. I want to install a 30 gallon day tank in the engine room, and monitor fuel quantity that way. Don't know if I'll get to it this year or not.
 

I have not been able to understand what access from the top of the tank would do as most of the concerns are at the bottom? If the tank has a site tub then how full the tank is should be seen/know, and the tubes marked. The Eagle three tanks have sight tubes, and how full marked in the tubes. I cut a 24” by 24” hole high on the side of the tank, so I can climb inside the tank to clean/inspect/repair.

The tanks sight tubes have valves that are closed all the time except when checking the level. Many years being a newbie, I left the valves open, a tube leaked before I notice had 5+ gallon in the bilge. So now I close them. :thumb:

So why can’t you monitor the fuel the way it was? I monitor the fuel in the Eagle three 400 gallon tanks but the fuel polishing/cleaning system, adding additive to the fuel, and turning/using the fuel. The Webasto diesel heat burns about 500 gallon per years and being the tanks are old I only fill the ½ full, so if there is a leak there is enough room in the other tanks.
 
Your tank must be slightly different than on mine. On mine there is an inspection/inlet-outlet port in the engine room as seen in the photo. I use a sounding tape for my fuel gauge.
 

Attachments

  • DSCN1125.jpg
    DSCN1125.jpg
    166.9 KB · Views: 202
Gulfstar 36 -
My fuel tank has a very similar looking panel which has the fuel inlet hose, vent line, supply lines to both engines & genset, and returns from the engines and genset. There is a square top plug in the midst of all that stuff, but I haven't messed with it. Not real convenient to get to. It looks like your engine room forward bulkhead goes straight across the space. On mine, to the right of the door, the deck goes forward about three feet, to the same bulkhead that the helm attaches to above it. By the way, where are your battery banks?
Phil Fill -
I put the access plate on the top of the tank because a) I could get to it easily, b) it's primary purpose was for cleaning, and c) on top would have the least chance of leakage. I do not have sight tubes, just an unpainted strip of fiberglass running from top to bottom.
 
Last edited:
My helm station is directly about the 2 black galvanic isolators mounted of the bulkhead.


Gulfstar 36 -
My fuel tank has a very similar looking panel which has the fuel inlet hose, vent line, supply lines to both engines & genset, and returns from the engines and genset. There is a square top plug in the midst of all that stuff, but I haven't messed with it. Not real convenient to get to. It looks like your engine room forward bulkhead goes straight across the space. On mine, to the right of the door, the deck goes forward about three feet, to the same bulkhead that the helm attaches to above it. By the way, where are your battery banks?
Phil Fill -
I put the access plate on the top of the tank because a) I could get to it easily, b) it's primary purpose was for cleaning, and c) on top would have the least chance of leakage. I do not have sight tubes, just an unpainted strip of fiberglass running from top to bottom.
 
Bilgewater....that 250 gallons of diesel in your tank is probably just fine. I have fuel older than that in my 500 gallon tank on our GS 44 MC... or at least the average age is more than 3 years... My engines start quickly, and run fine, as does our Northern Lights generator....

If you feel the need, get it polished...
 
A little off topic but has anyone cut an access hatch in the galley floor of a 36 to get to the water tank hose connections? I'm not sure where they are and don't want to cut any more of the floor away than I need to. I'm guessing that the hoses connect at the top of the tank and would like to know where to put the access hatch. Seems odd that the builder wouldn't have provided access to the tank to hose connections.
 
Bilgewater,

Even though your tanks have fuel you may be able to use the same idea you mentioned earlier. At some point when you go to fuel, mark your tank where it is before, then add a given amount of fuel. If a 250 gallon tank that might be 50 gal increments. So you add 50 gallons, mark again and measure the distance between marks. Go back now and start measuring from the bottom and making permanent marks.

That works on a square or rectangular tank.

If its an odd shaped tank you can use some graph paper and the measurements of your tank. Draw it on the graph paper and figure it out. Each cu ft or cu inch of tank has a given liquid volume. It may not be exact but it will be close. Make sure you use liquid volume when looking it up though.
 
Last edited:
aronhk_md _

The tank conforms to the hull, and has a wine glass shape to it. Even graduations will not work. I'm guessing that the last fifty gallons will drop quickly in the sight panel (if I ever let it get that low). I'll just have to wait and see once I get it in the water and start using it.

On The Rocks-

I hear you! I'm not sure where the water inlet is located. That's another item on the list to check out. I'm discovering all sorts of weird hoses and wires from the POs. Have to really hunt to see what does what.

I checked my stuffing boxes this morning. Starboard side had a 2 x 3 foot panel in the stateroom deck that totally exposed the stuffing box and shaft seal housing. The Port side is buried under the deck of the vanity in the head, with a pitiful 8 inch x 8 inch access panel. I enlarged it as much as I could, but it's still a PITA to get to. The old packing came out like sawdust, so I'm guessing it hadn't been properly serviced for quite a while. During the acceptance inspection it gushed like there was nothing there. Stbd side was fine. Next will be checking the packings on the rudder posts.
 
I can access mine under the forward dinette seat.


A little off topic but has anyone cut an access hatch in the galley floor of a 36 to get to the water tank hose connections? I'm not sure where they are and don't want to cut any more of the floor away than I need to. I'm guessing that the hoses connect at the top of the tank and would like to know where to put the access hatch. Seems odd that the builder wouldn't have provided access to the tank to hose connections.
 
Here are the soundings from the PO when he cleaned the tank on my boat

235 topped
225 30”
200 29”
150 25”
100 22”
50 16”

aronhk_md _

The tank conforms to the hull, and has a wine glass shape to it. Even graduations will not work. I'm guessing that the last fifty gallons will drop quickly in the sight panel (if I ever let it get that low). I'll just have to wait and see once I get it in the water and start using it.

On The Rocks-

I hear you! I'm not sure where the water inlet is located. That's another item on the list to check out. I'm discovering all sorts of weird hoses and wires from the POs. Have to really hunt to see what does what.

I checked my stuffing boxes this morning. Starboard side had a 2 x 3 foot panel in the stateroom deck that totally exposed the stuffing box and shaft seal housing. The Port side is buried under the deck of the vanity in the head, with a pitiful 8 inch x 8 inch access panel. I enlarged it as much as I could, but it's still a PITA to get to. The old packing came out like sawdust, so I'm guessing it hadn't been properly serviced for quite a while. During the acceptance inspection it gushed like there was nothing there. Stbd side was fine. Next will be checking the packings on the rudder posts.
 
Gulfstar 36 - Can I assume you have the same integral , wine glass shaped fuel tank that I have? When you dip the tank, what fitting are you removing? I assume you have a measured stick to dip with. What do you do with it after you dip it, and where do you store it?
 
In the photo above you can see the top of the tank with the plumbing connectors. Out of sight under the carpet is a 3/4 inch opening with a pipe cap on it, I unscrew this and dip it from there. Since I can't get the hatch above open due to an icemaker I use a collapsible carpenters ruler.
 
Gulfstar 36 - Seems like an elegant solution. I'm guessing you only check it once a week or so, depending on usage. Does the carpenter's rule get saturated after a while, and where do you store it when not used? Any smell issues? (the First Mate has a nose like a bloodhound)
 
I keep an operation log so I sort of know where I'm at with fule. I check it maybe after a few outtings. When I get to 26 inches I top off. The ruler is wiped and deposited in a ziploc bag. For my water tank I use a wood dowle.


Gulfstar 36 - Seems like an elegant solution. I'm guessing you only check it once a week or so, depending on usage. Does the carpenter's rule get saturated after a while, and where do you store it when not used? Any smell issues? (the First Mate has a nose like a bloodhound)
 
Back
Top Bottom