Chicken Soup For The Sole

The friendliest place on the web for anyone who enjoys boating.
If you have answers, please help by responding to the unanswered posts.

Tom.B

Moderator Emeritus
Joined
Jul 30, 2009
Messages
5,839
Location
USA
Vessel Name
Skinny Dippin'
Vessel Make
Navigator 4200 Classic
Hi everyone... I have started refinishing the salon sole. It looks like the PO just slapped down some stain/varnish and it has looked horrible for the entire 3.5 years we've owned her.

I brought home the engine room covers this weekend to sand (once they are done, we are already 30% thru the job). I sanded to 220 grit before I read Bess' thread she posted several months ago, so I will go back to 120 today. I plan on looking at some of the reco's for satin floor finishes today from that thread too. Lenmar, Zip Guard, Lasts & Lasts, Bowling lane, and Daly's Aqua Spar (Star?)

My first question is about the gaps that have formed and how to fill them. In the past (shop class) I used to use sawdust mixed with epoxy to fill gaps like this. I was wondering if that will work with West Systems epoxy and still be sandable? I was also considering standard white glue since it dries clear (again with the teak sawdust mixed with it) and sands easily. How would you go about getting ANY product into these tiny voids, or do I even bother with it? There is a fair amount of them and it looks like a big job.

Here are some pics:


P1020019


P1020021


P1020026


P1020024


P1020023


P1020027
 
Last edited:
I'm just as interested as you in hearing the recommendations. The only product I've ever used for wood filler is plain old Elmer's white glue mixed with sawdust.
 
And I think, Craig, that is what I am going to use too.
 
Tom--- The subject of refinishing cabin soles, filling dings and cracks, comes up a lot on the GB owners forum. The founder of the forum, Bob Lowe, who is also a master shipwright and former yard owner, has posted his recommended method of stripping, filling cracks and dings, and refinishing a cabin sole several times.

If you're up for doing a little archive searching I would highly recommend you check the archives of that forum using key words like cabin sole, cabin floor, refinishing floor, etc. and put Bob Lowe as the author. You may have to join the forum to search the archives but it's free. In my opinion Bob Lowe's method is the best advice on this particular topic I think one can get and it's based on years of experience doing this exact same job on all sorts of boats but particularly GBs.

If you join the forum you can ask Bob directly for his recommended method and it's likely he'll repeat the description of the process he favors.
 
Tom--- Have a slow evening here in Doha, Qatar so here are some of Bob Lowe's posts on refinishing the teak parquet cabin soles on GBs. Maybe there will be some information of use to you....

------------------------------------------

If you are simply applying varnish to freshen up the surface, are satisfied with the "color" and the parquet grain does not need filling or leveling, two coats should suffice. If you have bare areas, you might want to spon those with 4 coats of gloss first, blend sand and then apply a coat over the whole area.

When I refinish a teak parquet cabin sole down to bare wood, I apply 3 coats of CPES then 8 or more coats of a good gloss like Captain's or Crystal. When satisfied with the grain filling, I then apply two coats interlux satin varnish. If one prefers different finishes, I'm sure there are many that will work as well, they just happen to work well for me.

The reason satin or flat finishes are not as slippery is because their surface is rough, like fine sandpaper, so as to not reflect light like a smooth gloss finish. However, even satin can be a bit slippery when wet, especially on ladder or step edges which is why I prefer to leave the tops of outside steps bare teak and put non-skid strips of sand and varnish on the interior steps starting at the edge. Then a couple more back on the step.

--------------------------------------

I'm familiar with Minwax products but not on a boat, so no opinion on Minwax.

I have refinished many teak parquet floors and here is what works for me.

The parquet is probably a bit uneven with some glue joints loose, some with gaps of various sizes, depending on age and exposure.

Sand the floor with an aggressive grit, say 36/40 grit to remove the old finish and even the floor out. I like a 4" Makita belt sander and other smaller orbital sanders for the edges and corners, including scrapers and hand sanding. Then with progressively finer grits like 60, 80, 100, 150, and 220 with a random orbital sander and by hand where required.

Make sure to get good color removing all sun-bleached areas and stains. This is important for the best results.

Vacuum thoroughly including the gaps in parquet to remove all dust. Fill gaps with epoxy resin and trowel or fair with a putty knife to remove all excess. Resand to bare wood removing all surface epoxy. Apply 3 coats CPES. Then it's a matter of building a good base of varnish. I like Crystal for this as it builds fast, levels well and requires no sanding between coats if applied within the proper window of time.

After about 6 or so coats of Crystal gloss, sand with a random orbital to 220 finish.

Apply at least 3 coats Interlux Goldspar Satin Varnish sanding lightly between coats.

We found that this finish will hold up indefinitely depending on how used. We took our shoes off while inside. After 7 years it still looked like new. If wearing shoes inside, more wear, will need recoating more often.

-------------------------------------------------

I agree with Tom, in most cases. I follow a couple rules for gluing.

If there are any gaps in the glue joint, as is the case much of the time on boats, I use thickened epoxy which will fill any gaps. Be sure to thicken enough to not run out of the glue joint.

If the glue joint is well fitted with no gaps and can be well clamped while the glue is curing, I use a good wood glue, like Weldwood Plastic wood glue. It is brown and will do some minor surface gap filling, is strong and waterproof in most cases, though not for underwater use. Epoxy will squeeze out during the clamping process and the joint will be glue starved and weak. Epoxy needs some mass to be effective.

I also use the brown wood glue for plugs except for minor repairs that I want to complete in one day and the fit is good and then I use 5 minute epoxy. The brown glue will fill any surface gaps if left around the plug until cured and blend well with the wood.

--------------------------------------------------

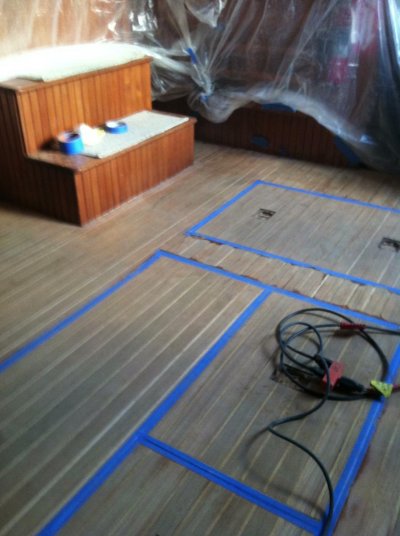
Assuming that the cabin sole teak parquet is worn through the finish and the color is not even, I would approach the project by first looking to see if any of the parquet is loose and in need of re-gluing and do that first with epoxy.

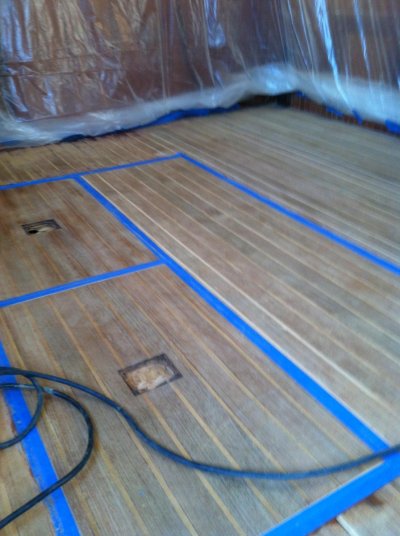
If all parquet is well glued, does it have spaces between the parquet pieces from the teak drying out? If so, then I would squeegee some epoxy over the sole to fill those spaces. Then it’s time for sanding.

Generally, when it’s time to refinish a teak parquet cabin sole, there is some color problems from mildew in the wood grain (black) as well as areas where the finish is missing, worn and/or weathered away. There is also usually some unevenness to the surface. To get a good looking refinish job, it will be necessary to sand the deck thoroughly and aggressively to get it even and with good color. The parquet is about 3/8" thick, so sand away.

I find it much easier to sand the old finish off with a belt sander using 36 grit until most of the color is achieved, then 80 grit on the belt sander, followed by 100 grit, 150 grit and finally 220 grit on an aggressive random orbital sander, using a good dust collection system on all sanding. Corners and edges can be cleaned up with hand scraping for color and then light sanding. Sand with the hatches in place to even/level all out. They can be removed afterwards for varnishing.

I find it much easier and faster to get to a new varnishable surface in this manner, rather than removing the finish then sanding. I also don't like all the gunk that ends up in the open seams of the parquet when using paint/varnish remover. When sanding only, the sanding dust can be vacuumed out and then CPES and varnish.

When the teak is ready for varnish, apply 3 coats of CPES and then a coat of Captain’s or Crystal within a couple hours of the last coat of CPES. Lightly sand with 150 to knock down any roughness from wood fibers sticking up and apply successive coats of Crystal (or other good varnish that can be recoated without sanding) two coats per day until you have a total of at least 5 coats. Sand with 150 to help level the grain a bit and apply several more coats followed by more sanding to level the grain. When satisfied, apply a couple coats of Interlux 60 Goldspar Satin Varnish allowing a couple days drying and sanding between coats with 220. Be sure to stir the varnish frequently during varnish work.

----------------------------------
 
Tom,

I have also used many different types of filler over the years in my flooring business. Sawdust mixed with glue or epoxy works well. I have often made my own mixing sawdust with clear lacquer.

If you fill after the initial sanding, the subsequent sandings with finer grit will remove the excess. If you do the final sanding then fill you will get a halo around the filled spots from the filler. Sometimes I fill after the second coat. The excess can be cleaned with a rag dampened with water or the applicable solvent. This method will also avoid a halo.

Rob
 
Interesting. Well... There is always the ability to sand again. I had planned on it. But I kinda like the idea of filling after the first coat of varnish. Hmmm...
 
Varnish away , it will bridge the gaps , and fill them.

Should the sole spend time absorbing water the small amount of varnish will do less damage to the piece as the wood expands.
 
Tom have you decided what product to refinish with?
 
Yes. I have plans to use Rustoleum Ultimate Urethane Satin. No particular reason except it's satin finished, water-based, and was easily gotten at Lowe's. Besides, I didn't want to make a big science project out of picking the PERFECT floor finish. I don't the the traffic is high enough or the abuse rugged enough (especially since Bess has runners down everywhere for the dog) to justify a nationwide search or the high cost of the best floor finish made by mankind. I just want it to look better and last a few years.

I have just now finished doing a hole and crack filling test with it. I mixed a generous amount of sawdust into a small amount of finish and troweled it into the gaps with a West Systems stir stick. Once dry I will hit it with 100 grit sandpaper again then apply a few coats of the urethane. Looks good so far... pics after the weekend.
 
If only the Karate Kid had a belt sander... :)

Karate Kid Lesson 2 (Sand the Floor) - YouTube

My results at 50-grits and country ham. Will hit it lightly with 80-grit then fill the holes with urethane and sawdust mix before the 100-grit final sand. Then go in for treatment for Black Lung.
 

Attachments

  • floor1.jpg
    floor1.jpg
    110 KB · Views: 134
  • floor2.jpg
    floor2.jpg
    124 KB · Views: 133
Greetings,
Mr. Gonzo. That looks pretty good and will "POP" even after the first coat. I'm jealous. My flooring is parquet and it's quite uneven. No hatches to contend with on the saloon level and the deck on the lower level is composed entirely of easily removable sections. This thread is great!
 
8172003957_acd8964280.jpg


With gaps like that, I would consider removing the holly strips and replacing them with wider strips. It migh be relatively easy, it might be impossible, but I would consider it.
 
With gaps like that, I would consider removing the holly strips and replacing them with wider strips. It migh be relatively easy, it might be impossible, but I would consider it.


No No No.......this is one of those "FREE" projects.....Don't give him any ideas! :hide:
 
Yea... I would NEVER consider something as drastic as that, Ron. I just don't have the time or any interest in making that kind of effort. Besides, the results of mixing sawdust with urethane have been very good (pics on Saturday). Moreover, if I completely f--- it up, Bess can just slap carpet on it until I can try again later. It's going well though. I have positive vibes about this. It's not very hard, just labor intensive and only wood. Been working with wood since childhood.
 
Here is the final sanding job from this past weekend. One thing I ended up doing was to limit the amount of crack filling to just the largest and most visable gaps. Otherwise, I would spend far too much time on it. There were gaps just about everywhere. Time and OCD were against me, so I tried to control myself. It's just not THAT important in the grand scheme of things. Applying most of the finish this weekend. I'll try to remember to get a few close-ups of the gap filling before the first coat goes on.

(crappy iPhone pix... sorry)


floor4


floor3
 
Last edited:
looking good! When do the coats start going on? Looking forward to more pictures...
 
Saturday mornin'
 
How's the refinishing going? We're sanding now. I'm ready to try something else (heat gun or chemicals) at this point. Though Matt will take back over as soon as he's back with lunch.
 
Coats 5 and 6 went on today. It's not 100%, but it's WAY better than it was. The old stain and dirt was pretty deep in the holly, but I didn't want to sand deep enough to get it all bright and clear, so I got it close. Our floor wood is pretty thick, so I was able to go at it with 60 grit on a belt sander for the first sanding. I had to keep the tool moving or you could dig to China with the thing.

The satan (pun) finish is going on pretty easily. We tried to use a roller to put the first coat on today and it left little bumps, or peaks, everywhere, so the second coat today was back to a brush application. Had we had the time or inclination, we probably should have hit it with a little sandpaper. But worst-case, it adds a little non-skid surface to it. We'll probably put a coat 7 and 8 on next week and call it done.

I think it will look fine. My two big hangups are that the floor is brown and the walls are orange-ish... and I am HOPING the finish will last a few years.

That's all for now.
 
Last edited:
We put on the first coat of finish today, at long last. We'd spent six days sanding, then put an oil based "sealer" on it yesterday which brought out the rich color of the wood. Hopefully we'll have time for a coat in the morning tomorrow before the Christmas festivities with the in laws.
 

Attachments

  • image-3891441360.jpg
    image-3891441360.jpg
    40.8 KB · Views: 74
I didn't read the whole thread but if you haven't done anything with the cracks, I would strongly recommend applying one coat of finish to seal the wood b/4 you start with any glue, epoxy, sawdust, mixtures. That way the finish will color the wood evenly.
 
Back
Top Bottom