I'm about to start a project on an older Chriscraft

The friendliest place on the web for anyone who enjoys boating.
If you have answers, please help by responding to the unanswered posts.
Steve

Your work on that CC is exceptional. Hope I get opp to stop by again. Plan to be in vicinity mid month for a Tolly cruise weekend.

Not trying to pry, just interested... can you give us a ball park figure of overall cost to refurbish a grand old CC such as you are doing? :confused:

Cheers! Art :popcorn:
 
Cost of restoration

This is very hard to quote as every boat has it's own set of problems. This repair is being done on a t&m basis and will come close to $35,000. We have more added work to do including repainting the hull , bottom, and completely remodeling the master stateroom and head. I would think this boat in pristine condition would be worth between 120K and 250K depending on area sold. I have seen as much as $500K spent on the restoration of a 48 foot Stevens and a complete bottom restoration at about $140K on an older 30's classic. It's probably cheaper to build from scratch. There is nothing practical about pleasure boats, especially wooden classics. This owner loves this boat and has been living on it for several months prior to the repair. He feels it's worth it to do a partial restoration, There are topside issues that could bring the total repair into 100K range if he continues to bring things up to snuff. I have to say this boat is a pleasure to run and provides great living spaces with ambiance you can't get in a glass boat.
 
Thanks, Steve... Boat: Hole in water that when old and still surrounded by wood one throws MUCH $$$Money$$$ into! :lol:
 
Progress

Current progress.
 

Attachments

  • IMG_3689 comp.jpg
    IMG_3689 comp.jpg
    96.4 KB · Views: 222
  • IMG_3690 comp.jpg
    IMG_3690 comp.jpg
    101.8 KB · Views: 179
TY for picts... Beautiful job, Classic repair, Cool look! :thumb:
 
Progress

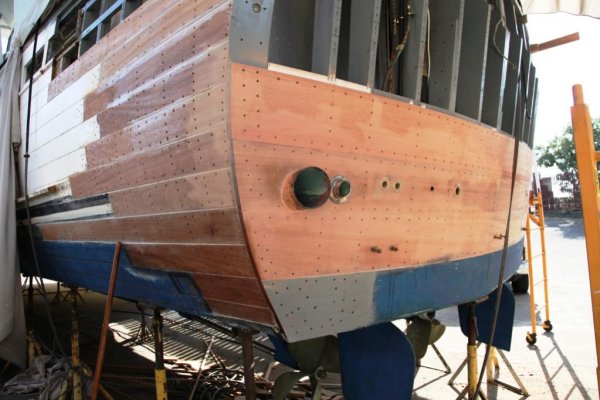
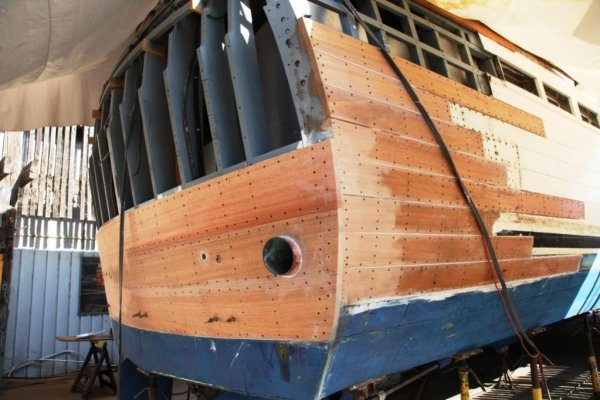
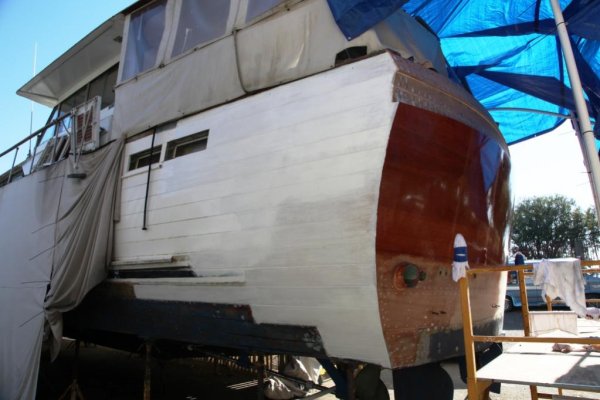
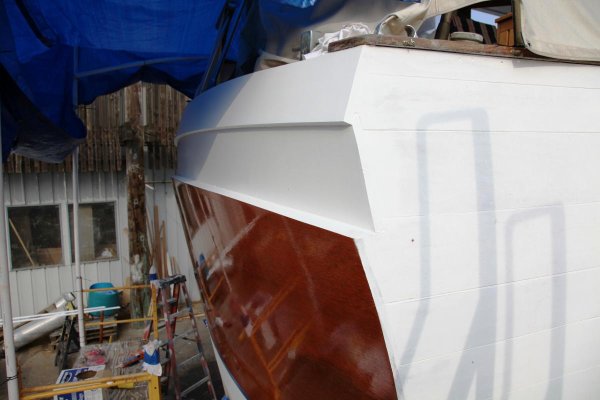
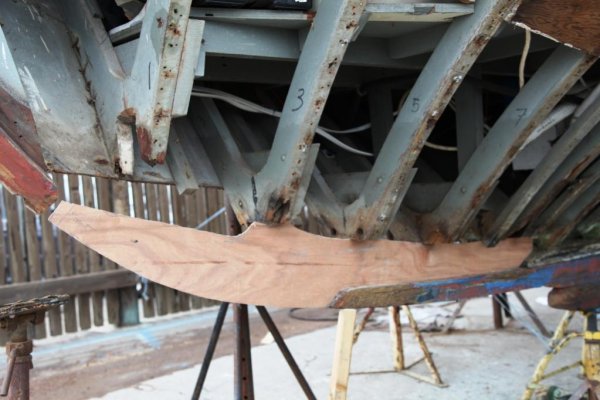
Planking the transom has taken more time than thought. Due to the the shape of the transom warping boards 10" in width has been a bit of an challenge. One of the failures has been the step that transitions from the lower section of the downward and forward slopped transom to the upper upward slopped section. I'm addressing the step in a different way than Chriscraft. Chriscraft sandwiched a spacer between two planks than was cold bent into it's contorted shape and held with calking and screws. We have chosen to laminate a shelf that will hold it's own shape without requiring glue or screws to hold it in shape. This combined with backing blocks should provide a better waterproof and rot resistant shelf. The new shelf will be treated with West system penetrating epoxy and calked with Synkaflex.
 

Attachments

  • Cause and effect.jpg
    Cause and effect.jpg
    72 KB · Views: 153
  • Transom step.jpg
    Transom step.jpg
    84.5 KB · Views: 161
  • IMG_3693 comp.jpg
    IMG_3693 comp.jpg
    102.2 KB · Views: 190
At last the last plank

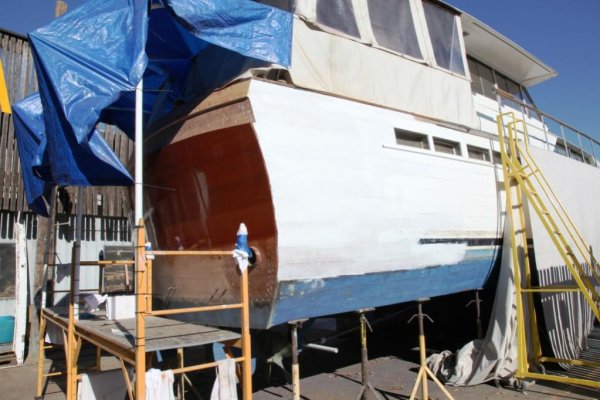
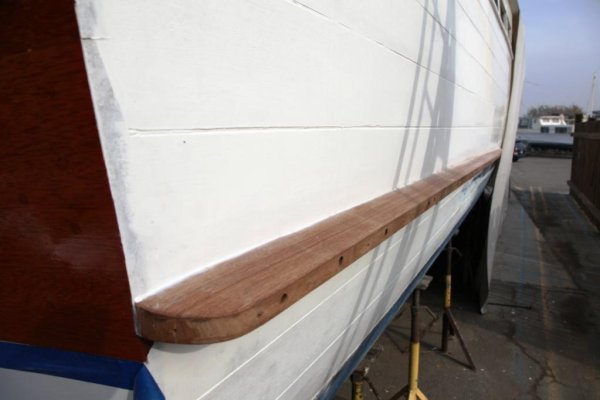
At last the final planks are in. Just two new Gunnels and Spray Rails and we get to start on the bottom refastening.
 

Attachments

  • IMG_4108 Comp.jpg
    IMG_4108 Comp.jpg
    79.3 KB · Views: 168
  • IMG_4102 Comp.jpg
    IMG_4102 Comp.jpg
    70.7 KB · Views: 159
  • IMG_4113 Comp.jpg
    IMG_4113 Comp.jpg
    71.6 KB · Views: 162
Steve - Looks great! :thumb:
 
Paint at last

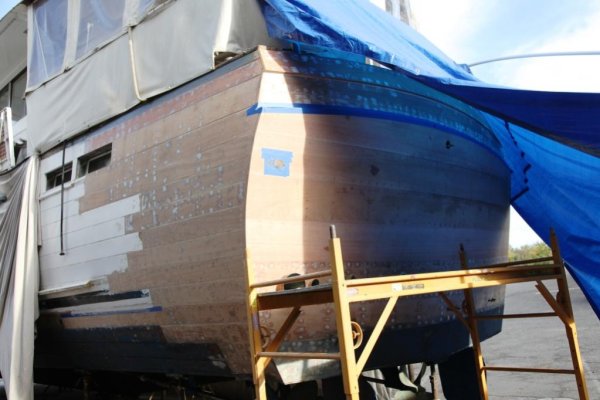
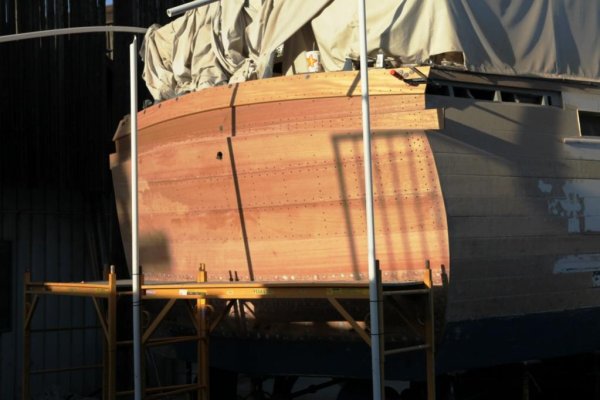
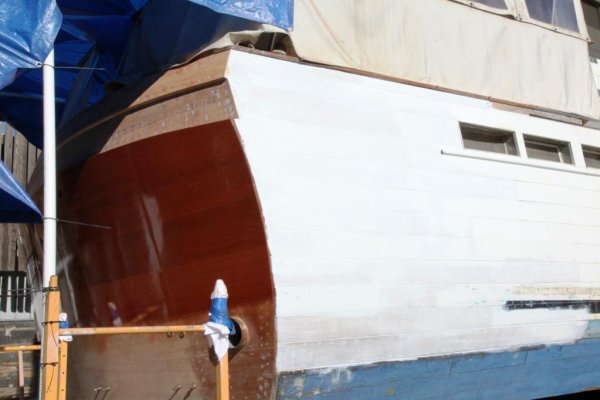
Primer and the first coast of varnish.
 

Attachments

  • IMG_4119 comp.jpg
    IMG_4119 comp.jpg
    80.8 KB · Views: 160
  • IMG_4120 comp.jpg
    IMG_4120 comp.jpg
    100.5 KB · Views: 157
  • IMG_4121 comp.jpg
    IMG_4121 comp.jpg
    64.9 KB · Views: 150
OOOOhhhhhh - Shiney :dance:

Looks great Steve. Hope wife and I get opportunity to stop by and molest your work with our hands before she goes splash! How'd the bottom refastening go... well I hope, that completed?

Cheers, Art :thumb:
 
Scary-you and your guys really have done a superb job on that boat. IT will have a really gorgeous ass-end now. I hope the owner appreciates the quality of the work you did!
 
Very nice. That SS cover that CC placed down the corners of the transom. Seems to trap water running off the deck and then creates a ton of issues down the road.

You simply going to leave as shown in pics or replace with same or ?

Just wonderin.

I personaly love to see the old woodies recieving the respect you are giving. Thanks for sharing with us.
 
Very nice, Steve! Great to see new life being breathed into a classic.
 
Getting close

Several more coats of varnish and a few assorted pieces and the stern is back together. New spray rails installed the new gunnels have been fit and are being varnished off the boat before installation. We have the go ahead to start the refastening of the bottom. This project has taken far longer than anybody thought. So far we have completely replaced the exhaust systems and most of the stern planks and several frames. The bonding system was replaced as well. All through hulls have been bead blasted and if not installed soon will be. The hull will be repainted above the waterline after all caulk joints are cleaned and re-caulked. The corner trim is a problem, it is however a ChrisCraft hallmark so we will let the owner decide on whether it get installed. All of the stainless trim causes issues, caulking the screw threads helps but is not a complete solution.
 

Attachments

  • IMG_4125 Comp.jpg
    IMG_4125 Comp.jpg
    60.1 KB · Views: 155
  • IMG_4131 Comp.jpg
    IMG_4131 Comp.jpg
    82.3 KB · Views: 140
  • IMG_4129 Comp.jpg
    IMG_4129 Comp.jpg
    52.3 KB · Views: 146
Last edited:
Oh oh

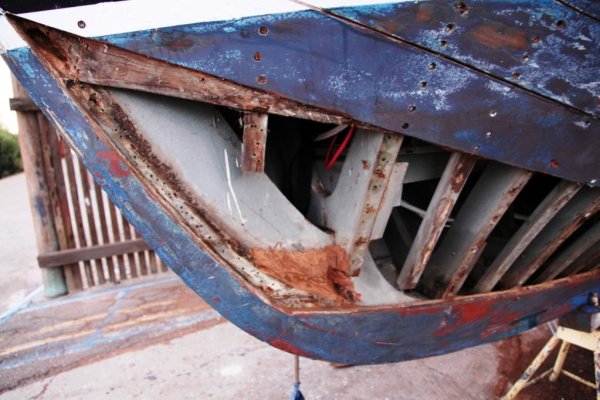
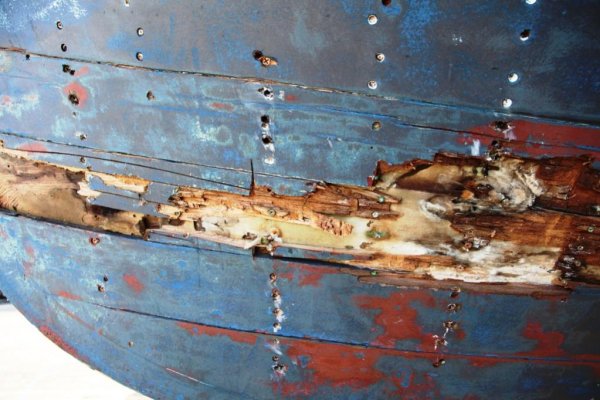
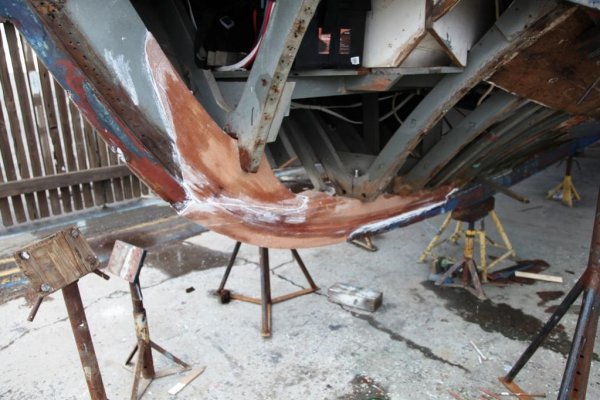
Well it looks like we are into more rot. The stem and several frames will require work. ChrisCrafts used a inner layer of plywood under the planking with a thin layer of canvas between. This can be a problem trapping moisture and creating dry rot. Unfortunately there were several cracks in the bottom planks on the port bow that have allowed moisture into that inner layer of plywood. So far there are two frames and parts of the stem that have obvious damage. This boat was also refastened so the frames weakened by the large number of screw holes. These holes will have to be filled with glue and dowels as a minimum. The two badly rotted frames are going to be replaced. The forward stateroom and head will probably require some dis-assembly. Removing the stem will probably be a deal breaker so we will try to stabilize it with penetrating epoxy and epoxy filler. I have ground out the punky wood and we will drill penetrating holes to arrest farther rot. This boat is rapidly approaching the point where repairs may exceed the boats value.
 

Attachments

  • IMG_4147 Comp.jpg
    IMG_4147 Comp.jpg
    79.5 KB · Views: 142
  • IMG_4157 Comp.jpg
    IMG_4157 Comp.jpg
    103.8 KB · Views: 161
  • IMG_4160 Comp.jpg
    IMG_4160 Comp.jpg
    91.2 KB · Views: 150
  • IMG_4154 Comp.jpg
    IMG_4154 Comp.jpg
    110.8 KB · Views: 151
I can only imagine the feeling in the gut when presented with more bad news like this. I have to wonder, though, how this would be a surprise. Wouldn't the whole boat be evaluated before starting on a major rebuild?
 
A good survey might have helped

Having worked on this boat now for over 4 months I'm amazed at how these surprises just keep coming. I discovered this rot when a otherwise sound appearing plank collapsed under the screw head as I was refastening it with. The plank appeared sound when tapping and poking with a awl. Wouldn't it be nice to be able to xray the hull like a dentist and locate rot without destructive testing. the owner said what do you expect it is a wood boat and wood boats rot. I'm sure this is not the end of it.
 
Having worked on this boat now for over 4 months I'm amazed at how these surprises just keep coming. I discovered this rot when a otherwise sound appearing plank collapsed under the screw head as I was refastening it with. the owner said what do you expect it is a wood boat and wood boats rot.
Gee, the owner is philosophical in the face of repairs> value of boat. He`s so far in he has to keep going, but ouch..
 
Having worked on this boat now for over 4 months I'm amazed at how these surprises just keep coming. I discovered this rot when a otherwise sound appearing plank collapsed under the screw head as I was refastening it with. The plank appeared sound when tapping and poking with a awl. Wouldn't it be nice to be able to xray the hull like a dentist and locate rot without destructive testing. the owner said what do you expect it is a wood boat and wood boats rot. I'm sure this is not the end of it.

Steve

As you know better than nearly anyone... old wood boats can have more hidden surprises of "ROT" than a pissed off ex wife with her name still on the house mortage and a 51% position in your business! Long as the owner is willing... I'm sure you can repair all the rot you may locate. Bow stem replacement is not really end o' life for a boat... just another week + of work and more expense. I look forward to your finished product... she'll be better than new! :thumb:

Good Luck!! - Art
 
That week plus of work

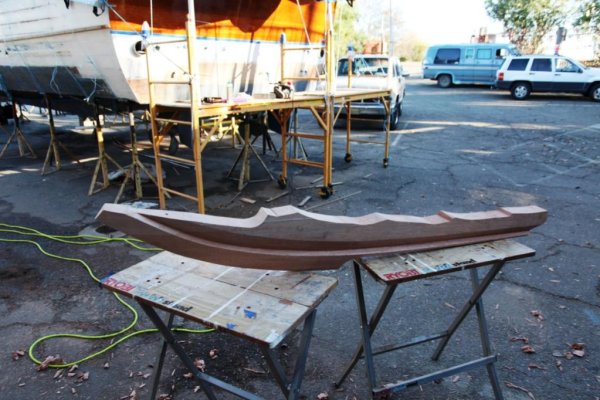
Here are the replaced keel and knee at the bow. The keel was pretty much carved by hand using chisels, scrapers, and hand planes. Everything is set in 5200 and will be treated with Smiths epoxy and bilge coated. all bronze boats have been replaced. the hull is almost completely refastened at this time. Just a few more frame to replace at the bow and we will be caulking and filling the thousands of screw hole with epoxy filler.
 

Attachments

  • IMG_4176 Comp.jpg
    IMG_4176 Comp.jpg
    85 KB · Views: 141
  • IMG_4190 Comp.jpg
    IMG_4190 Comp.jpg
    80.5 KB · Views: 147
  • IMG_4198 Comp.jpg
    IMG_4198 Comp.jpg
    102.8 KB · Views: 155
  • IMG_4191 Comp.jpg
    IMG_4191 Comp.jpg
    71.8 KB · Views: 142
  • IMG_4192 Comp.jpg
    IMG_4192 Comp.jpg
    116.2 KB · Views: 136
  • IMG_4194 Comp.jpg
    IMG_4194 Comp.jpg
    105.3 KB · Views: 143
Last edited:
I stopped by yesterday afternoon Steve and was quite impressed. The photographs really do not convey the size of job this really is.

Keep up the great work. You must be part magician.
 
Go Steve GO!! We hope to be up that way some time in Jan. Try to stop by for a look-see. You sure have progressed well since our first visit. :thumb:

Art
 
Here are the replaced keel and knee at the bow. The keel was pretty much carved by hand using chisels, scrapers, and hand planes. Everything is set in 5200 and will be treated with Smiths epoxy and bilge coated. all bronze boats have been replaced. the hull is almost completely refastened at this time. Just a few more frame to replace at the bow and we will be caulking and filling the thousands of screw hole with epoxy filler.

That's a work of art on it's own. If I had made anything that looked that good out of wood I'd stain it and hang it on the wall in my living room.
 
There is a fellow called Hendo8 in west Australia, practically rebuilding a woodie from scratch, who might well want to tap you skills brain, Scary.
 
Steve, Your talent with wood truly amazes me. Hope all is well with you and yours. Once you get done with this project, maybe I could talk you into a much simpler one with Teak.

Merry Christmas and a Happy New Year.
 
Here are the replaced keel and knee at the bow. The keel was pretty much carved by hand using chisels, scrapers, and hand planes. Everything is set in 5200 and will be treated with Smiths epoxy and bilge coated. all bronze boats have been replaced. the hull is almost completely refastened at this time. Just a few more frame to replace at the bow and we will be caulking and filling the thousands of screw hole with epoxy filler.

You sir, are a true Artisan.
 
There is a fellow called Hendo8 in west Australia, practically rebuilding a woodie from scratch, who might well want to tap you skills brain, Scary.

Hi Pete. Thanks for the intro.

Hi Scary. Yes I am doing a complete rebuild of a woodie. Ive made a thread on here With lots of pics etc. The only thing left original was the keel. Little bit different to yours as mine is cold moulded ply sheets but yeah might ask a few questions if I get stuck if that's ok?

Cheers mate
Matt

iPad Forum Runner
 
I'm with JD-that is a beautiful piece of wood! From a single piece? or a laminated piece? You are an artisan.
 
Laminated

I could not buy a piece Philippine Mohogony locally that had the rough dimensions needed to produce this piece. It is made up of two pieces of 8/4. With added pieces of 4/4 at the top. Glued with water proof Titebond and through bolted. Most of the replacement frames will be laminated as well. I think in most cases I end up with a stronger piece of wood. All framing is treated with Smiths penetrating epoxy and painted with bilge coat. It is more work to laminate, however I am able to laminate bend into timber and have it fasten with out the screws having to force a cold bend into the timber. This obviously puts less load on fasteners.
 
Back
Top Bottom