Bluewater 40 Pilothouse Roof Replacement

The friendliest place on the web for anyone who enjoys boating.
If you have answers, please help by responding to the unanswered posts.

syjos

Guru
Commercial Member
Joined
Nov 8, 2012
Messages
2,315
Location
USA
Vessel Name
Sandpiper
Vessel Make
Bluewater 40 Pilothouse Trawler
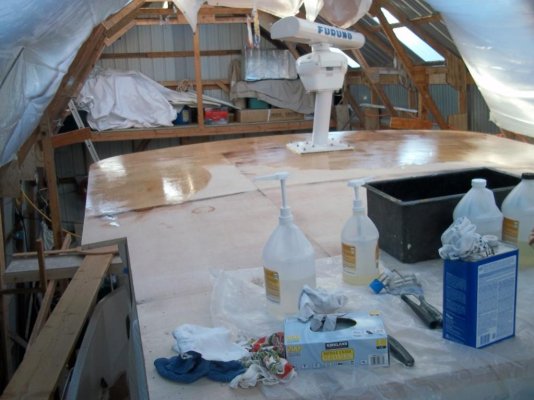
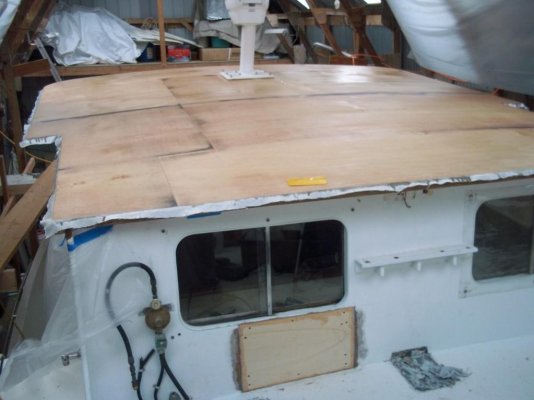
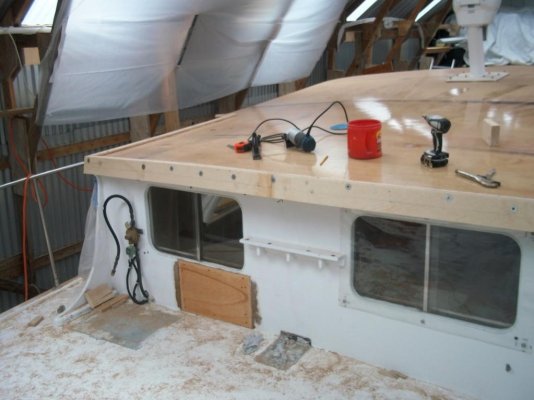
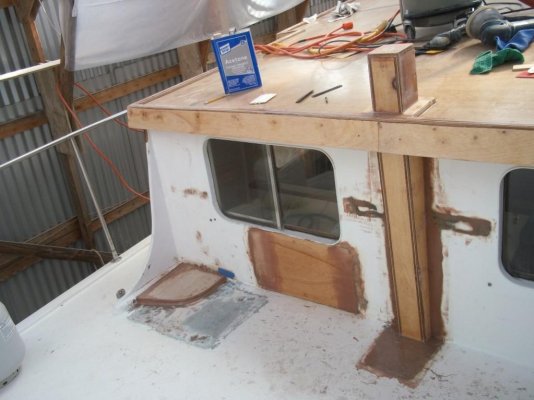
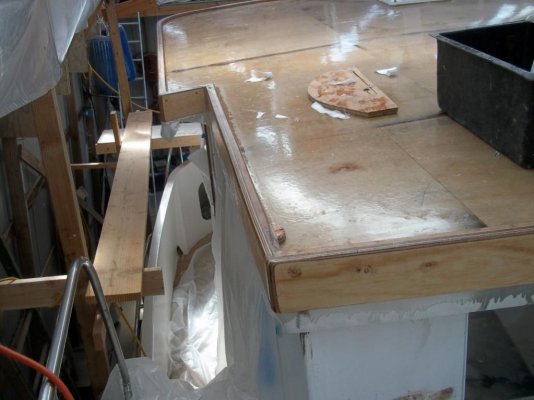
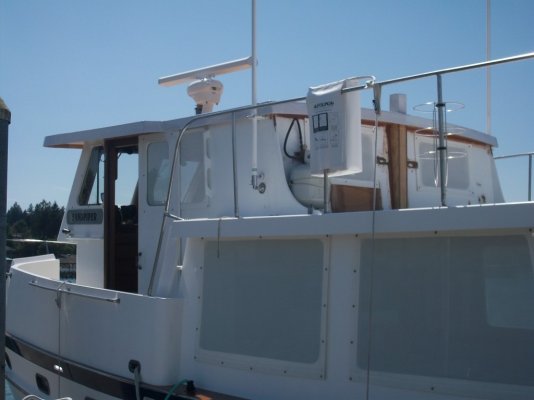
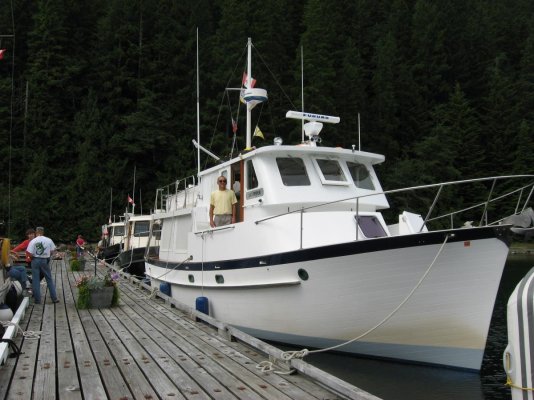
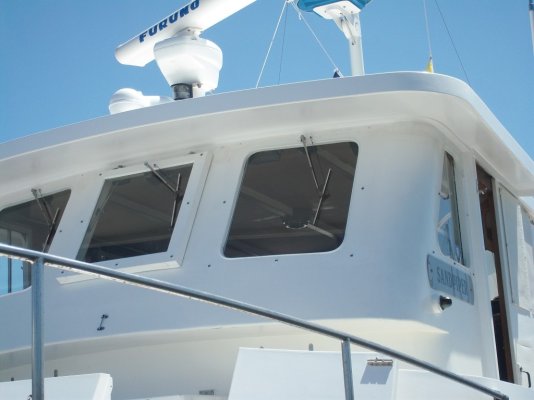
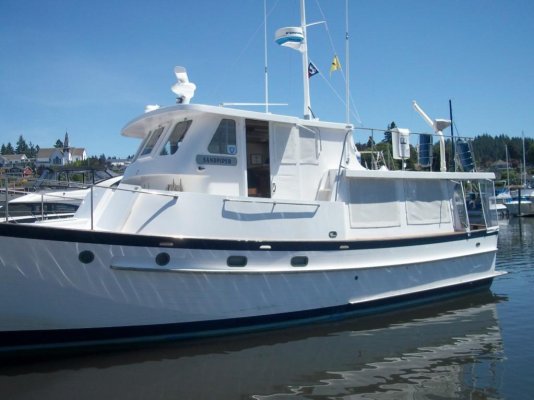
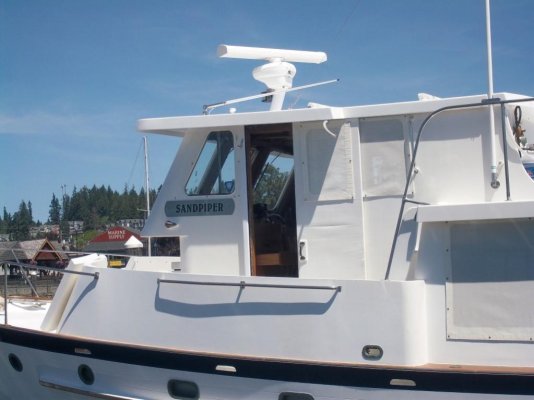
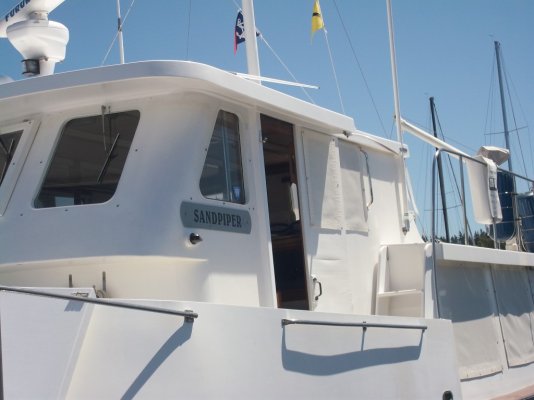
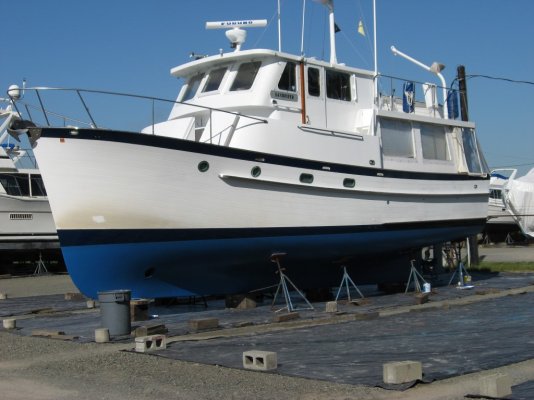
Here are pictures from my roof replacement project on a Bluewater 40 Pilothouse Trawler.

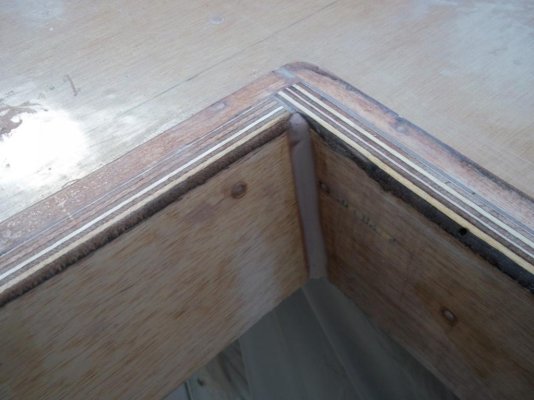
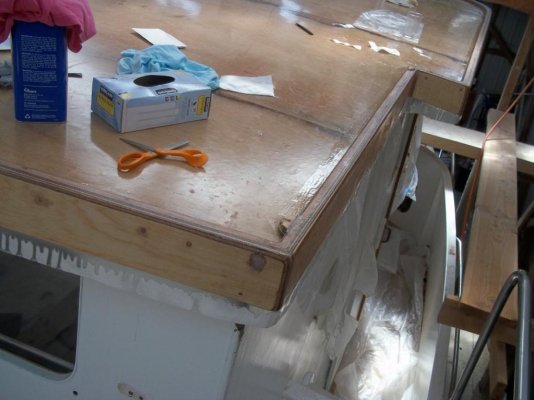
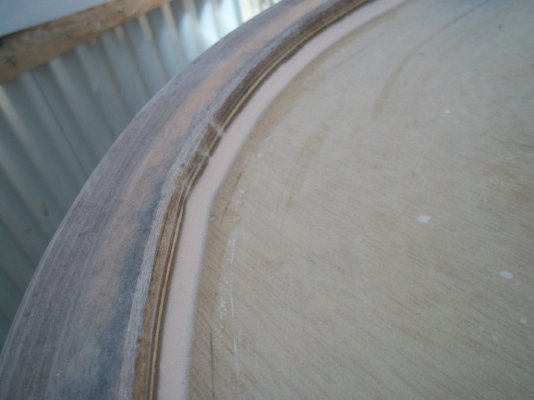
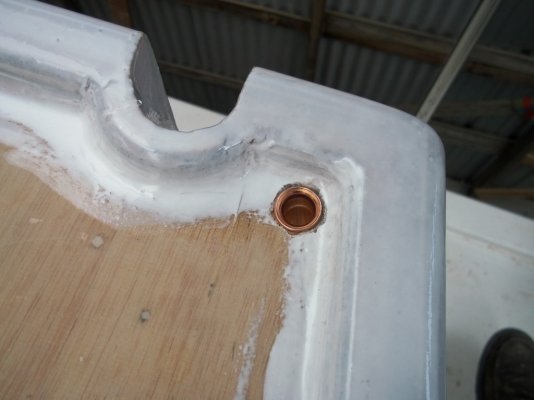
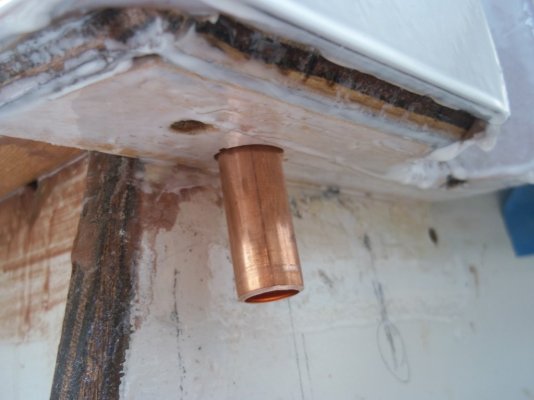
The roof was glass cloth set in polyester resin over mahogany plywood from the factory. The trim around the edges of the roof was made of solid mahogany, spliced together with butt joints. Water got into the roof and caused delamination of the glass cloth. Water in the trim caused constant cracking of the glass cloth.

The bad roof was pointed out by Matt Harris in the pre purchase survey in 2000 and the purchase price was adjusted to cover the repair. There were more urgent projects to tackle first so I've been patching it for around 18 years and the whole roof was pretty much one large patch.

Started the project in the fall of 2017, took a break during the summer of 2018 to go cruising, restarted the project in the fall of 2018 and am currently finishing it.

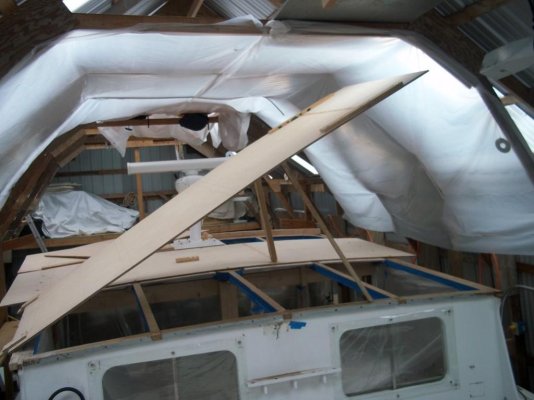
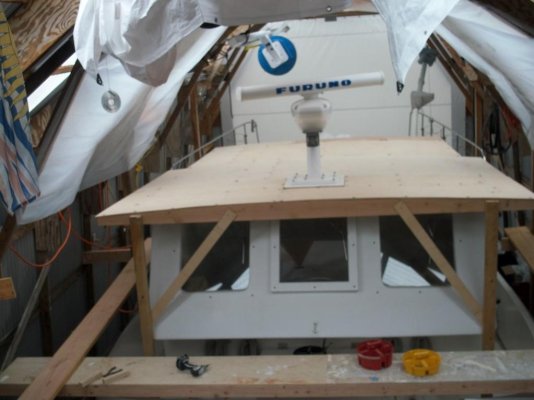
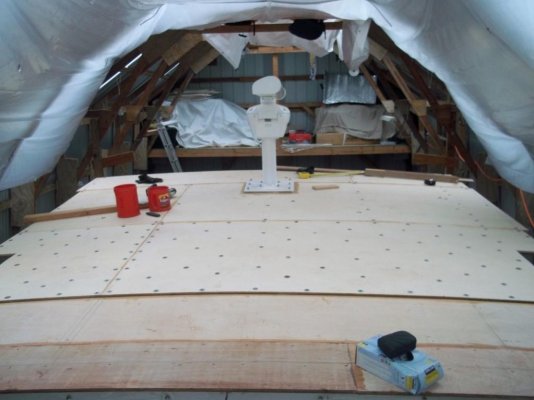
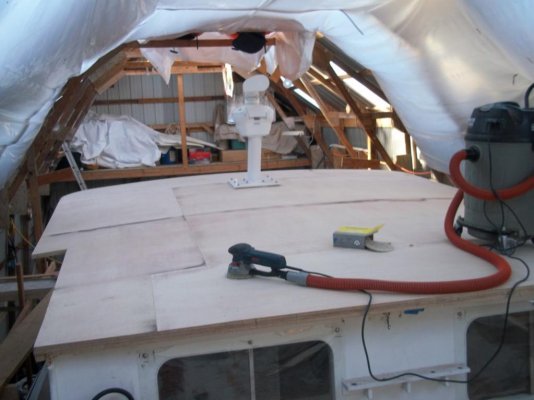
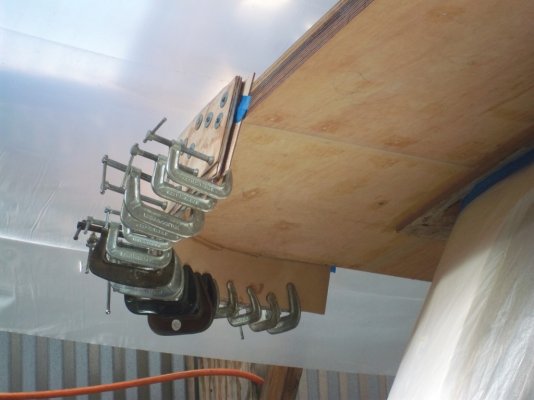
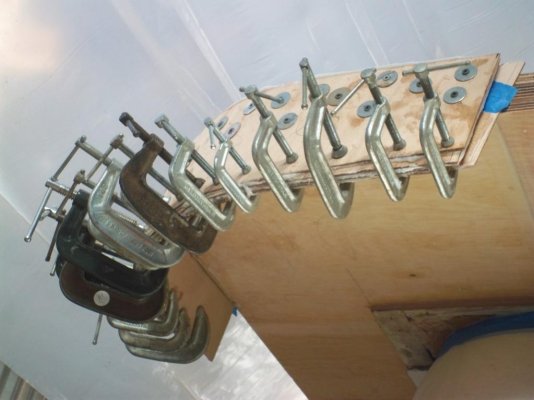
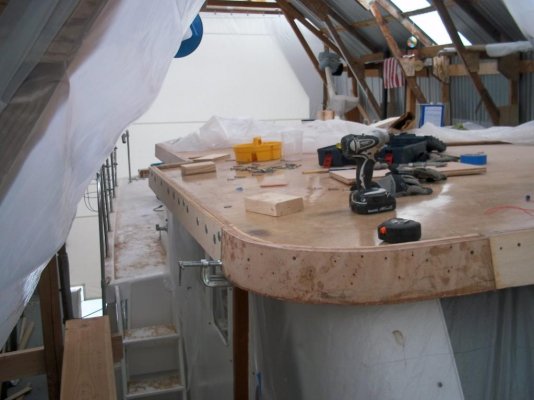
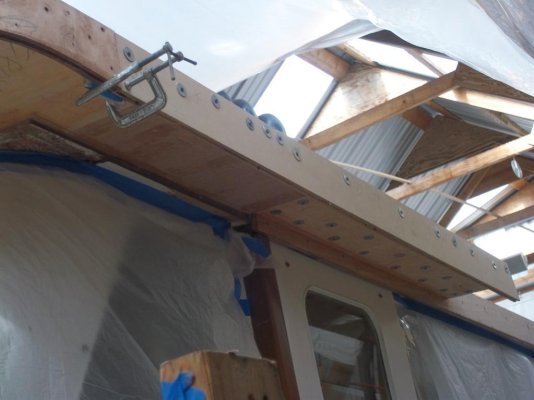
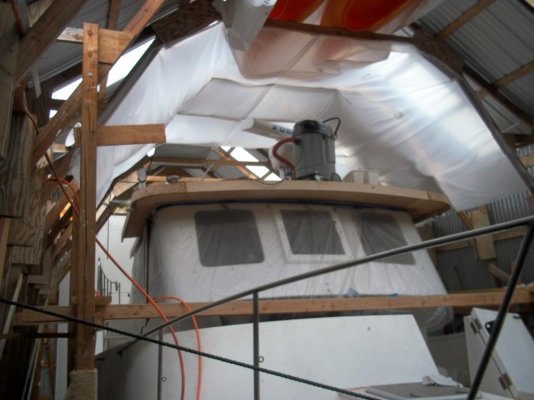
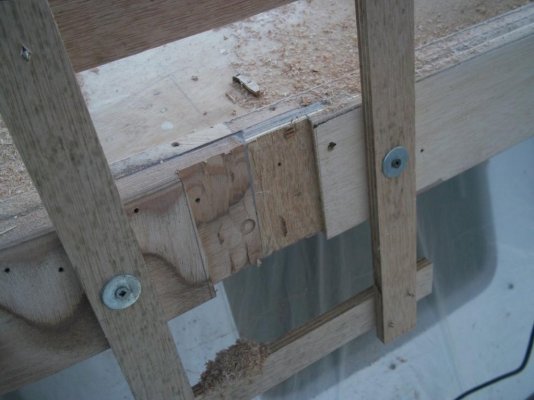
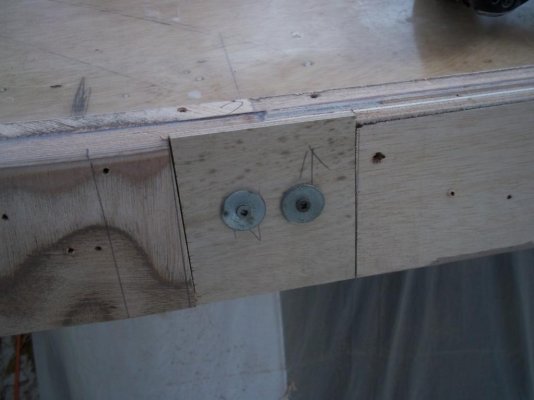
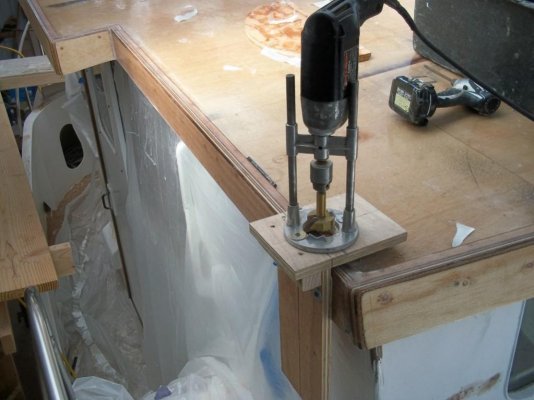
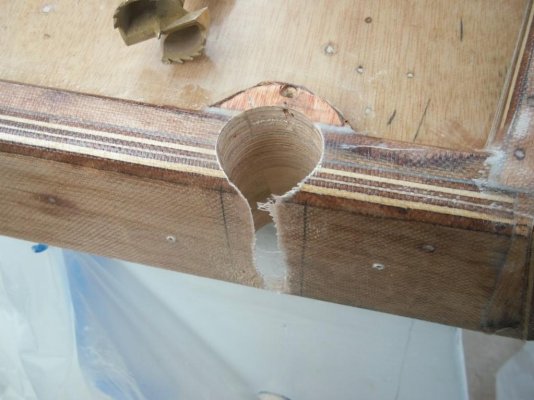
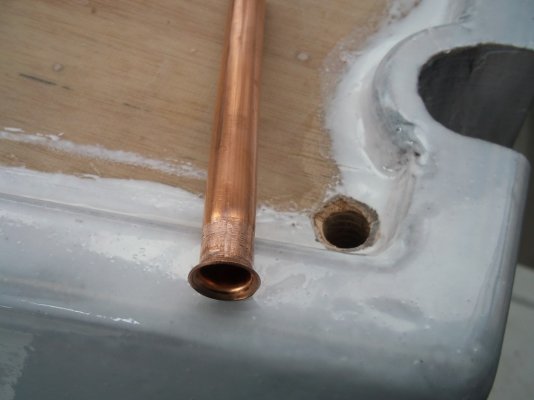
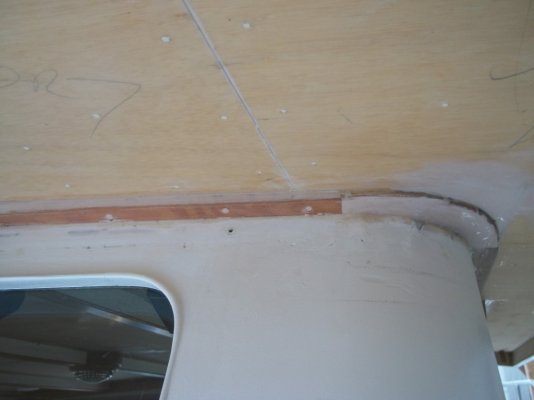
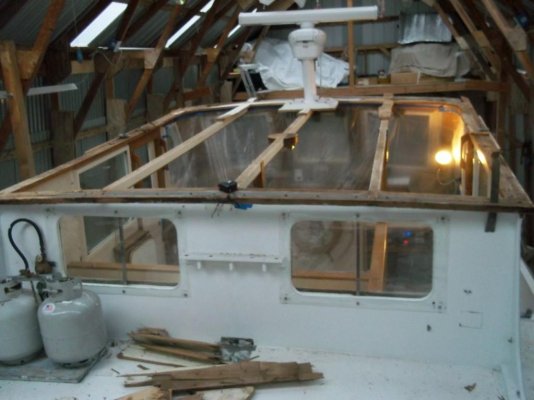
Old roof off. It was pretty simple removing the roof. The old roof was fastened with boat nails (ring shank) and no glue. Cut alongside beams to remove most of the roof and pried off the rest nailed to the beams. Left the radar mount in place since I had rebuilt that area years ago when the second radar was installed. Those roof beams are very springy without the plywood holding them in place so will need to add a temporary frame at midpoint.
 

Attachments

  • 1.jpg
    1.jpg
    74.9 KB · Views: 149
Last edited:
Pic 1 Gluing down scarfed 1/2" mahogany marine plywood panels. Temporary frame at midpoint of the pilothouse to keep roof beams at the proper orientation. The long plywood was hinged at the left side in order to locate them at the correct position so the adhesive did not smear while installing without assistance. The plywood was held down with temporary screws with fender washers into the beams. Screws removed after adhesive cured. Plastic on the boathouse roof to prevent condensation from dripping on bare plywood. Using System Three Gel Magic for the first time. Loaded the mixed Gel Magic into a caulking tube and applied it to the top of the beams and spread it with a notched squeegee. There was absolutely no dripping of the epoxy adhesive

Pic 2 First layer of scarfed plywood glued down. Scarfing was necessary to maintain curvature of roof. The underside of the first layer of plywood was coated with two coats of epoxy prior to installation. The second temporary frame at the front of the roof was also necessary to maintain curvature until the second layer of plywood was glued down. The planks make working on the roof easy.
 

Attachments

  • 3.jpg
    3.jpg
    76.8 KB · Views: 134
  • 2.jpg
    2.jpg
    69.3 KB · Views: 125
Last edited:
You and Airstream are beasts!!!!!
 
Syjos is my spirit animal. Talking to him about his projects gave me the confidence to tackle mine.
 
Pic 1. Second layer of 1/2" plywood glued to first layer. Used a notched trowel to spread the adhesive. All seams staggered. This layer of plywood was not scarfed. They were butted at beam. The second layer was clamped down with screws and washers. Screws removed after adhesive cured. The radar mount was scarfed to the new plywood.

Pic 2. Second layer of plywood glued, screw holes filled and sanded. Used System Three Quick Fair epoxy fairing compound to fill holes and fill low spots for the first time. Quick Fair can be cheese grated in 3 to 4 hours and allows multiple applications in one day.

All fasteners were removed after second layer was bonded and cured.. All the overhanging areas had an additional 1/2" plywood glued to the underside for a 1 1/2" thickness. This to eliminate the frames and hollow cavity holding up the overhangs.
 

Attachments

  • 4.jpg
    4.jpg
    71.5 KB · Views: 108
  • 5.jpg
    5.jpg
    72 KB · Views: 113
Last edited:
Pic 1. Sanded plywood receiving a coat of epoxy.

Pic 2. After the first coat of epoxy cured, it was sanded and this is the 10 oz fiberglass cloth being applied with a squeegee and rolled with a lamination roller.

The glass cloth is used not for reinforcement but to maintain an even epoxy film thickness. Without the cloth, it would be difficult to maintain an even thickness of epoxy during coating and sanding.

The other reason for the glass cloth is to make the top surface puncture resistant from dropped sharp tools.

The cloth is layed dried and the epoxy squeegeed on and rolled with a laminate roller to press the cloth down. Excess epoxy is squeegeed off to prevent the cloth from floating on the resin. The goal is to end up with a lamination that is not resin rich.
 

Attachments

  • 6.jpg
    6.jpg
    86.1 KB · Views: 102
  • 7.JPG
    7.JPG
    174.5 KB · Views: 107
Last edited:
Pic 1. Fiberglass cloth cured. Edges to be trimmed next. You can see where the roof has been widened. The roof was widened at the sides to offer rain protection over the PH side doors and the front overhang was extended to provide more shade for the PH front windows.

Scarfed in plywood under back window where it was rotted.

Pic 2. Two additional coats of epoxy applied.

I use a notched squeegee to lay thick coats of epoxy to fill the glass cloth weave and to have a sandable build up of resin. I don't sand between coats. I put down two thick layer and sand that. This save at least two days and two coats from not rolling thin layers with a foam roller. And avoid sanding.

I wanted to mention that on this project, I'm using System Three Silver Tip resin. I've been using WEST resin since the 70's and got pretty tired of washing off the blush and sanding between coats. With the Silver Tip resin, there is no blush to wash off and you can recoat within 72 hours without sanding. It also handles better in cold weather and can be used down to 35 degrees F.

Even though I am now using System Three Silver Tip Epoxy instead of WEST epoxy, I use the various WEST fillers when making filets and patching large holes. I still follow all the principles, methods and techniques described in "The Gougeon Brothers on Boat Construction". It is the definitive bible for composite wood boat construction and repairs.
 

Attachments

  • 8.jpg
    8.jpg
    68.6 KB · Views: 101
  • 9.jpg
    9.jpg
    77.8 KB · Views: 116
Last edited:
Glueing down drip edges in preparation for the edge trim
 

Attachments

  • 100_3407.jpg
    100_3407.jpg
    108.1 KB · Views: 95
  • 100_3408.jpg
    100_3408.jpg
    71.5 KB · Views: 93
  • 100_3409.jpg
    100_3409.jpg
    102.2 KB · Views: 97
Pic 1. Edge trim trial fit. Will apply epoxy to the back side of plywood prior to installing. 10 oz glass will be applied to the inside surface of the trim where the pilothouse door slides for abrasion resistance.

The edge trim will be at a slight angle so the roof plywood and drip edge were beveled with a router jig and pattern.

Pic 2. Back piece trial fitted after routing final shape and bevels on top and bottom edges. The roof was more than 8' wide so the trip plywood was scarfed.

Rotted area under window was patched.
 

Attachments

  • 100_3402 (Medium).jpg
    100_3402 (Medium).jpg
    75.7 KB · Views: 111
  • 100_3403 (Medium).jpg
    100_3403 (Medium).jpg
    73.1 KB · Views: 99
  • 100_3404 (Medium).jpg
    100_3404 (Medium).jpg
    75.6 KB · Views: 112
  • 100_3406 (Medium).jpg
    100_3406 (Medium).jpg
    67.1 KB · Views: 102
Last edited:
We are starting the fun portion of the project now that the old roof has been replaced with a new 1" thick roof.

Pic 1. Laminating the edging for the roof at the front curved corners. I'm using 6 layers of 1/8" Okoume marine plywood. The factory curves were saw cut from a single piece of wood.

Pic 2. Due to the expansion/contraction, water incursion and age, the corners started to crack around 10 years ago. I patched them every year and they would crack in a different place.

Pic 3. 6 layers of 1/8" Okume marine plywood laminated in a single clamp up. Using System Three Gel Magic adhesive which is a huge timesaver. Instead of mixing epoxy and various fillers to make adhesive, Gel Magic is a two part adhesive that doesn't sag.

3. After the corners cure, they will be trimmed and shaped prior to the installation of the rest of the edging. Almost didn't have enough small clamps. Could not use the larger clamps because the weight of the large clamps distorted the curve.
 

Attachments

  • 1 (Medium).jpg
    1 (Medium).jpg
    81.8 KB · Views: 95
  • 2 (Medium).JPG
    2 (Medium).JPG
    191.6 KB · Views: 107
  • 3 (Medium).jpg
    3 (Medium).jpg
    68.3 KB · Views: 89
Last edited:
Pic 1.The previously laminated front corners trimmed and ready to install

Pic 2. Laminated corner glued and rest of roof trim being installed.

The trim on the sides are mounted at a slight angle and the front and back trim are at a greater angle. The beveled curvature at the front and back were done with a router and a pattern. The side bevels with router and straight edge.

3. Roof edge trim being glued on. The total thickness of the roof where the edging attached is 2". Two layer 1/2" plywood roof + 1/2" plywood reinforcement under the overhangs + the 1/2" plywood drip edge. Which is enough surface for the edging to attach.

4. Roof edges almost done. Two small sections to go where the roof narrows towards the back. Next fairing and glassing.
 

Attachments

  • 9 (1) (Medium).jpg
    9 (1) (Medium).jpg
    76.6 KB · Views: 88
  • 9 (15) (Medium).jpg
    9 (15) (Medium).jpg
    73.5 KB · Views: 87
  • 9 (25) (Medium).jpg
    9 (25) (Medium).jpg
    66.4 KB · Views: 93
  • 9 (27) (Medium).jpg
    9 (27) (Medium).jpg
    76.8 KB · Views: 88
Last edited:
Pic 1. Routing roof trim at joint to add reinforcement. The plywood on either side is the template for routing. Was unable to scarf this joint because of fitment issues.

Pic 2. Glued 1/4" plywood to strengthen the joint. Otherwise the butt joint could show cracks.

Pic. Faired with Quick Fair
 

Attachments

  • 1 (Medium).jpg
    1 (Medium).jpg
    77 KB · Views: 93
  • 2 (Medium).jpg
    2 (Medium).jpg
    62.4 KB · Views: 80
  • 3 (Medium).jpg
    3 (Medium).jpg
    71 KB · Views: 90
Last edited:
Pic 1. The boats original mast tabernacle was installed at the back edge of the roof making the path between the mast and tender tight. The new roof overhang at the back is 4" shorter than the old roof and by insetting the tabernacle against the back wall, gained 8" of clearance between tender and mast.

The original tabernacle was solid mahogany and freestanding. The new tabernacle is laminated from 1/2" plywood glued to the back wall.

Pic 2. The top of the tabernacle trimmed and faired.
 

Attachments

  • 4 (Medium).jpg
    4 (Medium).jpg
    85.3 KB · Views: 94
  • 5 (Medium).jpg
    5 (Medium).jpg
    80.9 KB · Views: 91
Corners fileted.

Edges rounded over in preparation for the glass cloth.
 

Attachments

  • 100_3467 (Medium).jpg
    100_3467 (Medium).jpg
    65.2 KB · Views: 86
  • 100_3468 (Medium).jpg
    100_3468 (Medium).jpg
    87.9 KB · Views: 94
  • 6 (Medium).jpg
    6 (Medium).jpg
    74 KB · Views: 101
  • 7 (Medium).jpg
    7 (Medium).jpg
    79 KB · Views: 102
  • 100_3466 (Medium).jpg
    100_3466 (Medium).jpg
    95.9 KB · Views: 98
Last edited:
Applied 10 oz fiberglass cloth to the pilothouse roof trim, folding it over the drip edge. Next, trimming the cloth, applying more epoxy, sanding, fairing, more sanding and paint!!!

I used a foam roller to apply the epoxy. Not able to squeegee the epoxy on vertical surface. Applied 4 or 5 coats to get fill the weaves. Did add some silica to reduce sag.
 

Attachments

  • 100_3492 (Medium).jpg
    100_3492 (Medium).jpg
    72.5 KB · Views: 95
  • 100_3493 (Medium).jpg
    100_3493 (Medium).jpg
    82.8 KB · Views: 86
  • 100_3494 (Medium).jpg
    100_3494 (Medium).jpg
    82 KB · Views: 89
Last edited:
Here is a detail that took me all day to figure out and actually do.

The two 16" VHF antennas were previously located on the exterior face of the roof trim. It is located at a narrow place on the boat deck and the mount for the antenna would snag clothing as we walked by. Eliminating the upper mount, recessing the antenna and using a different method to hold the antenna in the recess should eliminate that problem.

Pic 1. Drilling a 1 1/2" hole for recessed VHF antenna mount using a jig. The angles were what took the longest to figure out.

Fiberglass cloth has been trimmed.

Pic 2. The drip edge trim around the hole was installed before drilling the hole.

Pic 3 & 4. Test fitting the antenna recesses. One on each side.

I'll have to have the bottom antenna mount machined to shorten it's reach to match the new upper mount location.
 

Attachments

  • 100_3495 (Medium).jpg
    100_3495 (Medium).jpg
    83.5 KB · Views: 85
  • 100_3497 (Medium).jpg
    100_3497 (Medium).jpg
    89.6 KB · Views: 96
  • 100_3498 (Medium).jpg
    100_3498 (Medium).jpg
    69 KB · Views: 81
  • 100_3499 (Medium).jpg
    100_3499 (Medium).jpg
    79.1 KB · Views: 89
Last edited:
Stopped working on the roof before Memorial Day Weekend 2018 to go on a YC Cruise and after that get ready for the summer cruise.

Made sure all the new roof components were coated with at least two coats of white pigmented epoxy to keep UV degradation of the epoxy coating to a minimum and to keep the interior of the boat cooler. Put all the antennas and other roof equipment back on.

The new roof with the deeper overhangs really changes the look of the boat. The overhangs provides shade from the sun and keeps rain out of the open pilothouse doors.

Last picture was taken before new PH roof.
 

Attachments

  • 100_3520 (Medium).jpg
    100_3520 (Medium).jpg
    70.5 KB · Views: 77
  • 100_3525 (Medium).JPG
    100_3525 (Medium).JPG
    168.8 KB · Views: 86
  • IMG_2546.jpg
    IMG_2546.jpg
    153.6 KB · Views: 87
Last edited:
Here are some details I forgot to post.

Pic 1, 2. After the fiberglass cloth was applied to the trim and folded over the drip edge, the inside corner was filleted with Quickfair, before final coating with pigmented epoxy.

Pic 3, 4. Copper tubing flared for roof drainage.

Pic 5, 6. Hole drilled through roof, chamfered and copper tubing epoxied in the hole.

Pic 7, 8, 8. Tubing and hoses to drain water away from boat.

On the pilothouse roof there are 4 roof drains
 

Attachments

  • 100_3503 (Medium).JPG
    100_3503 (Medium).JPG
    178.1 KB · Views: 83
  • 100_3504 (Medium).JPG
    100_3504 (Medium).JPG
    187 KB · Views: 91
  • 100_3506 (Medium).JPG
    100_3506 (Medium).JPG
    164.6 KB · Views: 76
  • 100_3509 (Medium).JPG
    100_3509 (Medium).JPG
    163.3 KB · Views: 88
  • 100_3510 (Medium).JPG
    100_3510 (Medium).JPG
    175.3 KB · Views: 83
  • 100_3511 (Medium).JPG
    100_3511 (Medium).JPG
    181.8 KB · Views: 79
  • 100_3515 (Medium).JPG
    100_3515 (Medium).JPG
    154.6 KB · Views: 91
  • 100_3517 (Medium).JPG
    100_3517 (Medium).JPG
    183.3 KB · Views: 81
  • 100_3518 (Medium).jpg
    100_3518 (Medium).jpg
    78.9 KB · Views: 81
Last edited:
What size copper tubing did you use? Getting ready to add four to our boat deck next weekend.
 
Here is a picture of the completed painted pilothouse roof.

Two coats of System Three LPU two part polyurethane paint was applied to the non walking surface areas of the new roof. The walking surface areas on the roof was painted with Interlux Intergrip Non Skid Additive mixed into the paint.

The extra width and length of the new roof allows more toys to be carried. Like my Hobie One 12 sailboat that I bought last fall.

Picture was taken in Ladysmith BC.
 

Attachments

  • 20190720_101406.jpg
    20190720_101406.jpg
    180.1 KB · Views: 87
Here is a picture of the completed painted pilothouse roof.

Two coats of System Three LPU two part polyurethane paint was applied to the non walking surface areas of the new roof. The walking surface areas on the roof was painted with Interlux Intergrip Non Skid Additive mixed into the paint.

The extra width and length of the new roof allows more toys to be carried. Like my Hobie One 12 sailboat that I bought last fall.

Picture was taken in Ladysmith BC.
Congratulations on a project well done and thanks for taking the time to write up and photograph. You even succeeded in improving the overall look of your boat, at least to my eye.
 
Congratulations on a project well done and thanks for taking the time to write up and photograph. You even succeeded in improving the overall look of your boat, at least to my eye.


Thanks for the compliment.

You have a good eye for boat details. I always thought the original roof line and trim was lacking visual appeal and made minor changes to the shape.
 
Finishing up the Pilothouse Roof Replacement Project. I painted the top of the pilothouse and edging during spring 2019 before going boating.

Prep work before painting the underside of the PH roof.

Picture one shows the connection between the new roof and the existing sides being faired with System Three Quick fair. The original flange (second picture) didn't look right being square so rounded and profiled . Glued a trim piece across the front of the PH to fill the crevice.

Painted the underside with System Three WR-LPU white paint. WR-LPU is a water based two part Polyurethane Topcoat. It dries fast, hard and can be recoated within 24 hours without sanding between coats. I rolled the paint on with a dense foam roller and tipped with a brush

Picture 3 shows the underside of the roof after three coats of paint. I did three thin coats instead of two thick coats to mitigate runs.
 

Attachments

  • 000_0003 (Medium).JPG
    000_0003 (Medium).JPG
    145.8 KB · Views: 31
  • 3 (Medium).jpg
    3 (Medium).jpg
    68.3 KB · Views: 27
  • 100_3772 (Medium).JPG
    100_3772 (Medium).JPG
    184.6 KB · Views: 28
Last edited:
Here are pictures of the finished recessed VHF antenna mounts that I started on post #17 above. The antennas and their mounts protruded into the walkway, making the walkway narrow and catching clothes on the mount.

First picture shows the completed antenna recess. The back of the recess and the strap has a piece of white rubber for anti-rattle.

The antenna is closer to the PH wall so the stock antenna mount stuck out too far. The second picture shows the antenna mount after I had the post shortened and a new flange made by a machine shop. There is a recess on the plywood behind the flange to capture the nut.

Third pictures shows the walkway and the antenna. Gained about 2" of clearance in the walkway.
 

Attachments

  • 100_3759 (Medium).JPG
    100_3759 (Medium).JPG
    162.1 KB · Views: 22
  • 100_3762 (Medium).JPG
    100_3762 (Medium).JPG
    142.3 KB · Views: 22
  • 100_3769 (Medium).JPG
    100_3769 (Medium).JPG
    188.9 KB · Views: 22
Here are pictures of the completed roof. The roof was widened over the pilothouse doors for shade from sun and rain. The front of the roof was extended to provide more shade. The rear of the roof was shortened to provide more room to walk past the tender.

Next project is to build new pilothouse doors. Both had water in them, causing delamination of the plywood structure. You can see the crack on the door in picture 2. Will begin posting when I start.

Also will need to make new headliner for the underside of the roof inside.

Last picture is the original roof.

Got rid of teak trim at the front of the door opening. 6 oz glass cloth and epoxy over the teak before the paint.

The only teak left on Sandpiper is the caprail around the whole boat. that's getting painted soon.
 

Attachments

  • 100_3764 (Medium).jpg
    100_3764 (Medium).jpg
    74.9 KB · Views: 23
  • 100_3766 (Medium).jpg
    100_3766 (Medium).jpg
    68.5 KB · Views: 29
  • 100_3767 (Medium).JPG
    100_3767 (Medium).JPG
    191.7 KB · Views: 24
  • 100_3776 (Medium).JPG
    100_3776 (Medium).JPG
    189.1 KB · Views: 29
  • IMG_3831 (Medium).jpg
    IMG_3831 (Medium).jpg
    174.6 KB · Views: 25
Last edited:
She looks great. The extra length to overhangs give the boat a nice touch. Great work.
 
I like it, especially the antenna recesses. Looks great.
 

Latest posts

Back
Top Bottom