Repairing the framing under the teak deck aft

The friendliest place on the web for anyone who enjoys boating.
If you have answers, please help by responding to the unanswered posts.

sdowney717

Guru
Joined
Jan 26, 2016
Messages
2,264
Location
United States
Vessel Name
Old Glory
Vessel Make
1970 Egg Harbor 37 extended salon model
I have an album setup.
This is a job I wanted to do couple years ago. I did the starboard side 2 years ago, and it has been good.
I am using PT lumber, has very few knots.
I have done extensive rebuilding on this boat, and anywhere structural I used PT SYP wood, carefully selected.

Another good product is PL Premium Polyurethane CA.
Sometimes I mix it with sawdust as a filler.
https://photos.app.goo.gl/ePYqVq5nobr2VNcg1

y4mj4mNQazDYaszkz2S7f-3lKTGPp3xmct8_0984OFsyXTbaVSE2YpEPdcEph6EZewhW7Eo6GCopffzel9GKwFttsFs2vORsFpiTMTjIysb_0xFCbOKWsNjbQx__UspAdJD7Vha4QER5UBEpvbYRyfWGUGXxLzlj1g3pUogm3F_7mhC3syeCnYBkT5fdQyGv3wearYLRnV3VHtRsqSqdxbqQw


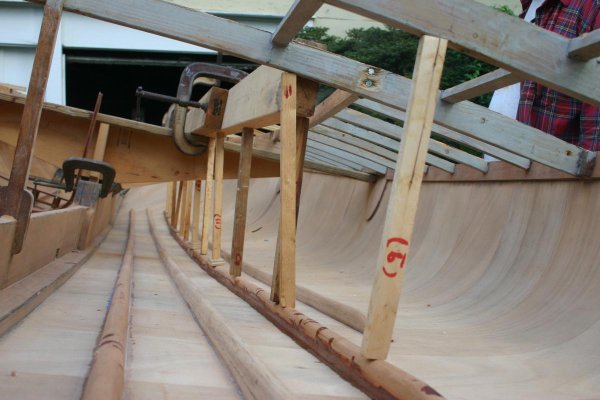
This structure is incredibly strong when in good condition. It is a solid 6 inches thick in width, and has a curve. Then 3/4 plywood lays down into the groove formed by the support piece not shown here. And teak boards attach to the top.
 
Last edited:
I have an album setup.
This is a job I wanted to do couple years ago. I did the starboard side 2 years ago, and it has been good.
I am using PT lumber, has very few knots.
I have done extensive rebuilding on this boat, and anywhere structural I used PT SYP wood, carefully selected.

Another good product is PL Premium Polyurethane CA.
Sometimes I mix it with sawdust as a filler.
https://photos.app.goo.gl/ePYqVq5nobr2VNcg1

y4mj4mNQazDYaszkz2S7f-3lKTGPp3xmct8_0984OFsyXTbaVSE2YpEPdcEph6EZewhW7Eo6GCopffzel9GKwFttsFs2vORsFpiTMTjIysb_0xFCbOKWsNjbQx__UspAdJD7Vha4QER5UBEpvbYRyfWGUGXxLzlj1g3pUogm3F_7mhC3syeCnYBkT5fdQyGv3wearYLRnV3VHtRsqSqdxbqQw


This structure is incredibly strong when in good condition. It is a solid 6 inches thick in width, and has a curve. Then 3/4 plywood lays down into the groove formed by the support piece not shown here. And teak boards attach to the top.

Looks plenty strong
Be aware many products such as 5200 or others do not playing well with PT wood
While your repair may not rot, it will not retaine a seal with any caulk that you use.
It may take a few years but the caulk/sealnt will fail notching will stick To PT wood!
 
As above certainly looks like good repair, how ever there are some possible issues when using Pressure treated wood as

1) The manufacturing process can only drive the chemicals products so deep. You can clearly see this when you look at an end-cut and why all manufacturers specify that you treat end-cuts with preservative.and the base timber used for the PT is usually a lower grade timber in the first place,
2) Depending on the chemicals used in the treatment it is possible to play havoc with the fasteners hence why 316 SS is the preferred chose or min 304 SS
3)Moisture levels need to be 12% or less to achieve full strength with an epoxy bond, and many PT treated woods are way higher than this.Even air drying for a year many will not achieve this figure.

Saying all that, we all have budget constraints and want to get out on the water and so do our best within our resources. I'm not against a quick, and cheaper boat repair but they must be held to a different standard than those built with longevity in mind.

Cheers Steve
 
All the repairs are screwed, a few are glued.
The problem with treated wood and glues is helped if the wood surface to be glued is abraded-roughened up. Yes epoxy does not work as well as the polyurethane glues on PT wood.
Maybe also because it is wetter. I let this dry a few days before cutting.

The earlier repairs were made using the old arsenic formula of PT wood. Can't easily buy anymore. I also sealed the end grains with paint of that poly glue.

There is no good points to using wood that will rot, your wasting your time. This rim wood did rot because the teak seals over the decades fails. They used inferior techniques on a lot of wood boat constructions. Another bad choice is bronze or brass screws above the waterline, They eventually corrode and break. All my SS screws have held great and endured so far.

Here I sealed the surface of the new wood with that PL slathered on, Then to fill completely, where the frame slots are mixed in some sawdust. It swells up as it cures and does interlock these parts. Since it is on a cut surface it will stick well to this wood. Plus make a durable water seal.

The first picture, I painted the outer plank with white water based exterior zinsser primer.
That will make it easier to separate that plank if it ever needs to be removed since I glued over the top to seal this structure. I did not glue the 2 inch rim wood pieces to each other or to the outer wood hull and frames. Just SS screws, 2 inch square drive deck screws.
All these wood parts I recut on my table saw, they were cut to shape from 2x8 and 2x10 PT wood.

So you have a metal edge on 1.5" rubrail, 1" mahogany plank, two 1" rim wood pieces, then a 1.5 inch shelf for the plywood. That is 6 inches solid wood, not counting the plywood.

20170918_140634.jpg


The slope angle for the plywood is 5 degrees. So the water drains away. Same angle needed to be cut for the rim wood. A handy tool is a degree checker I got from HDepot cheap. Has a swinging needle.

Also there was not enough room to drive those screws with my drill.
So I predrilled the holes just through the parts to be attached. Then ran them home using a 1/4 inch drive ratchet and socket with the square drive bit. You can get some screws in TORX drive, might be a little better to prevent head stripping.
 
Last edited:
I am fixing an error that EggHarbor made almost 50 years ago.
The mahogany plywood support piece that holds up the rear deck, a worker cut it at a 10* angle when should have been 5* angle.
Then they screwed the plywood on top this and it pulled this support piece away from the aft cabin door area creating a large ugly gap.

I was finally able to see what they did when I took this apart. I ran a 4 " long 5/16 SS lag bolt to pull it into the proper position. And I fixed the rotted edge of the cabin here.

Took 3 pieces glued and screwed on. First piece is mahogany, second is white oak, third will be white oak. This is covered by another piece of mahogany on the inside so the oak wont be seen. So now the edge should be more durable.

And , the support piece was screwed on too low. It will need to glue on a shim to raise it and compensate 5* for the bad cut angle.

This oak had sat outside for years doing nothing exposed to the weather and it is still solid super stiff and stronger than mahogany. Just needed a little clean up recutting on the tablesaw to get it to fit.

y4mHgw2YtEBkpmeFmpVQKqYq_8Q_ZCR8PsS4xXZNWP8KvrrmTNjBXEiNQNGRRmCChnm-Txfr09QWTe9qFYSx3D5gkp01wQhuGfR58HdOdGce-95pRBI4fzbeNgecfFJCK-RBaAOYgOi-vyr_ThglvgcS2FclpXZGEwohxCg9lKBxkDWIYD3G27OlWfVI1CZU53AjP8CJNBLUbpAIF6xVrOoow


y4mDgLHseeOKWsHyw8f3CJVrs2aYJ1ybX86BjhcK0tAz8eOTVqsglTycHHK0hdQRfXSwHHIKVKpLysgzjJd9bGwg9h7MqwtjixO-DGIe1FnLPR6vn_jpvy3aFiO3lwD-tbGrHMhDRf2wND70F4uaqhhODpEEZvqBkBKf6mQ-snpWPo5b4BwEoR7XuwDM-2u7nHfrAZh6uNqWPrJfvnazsZ68g
 
View from the other side. Shows the gap gone, was 1/4" wide where cabin side met the rear door are piece, whatever that is called.
I do recall Egg Harbor had put a little filler piece to hide it. But it also caused issues with the cabin side not being totally straight.
So I am real happy to see it like it should be now.

Amazing how even old wood can be twisted back into position. It took me hours today to fit those little glued in wood pieces into place properly.


y4mey97GDMi3iCwjTGsXlkoNC4nu3NrVfopBpIMun74crJ_5HArOYhOBAT9w_Otb4vCOVjqHP5urwzdfdMWbDnXGW11jJf6e9MgZRXYXYKXTLOvf_xdE9GjOfpisvVsA-mZKZEmwTfA_tLPvxAN_9M32_BX9rJhChEclX2FQF1x0jJp9QRzcbFlEEqHDGV6dhUWiga4CA81eAwJuxyreI80bw
 
I have a reasonable amount of faith in PT lumber and plywood. The three problems are: when you buy it, it's sopping wet, 2, they only pressure treat junky young yellow pine (unless you pay dearly for your specified lumber to be 'specially pressure treated), and 3, the chemicals used for all lumber except for some posts (4x4, 4x6, and maybe 6x6) are 'not suitable for ground contact' (means that the new chemicals are less poisonous than the good old Copper Arsenate).

Pick your lumber carefully; you can be successful even at the Home Despot. Buy early and let it dry just like green lumber; one year per inch of thickness. When dry, it glues perfectly adequately with Titebond II and epoxy resin. Polyester resin really does not bond well with wood, despite its' ubiquity in our TTs. Fasten as well as glue, bearing in mind that some PT-ing chemicals are tough on fasteners (use galvanized, coated 'Deck Screws', or stainless steel).
 
Yes, I let it dry for 4 days outside, but not in the sun.
I found 3 nice pieces, but I had rejected 10, too many knots.
In the larger sizes you may find better boards.
For my rim parts, I cut them out of a 2x8x8. First split in half at a 5* angle, the ripped to a 1" width.

The plywood supports I used 2x6x10, same way split in half but left wide.

Wood boats have curves, they are not straight, so thinner pieces can be bent to the proper shape. Otherwise you have to grind to fit.

I sealed the end grain either with paint or adhesive. When this is done, it is going to stay dry under the plywood. I plan to put a skim coat of the PL adhesive on top of the PT plywood, then a coat of white paint.

Eventually I will reattach the teak.

I also need to tear off the aft teak covering boards and replace the plywood under them too. These plywood pieces are not that wide but do add some stiffness, otherwise I would use wide PT 3/4 boards.

The original rim wood was mahogany nailed to the framing with what looks like monel nails.
I reused those nails attaching the short interframe support parts that go between the outer plank and the first rim wood part. They add strength if something hits the side of the hull.

Back in 2006, I had this entire planking side off the boat down to the chine, and replaced the frames with laminated PT wood glued together.

Titebond 3 is good glue even for teak wood. And so is the PL premium polyurethane CA. You can build thicker layers mixing with sawdust. It will swell so you can force it back down with plastic HDPE sheet (cereal bags ) or a putty knife, or just grind it when it gets hard and fill again. Doing this actually becomes a structural repair.
 
Last edited:
It was easier to build up the plywood support using glue and sawdust since it tapered to nothing at the forward plywood deck edge and is about 1/4 " too low at the other end of the support.

And I found out it was supposed to be cut a 10* this support, so I recut the new wood to 10*.
The cabin side angles in 5* so it works out. Nothing on a boat is straight. 10 -5 = 5* slope then for the decking.

The problem was they mounted it 1/4 inch too low on the mahogany cabin side plank at this spot, then it rode up to the transom, so it was never straight. I now will have the teak angling at a proper 5* so it drains to the gunwale. Somehow the cabin mahogany side plank must have just warped, and it was never properly secured which the bolt does fix.

I noticed this side of the cabin is longer than the other side, and the worker just screwed the ply support piece aligned to the bottom of the cabin side.

y4mx6PHB4K0ItA5OqrmU5SxrH-D_JK9tnX-qHNrAaqY-ky0UcWX3Tx1A-UVj9jow0qAsZMzOp6sec8gSmGypoX3uhHuW-5QokTsmCOhEyoRfEekLz17LdsXdyBiw6FJcMKYE7FxMaHLCa1XIU4MSbNVcTqO69B10QVbvChMkpNSZlewX6e7NCkI0Y6FTF1eGCyWkkZbkOMEilKCuavRpLBUrA


And I got the last edge piece on the cabin plank.
This marina is very nice quiet place, never see anyone here after labor day.
I feel like I have a private slip.
y4mfmIytXtxn3W0k7cFLHqEn6hhGRgQb-GplDVuuJR4r3nmPii9Oqq1WUy5V-wWCW4GNrAXRcCVE-J26iTSyMgd9phw-1--g7QCypUGiKD4OxBGI2VUtMAteWCm_W6MlBGKwf_RWSOs0DHpkaLLFe3ikI9AFzrVB5RNqPBoQu67U0G9oF05tIJTop7jv9or72_3Egsj73MHV0Sq1u9_Z6DbsA
 
Last edited:
I bought the 3/4 plywood from Treated lumber outlet, and is nice looking and dry and flat. It is rated for ground contact UC4A. Price was $35.

Some of the new treatments are rated for ground contact.
http://www.deckmagazine.com/design-construction/framing/treated-wood-update_o

Treated Lumber outlet, all is ground contact using UC4A micronized copper azole.

Lowes has both ground and non ground contact treated woods.
The structural wood I used from Lowes is EL2 treated and it stabilizes the wood so less likely to warp.
http://treatedwood.com/uploads/Ecolife.pdf
 
Treated Ply sheet from Treated Lumber Outlet rated ground contact.
Notice how nice it looks
Edge is tight glued, not falling to pieces, not soaking wet.
Will be perfect to lay under the teak.

This nice sheet was third down from the top of pile.

y4m1yKL-lYwyT5jhHq8C4RRsfj6M2vnUBWQtZ6K4H3CoHhQS3CAJebokKeljXM8GRFf3Z38ijgmzF2rRBA-wuAk_9BkX51-ji0IpOO6P9Sd7GydfBBkhBXpCFyZ4jd-cL9wH3phZj1Gf47mN95sW0Q-b96cLy4Mgcs-NSQs8HeJu_6BXOZ5J37qktt-rsvGMlYzw6qlPiFRkgDlx1JsfDR6gw


y4mvE3tcwrkkfelNpO-69BTOOFd8lZNiEhgHiLQnXDwRy3JHFCbQS06S8gN3MQ7SFxSlp6wHzMOa7Ui2sytNzJiRKQDkQNRNnCxNXRqz77B0pBO-HSYS3isgdD7K2qjcOjjqlpn1NEqwEjU7xL8FpRuldmWecQTzgNDbbtHzGZ2ytx8npTq_A9ZdcNSIWIj6FfJor3R64CNj7PPUe5eyRWBfQ
 
Nice work, sdowney! And thanks for the PT source.
 
Got it finally fit the last ply support board. Was complicated by them not cutting things right long ago. Had to trim bottom edge of the cabin side, was too long by about 1/4". To make things look and feel right, everything has to be cut and fit right, otherwise it wont be right.

Also glued the back corner. The side plywood will stop about 10 inches before the back corner. The rear plywood goes across the entire back of the boat into each back corner.

White paper is the pattern to cut.
y4mvJsBMQForDAgrHD07d5pa8rIa9TwQm82ZU1qXCtysnGxxIu9vZYCnVm8Zx7jfRc_2JpW0GS0aIeux2mb0pKbSt-g918Ai4UNNtbyvEpB-jhOHgzl448m8ktZVtMrrthvIU0uHFmrhs8ZcnNQukMAEGwvXHT-39qKe2USSkLAvNXQWEEgeUyw7s1CJ39WSeGyMcn6E4189Pl7wKp0ZMwxtA


Rear corner
y4mkksh_92vtsLN1PdW2l9FZ5gHJYWtud-sX55T_hqtInjopESmSrEBOMXbScP9OIfjwqWGAqN3vGPG8RVcqj0CZA_GkgknxrNn5ZvfU0d9zM_kwpLG77boIMKjhQ98x-IQCzVcZQQCDKpz1CXorzbgVM2DtYCbv2Z-NzfhgDUJkM1XFmBRgK92XL8aNmjOGZ_Zmzn49WTEHnhfsBEQ_4Ayjg


Blue tape helps form the glue to shape
y4maq2zzRuEpIIm-d6GCRbp_FLBQtgXDJ9f9iEn4-oiHlo6K_aWQh8qh8EDh3oaFoq7TSeeSkKscQ7XkEqBDhpip9XR8BLHsbcJcMpSUx93fz8WcHxCy8HFM0gfdpDTjhoU13Ru3VY6O_YofxFOzB8Tv3Y562kQM5nBhNUi6k9S-hFbEIeCQsjbxyCfTVL8B870kUJvKeHK_-O9YOIg0_rzTg


Sawblade makes a great flattener scraper. Easier than belt sanding as my belt is worn out, plus I can get into tight corners. After scraping and hand block sanding smoother, I recoated with a flash layer of PL sealing the entire surface including the ply support so no water can weep in.

y4mdBZ052xn6_gb1TMKlPrnTxchM_e45-FcVKnOQqAoG5YXB1rdcz3uR__s5yQ2ZIkiXbuy_qTK1JkYsmUGaMU1bvCBKxT6p3FyjExlkejnmfW2xHVsQsiexsQKgQLfgG11eHu0cVZ1Ef5SGrgWxLEXM3R0avM2pWhDn92vENGJ80nZsmEvfrtIgaVvWbHoTx3-satXA3NZMFRdpclgqaFJvw


Another view of the rear corner. It does fit pretty well the plywood, but may need some filling on top the plywood to smooth the flow.

y4m1sE0qI0e7D4hD39v8FXS6n6SPsfpZgDg94vhv9L1AQ60Z7WzRMu5gOVJc5J-rzRvsbJkOTEUI4vWafSf3oH9FpJsXEnBnD2FfrxxPJlyIBR1d1BS7e9x7ZKpY4JGAkJdTbTBvz-AxurEUglGK1gCOijQXbEgny3twCg9c_vK09otswhZ72-TI2JgEPwBDi8NoqRYhQCn2Zjg-g9e4FxIqA


after finishing the side, I will have to strip the rear teak to fix the plywood under there too.
 
Last edited:
Got the ply screwed down, will seal it to surrounding structure later.
I painted the edges with primer.

Gluing on this inner piece of mahogany to the cabin side. A piece of SS trim goes on top later. Been a long time since this was here.
y4mTSrTMVT4BACwlEzbL--he4HU2kAtPurxJV1qu3aA4yZ4NtscVi14uOU0yBBFcCeRxHNutGqQDwON6JUQKvdz7HdvATmZYWJ36IQiMO3ExuRZKpJU8-y6fkRDwcwPUhNgz4Ul3inCoHjqK5LFCN-_finiu6-FEWk2TbS9iz-LRXVLdSKBs2ewcoUy51anfVhDnGwwZVARyj1rh_SxvZcCBA


Showing how they placed these ply sheets. Next job will be to work on this replacing the plywood under these rear covering boards, the ply curves, the back top surface is not flat.
y4mDE9bkUv7Z8HrTENZA4Yh6T-3OcIZxstJvJuyJhviDoFyu6aHLYUhg0Z506_CO9HJrWEHGo19Ege54gAx9cua6audUkEWPVFo8gXakoVN7fMJZlWBTVmgO38NlOHqCAwNhMNXvSW9IAVTXp5eszQgYdnYHHCRkV_mfWjHgFaf3fmnpuPErsgacLvtMlbGY1cPy_yklCTQMkmWQEWsPKL5oA


Laying in some glue with sawdust to both seal and create the correct fit as this ply support piece was 1/4 inch too low from OEM.

y4mUS8ebZnq7D3G3lZ4fJpTmNy3FG5q_PKGea8pTHlskSckCOc0jqJ7V3UAw3lpE3QIP2jW24WnZhcYz5Vbui7rzAACMkm34te30SXTquIDY-gbBzbBTtbrm7KSi6dnp0ROUNAuk1e_1MjXcYsbiSry9KuxJ2TP7MlP4KxJJFCKnwjkdYoDcsE4H4yTmPqfSHGY2qklhKdULf89-G9pXfM19g


Done
I ran some long screws in here. Then cut the heads and used these to help ensure where these 2 plywood sheets meet, there wont be coming loose. Just extra insurance. It would be too hard to cut in and slide the new plywood under this double layer of plywood that makes up the deck forward here of the teak, so a compromise was struck. The span between the ply supports is only 6 inches. Drilled 3 holes in new sheet, put glue in screw holes and whacked plywood home. It was easy to align simply hit plywood against screws marked the wood where holes were drilled.

y4mZwcKn_oB7hlap_szZBsR0sqZO7527fkUUPOjc8l1YP54jOZkkZnxyNlpY_6K-qrDXDPPlkqEkpaWYKuwzlts0FbaZpgHPiTLRk02SfClwxQ2M4B0ZbfysZP0Wh3zuqmXxlEJ9bytl6yNe0ujqfbvBteRfLgE6jC1JxOJfO4gzklKLmdh4ujvsoTP9mlTH41qBQ4Hfm2ey9yTFtEYWnWVqA


It might help, can't hurt!
y4mJ6IkvsEvH1iGX7hI08fjcH5I3hJR2KjcamZMUDfM5y6s8fJHFrZX3L3DSmjDccVqpOIsyUfCdL4JK5SAUcZ0JMNnIrLMpearKPyRUAtHc9i4MHYKi84UgA_4DXLb32qHlcjgnY0_bC6swfGjMMmMWUxGkPY4Xz6ksFTVAm6jZKv6fKWrG19Xk-3_7K78vWbF3CCGS6IqIkdJ16WbzVAjnw
 
Showing the PT wood I replaced in 2006 on the other side, in fine shape, not degraded at all. Two white pieces are new wood.
y4mVlvZN6qSN8MrTtG-wOKjuxK1R7QW2SdeDuuikzm8qDbGTJ8d59SimGHQ3EpQ3I1YXKMfzOrXBTsRvSFR1WjUeD5bKMTDJunJwMJpr2HhTbj2a3Lx8AgbXXiIJW8aLy0YBS9lnB1WGWX6NKaISdcBrQvHoKEtjkePFBHMIbW1anm-Hxh2wjlqkUsOPD9BbKoj8T0F-xM0OMrTys3hxhtG1A


I sanded the surface to clean up the dirt and such. I scraped the mahogany top planking edge to clean wood, treated with oxalic acid. Then smeared in some Titebond 3 glue.
I will paint, then fill with some PL those frame pockets, then paint again on top, or some such method.

y4mb3ZWE1gsXOzU_XMPmM8BEqJNV1-WY0jQFbjNhqK1XylfIrLXa4kj7ZF2IBrmSmXzdENIMM-V4-CGumlnATvZaZWhlQJLqFruUwGX3NjxnM9pzB298HC_ikl8IizHiV8dPlNz5kOUklOg04pVEjYZpqZGzBm2WbfgKrcxQ4j8uERibCw_IaHhEIFDHdvHTw1NiSnoFU1rLEqxDlCyp9G2gg


Otherside sealed and painted with primer.
You can see the ends of this degraded mahogany plywood support for the back teak decking.
I found out this board curves in 3 directions, it humps up in the middle, has a concave curve, AND the bottom edge twists forward about 5*
y4mOb-x_r_UeAG28hPG_ttOl04vVNSXd0rU2k0opcQdBujNGnAjiDVQXaaCMa8ru0219JnJ7e3X0apuEmUp8L6pH35ggRsIRJAG69q_Z_j7EpqB6mZsAkt5FJjm9bVyK-inBiSMdMR4UTGLdyP1z3rbltTciqReJYUB_jAUuQxyKryOz9-d8_K60cQy4wTqC0lTgT-zIgGsHK7lltl-gqb0GQ


I have created two angular triangular brackets from wood for the inside corners to support the inner plywood support rails. Basically 2 2x6 pieces glued together, then ripped to 2.75" tall matching the height of the rails.
Then holding them in position, determined the proper angles to be achieved to fit well to the plywood support rails. Ripped from straight wood, glued on the angular edges, side edge is 15*, front edge is 3* and this fits well the space matching the plywood rails.

Will fit them in tomorrow. the old rear plywood still has enough left to aid in me designing the new ply support piece. Plan to cut some angled pieces that but up to it to help in making the new rail fit as it should.
 
Last edited:
Have the corner rail support blocks installed. These were difficult to make, every face has a differing angle.
And that rotting mahogany rear plywood support rail is off.
And those posts need replacing.

y4mFV9XwxRX17C9csakMQ6YVftcsPghKNIffVlBpYWESPDlzpvTeaxEJFFLfN6rH64dMnXWUOIuclP51INC2XiwXZmX9Ul-JG3RybhtyyTtfviH4XJQrMTpAr0yP2a4GmziRKpBIr5T2kwiRYtydHpdeZZJR6gl8bFfLvoIVRZNkN3E2BKjqA_oeupJ_4eT2XnyvwD1FXDHARJnMz-eMtPQeg


y4mV4b-c0CBVAbr1NMCPbrzzmQpiwkp1AIvzTpnPqqD4zvggmEIIfajPTeqrkuJmeEoWDs_wQ7sI9z_yePH-DwfBpw8_EXIXnWBoQyLdDSW9Qk0mn6Dy2JxBmndy2dfIKcrnDJeHNY8-MGOX_QoramdIGwt7pg0eFfdP2k3DoIsKtf2NAdDl4laIWSV1as6SjpDwi-0sirIcP8XUYRvKgOJ4A


I screwed 5 angled guide blocks to the old plywood underneath to aid in positioning the new rail. New rail will be cut on a curve then split in half to make the concave bend inward, so the old ply stays on till the new support is fit into place.
 
Last edited:
Looking good!

Thanks, I now can envision the finishing of this project in the next week, except for putting the teak back on.
the original construction lasted for 47 years, this repair should outlive my grand kids. Since 1998, I have yet to see any of my PT wood repairs rot or degrade in the slightest on this boat. The wood boat fanatics do not like using PT wood. But I carefully select what I use.

The repair feels really solid and tough. Total time so far is 2 weeks. one nice thing, almost no one comes to this marina after labor day, so I almost never see anyone, so I disturb no one making noise with saws, etc..., and don't have to hear negative commentary.

But the few that do see me working on it, it is like they say too much work, etc...But I know what I am capable of repair wise.
 
Last edited:
Very nice woodwork. Trust me I know this is not easy to do. Keep up the good work sdowney .
 
Have the starboard side rear corner mostly done. Need to and grind down to the proper shape.

In 2001 when I replaced the transom frame and wood, I did not desire to open up the teak decking. So I never could properly finish and seal the upper corners. Now I have.

Cut and fit a filler piece on top the too short inner corner post.

y4mHLs6U-xM5ZFkRED49QgGjVMw6YlIKKhyQDChd84OWTIZaQFMB3njUTCHDWGG3YuSPuBsrUZsedI9Sib6jqEVwa8afkVPJa1ygqtTcvtdNh056V5dnA5CL_OTzqddEgtw5kc-jeql02flfr6HKdVKQGhQGY-5TIiTIn-4K2nkbhw29u2Tk58iPM0HSn9Sm7DAOm87E-IYLysDI5wuHbhnJw


Cut the larger filler piece that also covers the rails and the corner post.

y4mgmKtAUXEwkGKEyaXcziv2UtDAjoreVpgzaGQ6nxHBEUQkm5rOIuioTcwnkFCzZCg2Gl0KyzP9ZtxzzqK04j_D0xsJZKExCUUPoy0txgyNe7SfpguSYSNqIR_fUX_imFJCPK2OkCfDYOURKlgqQVY_YTY4kbd1GLt8Is1k9oumw4s8CU33nlPpvqo3WvlqiLk2bYiR8vlbLCI96Hx0SwkTQ


Glued in everything sealed, the rear plywood deck fits into this corner.
y4mW9S1iO0byoaRdBjGH43mZeg87IXKo-DG4WyiXaBDC86tNSIxFmDTFFkEYJTJeTMtsyCnSD5l7wvK0lKl1kMv_L_u0bEbxmbUhhoOZnbBhC1JzLbcrVE6XYYUFjiNE8aAXRdTIOBWJV468PToMWwBf_yA_Vn0AlM9NotXB2IGRWYYyyOnPyz11_0kuS8S9B-It5zJ_6jsgFj9pvRqjWY0xQ
 
Greetings,
I'm getting tired simply looking at the pictures...That's one of the good things about wooden boats. They can be repaired/rebuilt in stages.
 
Greetings,
I'm getting tired simply looking at the pictures...That's one of the good things about wooden boats. They can be repaired/rebuilt in stages.

Absolutely, but you have to be willing and able.:)

If someone comes by and makes a comment like too much work etc... i tell them I like working on it, keeps me entertained and is good therapy, it keeps me active physically and mentally. ;)

Plus I like seeing the reward of working with my own hands.
 
Here is the multi curved mahogany plywood rail board. This goes under the front edge of the rear plywood, and the teak screws on top the plywood.

Back inside is in pretty good condition.
y4mt0dlxmcO9masQ_2NhAcVDEpYIKiuH1kDIZO9tRyTAEt9BauUgshFIfeCOHuRj-JDQQXqils1V4D52rpEFDXFhAzd8BRJqY7klkrOQW9tICBWXQi0mrOyp6SfLdj-A1nFvogorsTwJjWXgndyh6X_mkISq5xl2tjqV18t8AppOLRP1NwSEGwYzV4Q3lTaQXJ5xjfLf2EWCy6k5GyuGtfPVg


Bottom view, board is fine here.
y4m6xdGraSK7rtoS8xvM__NJ1cv0ql6qxBK2ZedRGnYZAmRkjXV3AM7mA6xVxbUVERg5zfaUU_-AEMY98vZZ1xpQ7MkSZ1Gt1l7iqFXoAS4FUEsZiXv64wHgWgwVM9Pc-HAIjqYZ7RlaQZULNubofCGqI2C_DnqQrVlzRlMEbx80f06Cidk4oXem5rzW5V1iiGhMtoP_pH5rhSroT4GsnLTIA


Showing the curve hump up,with board propped up.
Top of board is badly damaged on the inside ends.

And somewhat damaged where it laid against the inside cockpit teak covering board. The linseed oil putty had long ago dried out and was hard to scrape clean.
FAIL, oem liked that stuff, but it is a fail.

I used a metal brush and scraped clean all the rotted wood from the entire board. The board still feels pretty strong, so good for a form.
y4myWmDK2yUaUqTXlW-HFtaSajGVhq9vekHpgW_r5jpCLh8eIVxX_f0J3xzhXfCjrwDZUwQf58RWd-OGdbDfD7NljtIimsO9TZzVW7LbiL1G_PQKcCJ-HbVbxi0jaFVdeqpOZ_L2P5pdVH9bgxR9UNk3ZHN0uCZVY77calGIgPxdpxtKXR9rcK-j45JEXgO83fMasVU77oSGgnkEeOfgKYa9g


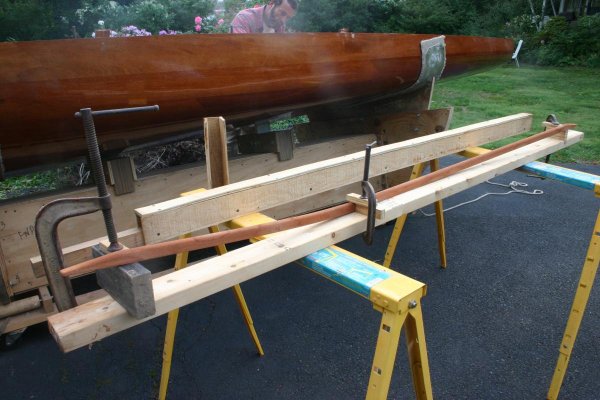
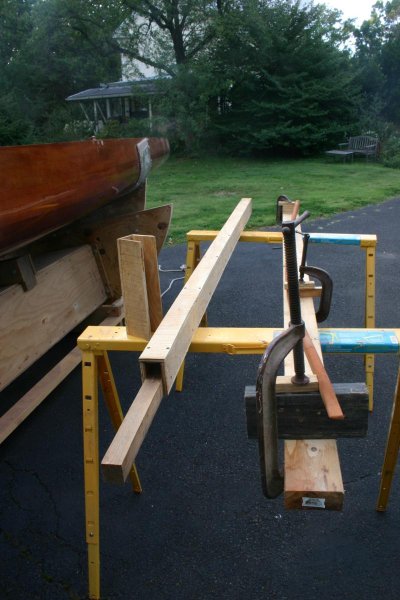
I have been thinking maybe the best way forward, take board to boat and temporarily screw into position. Then laminate, glue with titebond 3 and screw on the bottom thin strips of treated wood, perhaps 1/4, maybe can go 3/8 thick. Build up several layers. Then unscrew the board, take home and on the tablesaw slice off the top layer perhaps a half inch worth. Then glue more laminations on top the board. So a sandwich will be made.

I can also laminate a thin piece to the front to seal the mahogany from rain effects. This board being such an odd shape using it as a pattern is a good idea.

And all my new rails are all taller and wider than OEM. 2.75 inches tall and 1.75 inches in width. Old rails are 2.25 inches tall and 1.25 inch thick. So I have room to add height to this board which can only help.


Why the OEM builder did such small sizes, who knows, the teak covering boards are plenty wide enough to accommodate taller plywood support rails. Just another OEM blunder.
I have even thought of wrapping the repaired board in fiberglass wallboard tape, then smearing PL glue all over it. Would add more strength and better sealing. I repaired a molded plywood chair bottom that way. Somewhere I have a roll of tape.
 
Last edited:
I bought a real nice piece of ground contact 2x10x10.
Very blessed to find it first one I looked at.
No knots, except 2 small ones on other side, which would be cut out if I use this as a pattern.So I will try and cut out a new shaped piece from this and see what happens.
y4magYc9_ZehHCYfl1AV0UgTrt3yxJIn2VSv6ND6rUN4Hd4p6rI6CsCozRT7PHrfHQo-V-0zUNgVG0vFaLS-SofPHU_t8B4ddNUofmlw0WvLIF_YBHsyPwjj_gTxLpizNlzbd0jCT6jdDQV2n6jwP8Bk5S3sc7zV44-SFQehprzjS56W_Uk5nxj3fq2CaNVzVvFS8NHBeCtcNiKnpLF2BkDlw


The left side has tight grain, so that would be the humped up part.
y4mrtaGPFStzwJ3zgo2s71n5eDEIwQZiAjyr7l5xk4HcjEnq9tvHwunmrBS-Bi2xgmw-anxeXXV5bU2SzAWvDtz9jyuEG_ekG9q_Fi1UsBLG9wzProTqx9R_LMTWO41E5sFpl9Hx9s_nxnDburC9YJ6-b7yLzwO-MeXBahZogLJ4fDUDxrCED8HnSv9FS-KdQvJ3T1_SwDPyxYOmbfzSS8vWg
 
Last edited:
I am able to keep busy enough maintaining my fiberglass boat. I am sure I would not be able to keep up with a wooden boat. Kudos to you for doing all this work.
 
A possible source of adequate Mahogany is the plantation-grown stuff sized and sold for high-end residential decking. A smidge over 1" thick and 5 1/2" wide. I cut mine up into 1 1/8" or so, strips and laminated 'em to the curve required for my swim platform (see pics included in my posts from last spring).

Another idea which may suit you is to steam bend your replacement Mahogany with a home-cobbled-together steam box. Here a a few pics of my steaming Mahogany stringers for the Flying Dutchman. They had to be curved and twisted. I built a simple jig to drop the hot wood into that was arranged to bend the wood farther than necessary to accommodate 'spring back'. These stringers were 1 1/4" deep and 1" wide so your steaming time will be greater. The steam box is that hollow plywood square tube; the heat source was a propane barbeque.
 

Attachments

  • Picture 006.jpg
    Picture 006.jpg
    135.1 KB · Views: 107
  • Picture 007.jpg
    Picture 007.jpg
    124.8 KB · Views: 103
  • Picture 019.jpg
    Picture 019.jpg
    101.3 KB · Views: 109
Came up with a better idea and still get to use the OEM piece. I will make a replacement piece from that plank of wood. Still split down the middle for the concave inward bend.
Then after I have it installed, I will cut off the rotten ends off the OEM mahogany piece and put it on the backside. Should then provide plenty of extra strength, and aid in keeping the original curves. It will be sealed up and painted so will no longer be getting wet as in front of it will be this thick piece of treated wood.

The ends will but up close to the samson tie up posts. The piece otherwise is sort of useless wood just to have laying around doing nothing.

Supposedly 4 days of rain coming next week. so can't get as much done as i like.
 
Last edited:
Board marked out. Wife stood in middle with original curved board on top this big board with curve up.
Then I outlined the edge. Since it was curved up, I lined up by eye pulling the marker perpendicular to the run of the board along the edge.

I then drew another mark next to it to flesh it out to 3 inches in width. Will be carved down to 2.75 when done.

y4mndXoaeGh2KAeTvdTTMSIIZqmXdvWHhNzrHDX2XYcemcT4N-43ebysYVEO8K39giRqG-7yXhcDtEqqxDPT2_GZemyUVQQs1SCtRrR-UzvRqJa8QKJfiMHxwz8xv_4b8_hwdkGIj9tE89MYJpCAgmMaItn_W1HK2R75juCoKXRkKjBIXP7f2HeBRE_wzFb4dFRFUZa2_I8IfZw5AD5AhBi4w


Results, and I may use the large piece at right to backup to this versus the OEM mahogany piece since I don't like woods that will rot. Will give this some thought.

y4m5AaW7KC8B7oD6dMtWdOdoxm8ZOYE4POzznBCsVW13shpfUHQmwHE3mw3HQZBjkEc-dT10naVIwLnOsEOrHexYUvzEUlPKA4zGBO9H3ahHijrR8OgTRwhZWWnrctHWnR-Gm8HcsyUpxjjs4VYLX5Xq-2S8cqp2fvmkuIaY1_OpZJHDGodCd_AHygXklBRJ7_21OPUldlBAK6CB5ftFyM0Uw


Then split in half on tablesaw to allow it flex into shape, will be glued and screwed into position using the original plywood still in place on the boat.

Before that, I will clamp or screw to the original board and belt sand the top edge to a perfect fit to match. Then also the bottom edge.

y4m71xLk5hmSJo-4NgwJV4q_AVs6izMYSLxUtlXi2xKX7U_YGWpm_KUmK2EcmPEKYs0RhPQ1laMUVVH-zCV4iqxFPIZ2wxmhVn5NbRLi0cOzYMTFN0ktainGfxsHUqFyK4MAoF6_JZKkw_pwsfEGsA2VWsypvnSajTg8-x_x0yBDkWkdlWfoZEE7JCG8IeXT6GIWixEHVhEDnKY2z2u2TQNBA
 
This morn I ground both boards to curve properly to the shape matching the ply edge of the old board. They are not as stiff as the original board. Since the original board is still holding a good curve, I will use it glued in behind these new boards. I will have to repair some sections of the old board.

So the new construction should be at least 50% stronger than new. I am also planning on attaching a 3/4 by 3/4 piece to the top of the outermost new board. This will cradle the new plywood edge.

The builder being dumb, ran screws thru the teak covering board exactly between the mahogany support rail and the plywood. So gluing on a a piece will be better for these screws too.


Clamped along the length plus the new board are 1/2 inch taller than the old one.
y4mA3NZA1eI5rDpA8xHeT6Fv5Foiz16mlUpnX6qIASulOC2io2jUSVe4oOC8h0Rp8r0wQSfUMWHUudMlrQP-TzK7yQ6Z3gzqxHn076wB1x6d7i5YOTsc_dfRJBiRp3AeZRfKKE_r7YuK-gQVR9KTV5n7HHej66KbER3uCuRhinNm1FTwOaSDZHSV8DFLap1a6541wNbWP3jWpBBqcmwstb-Ww
 
Today I decided to increase the height of the curved mahogany board to match the other ply support rails. I glued on a piece of ripped treated wood. I predrilled screws to use to line up the parts, then took it apart, glued with Titebond 3, screwed it together.

The ends will be cut off this board to fit between the samson tie up posts.
It will fit behind the new boards that take the original position of this board.

This will make it pretty strong I think. Adds little weight for more strength, not that it needed this. Screwed on arched plywood that sits on top of this adds a lot to the structure.

Your looking at the top of the board, so treated plywood will touch the treated wood.

y4mFo-nAir38vh8HU0LcQZ6wiXgSAkkV7HMjiaqGkUvrZPkeiI4eIn6yzZGsOP2cB0Wv4-Hoq8VHxlo12JDpMDHlhwDCdwOHRA8Gp-dyNKBXh6QcgpuEciEadc2e9tKHjM_m3tokH_4mhUkqW7qWQZn7xhEd6kl-uZajA9bKPkGrFjlsvrb2vSg-RlR7ycir5uFRWtp6T-Jqs5a1p7Ysw4PsA
 
Back
Top Bottom