Show us your ER

The friendliest place on the web for anyone who enjoys boating.
If you have answers, please help by responding to the unanswered posts.

FlyWright

Guru
Site Team
Joined
Apr 15, 2008
Messages
13,731
Location
California Delta
Vessel Name
FlyWright
Vessel Make
1977 Marshall Californian 34 LRC
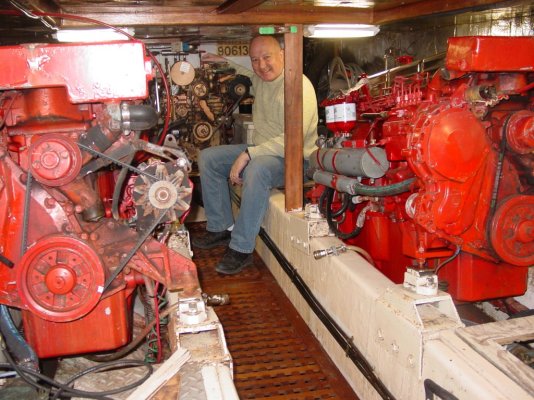
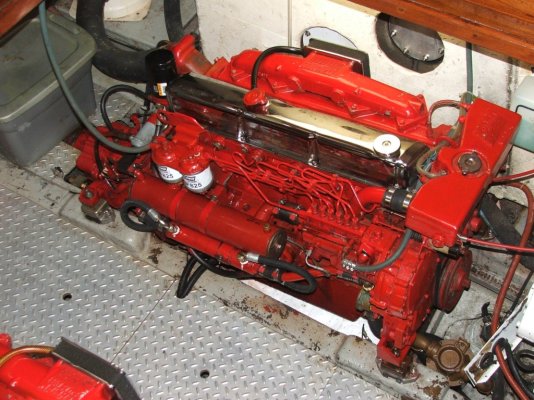
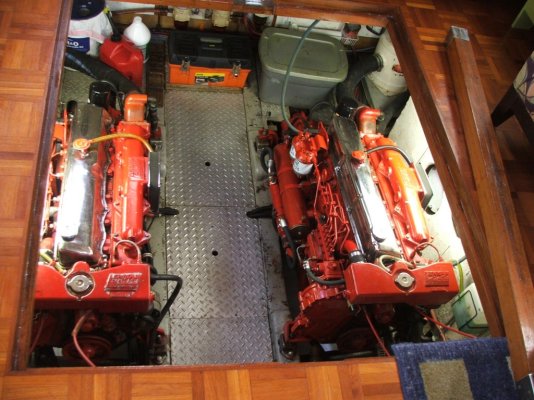
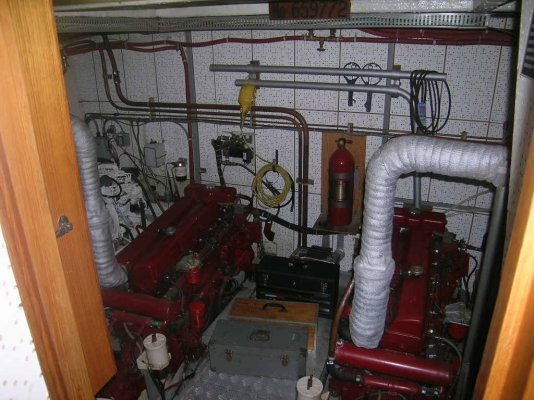
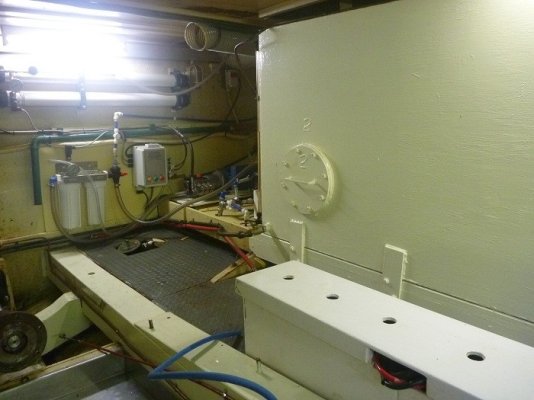
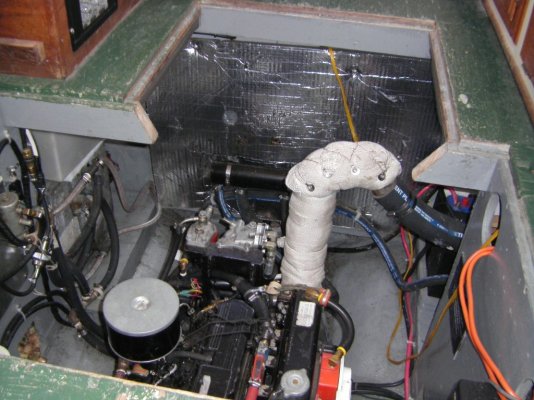
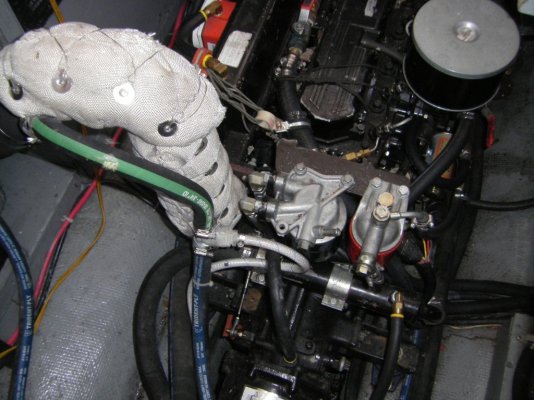
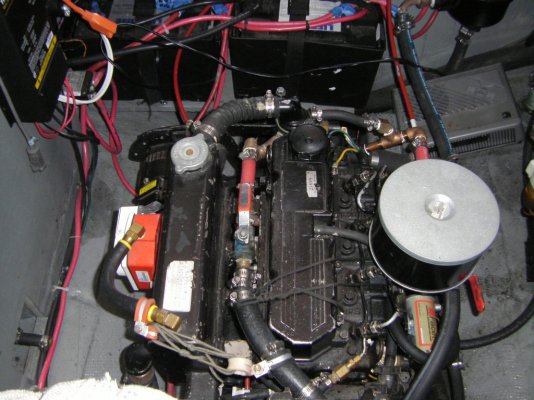
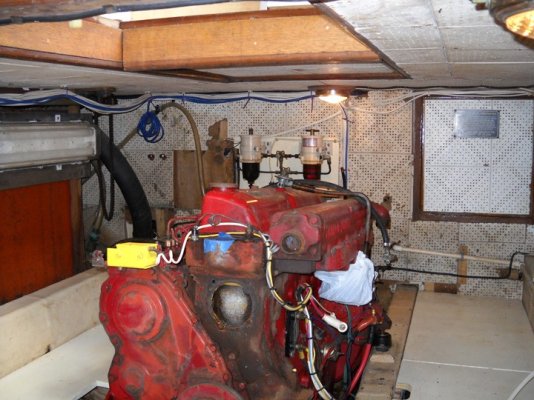
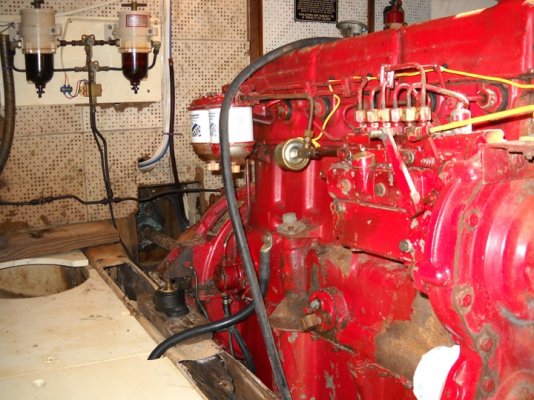
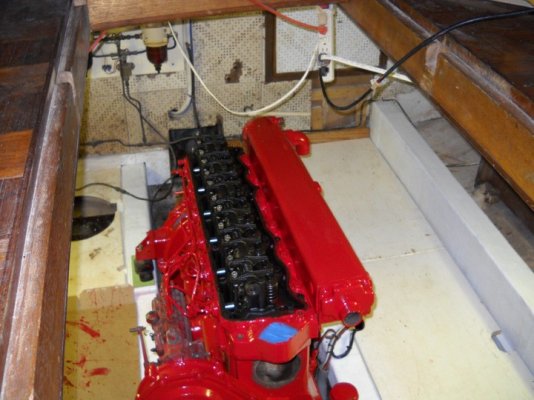
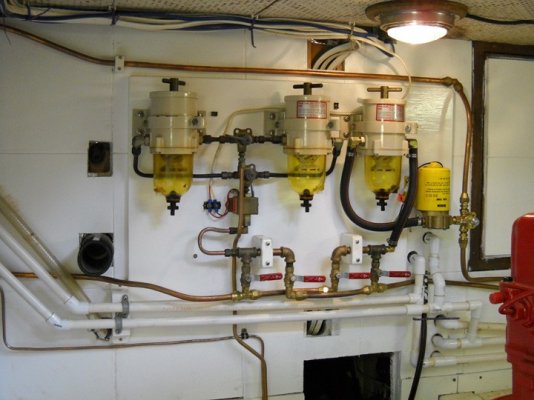
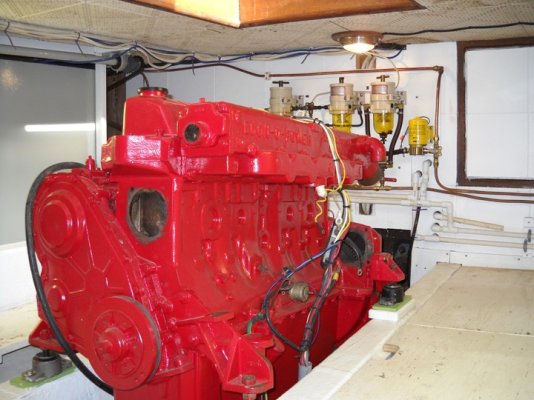
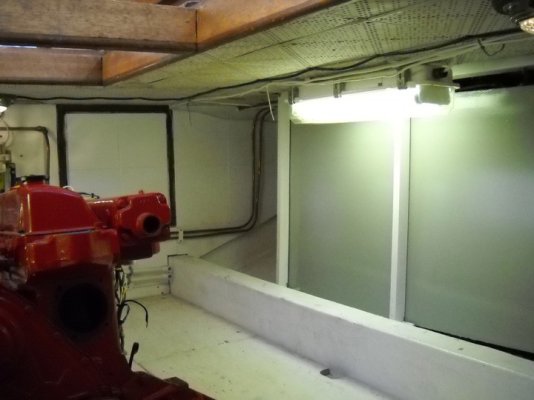
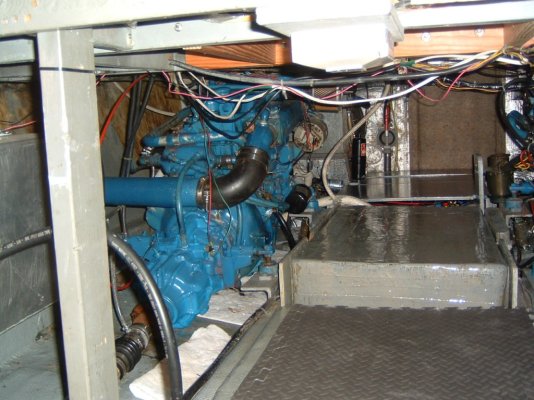
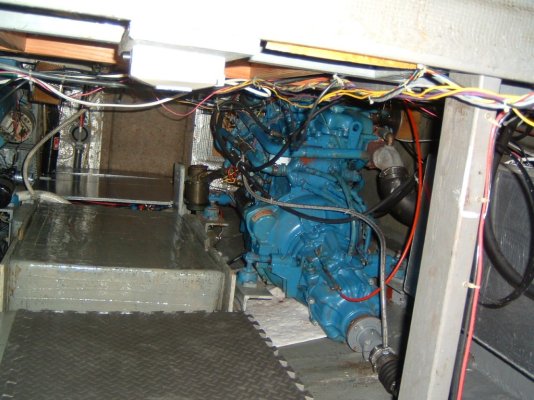
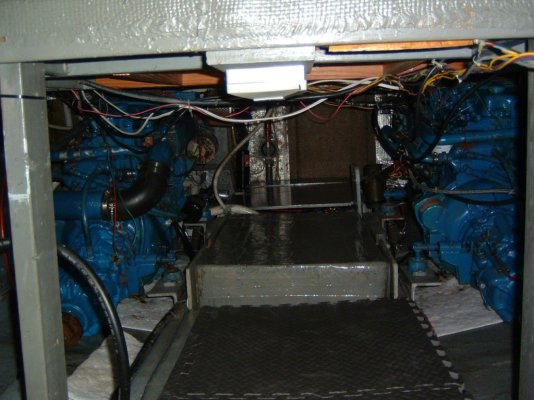
Engine rooms come in all shapes and sizes, ordered and disordered, clean and dirty.* Some bilges are clean enough to eat off of, others look like a petrie dish experiment gone bad. Here are some older pics of mine showing looms of wires in need of attention.* BTW, that's not rust on the engines...that's "Perkins Patina."

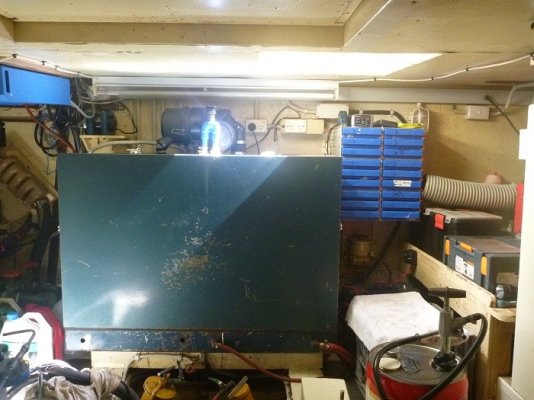
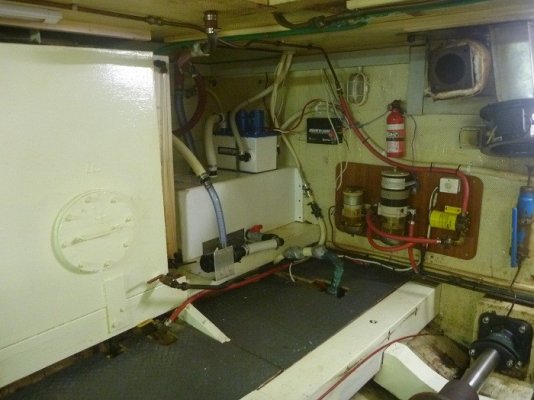
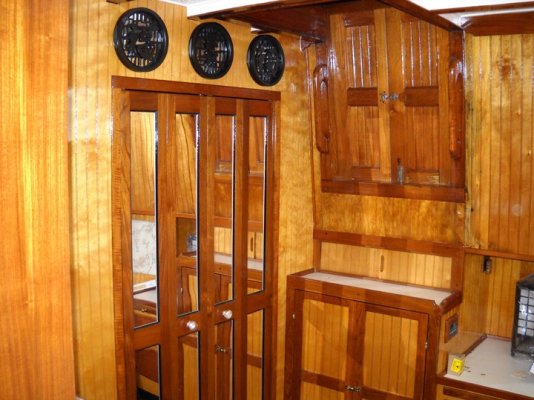
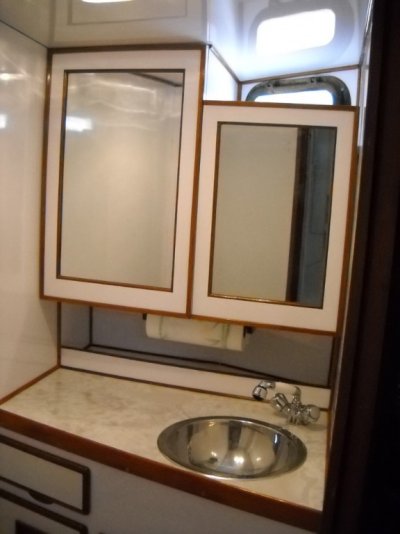
I'll have to bring a camera to the boat for more detailed shots of batteries, water heater, fuel tanks, electrical panel, strainers, etc.* Some of it I am proud of and some is embarrasing to show you, but it will probably motivate me to address the issues in need of attention.* I'm sure the excellent advice from the board will help me avoid pitfalls and allow me to focus on the areas in most need of attention.*

OK, I've shown you mine...show me yours!
 

Attachments

  • dscf0075.jpg
    dscf0075.jpg
    208.5 KB · Views: 351
  • dscf0077.jpg
    dscf0077.jpg
    203.3 KB · Views: 378
  • dscf0078.jpg
    dscf0078.jpg
    188.1 KB · Views: 393
Here's mine!

er_cast.jpg
 
This is all I ever get to see of my engine room.....

*

*
 

Attachments

  • running2[1].jpg
    running2[1].jpg
    108.8 KB · Views: 385
SD,

Don't you have battery boxes on centerline under the floorboards just aft of the fwd ER door? I have 2 boxes there...fwd box for one 8D start, aft box for two 8Ds for house, or now in my case, six golf cart batts. To port, water heater and battery charger, to stbd electrical panel below helm, between engines is 'glassed in holding tank (shown above with the floorboard removed), then aft to water tank between trannys and fuel tanks. No genset, so the walkway is clear from fwd door to aft lazarette. Having never been in another 34 Californian ER, I'm not sure if mine is unique. I guess after 30+ years, they all become somewhat unique.

What's the blue thing you mentioned, a holding tank pumpout line? Mine comes off the top fwd edge below the floorboards, runs immediately to port, then out to the pumpout fitting on the port sidedeck step.

Do you have original fuel tanks? Without dripless shaft logs, the shafts tended to sling seawater onto the tanks causing corrosion. My shaft logs and tanks were replaced before I bought in 2007.

Gotta love the large ER on this boat. I never actually measured it, but it must be close to 12 ft wide and 20 feet long.
 
superdiver wrote:
.... battery box and put it ON THE FLOORBOARDS, so going from front to back is near impossible!
******** I had a similar battery location years ago on my Ocean Alex 42 Sedan. It was a real PITA.

*
 
One of Dan's favourite places on "Delia Rosa". *We're still working on cleaning everything up in the engine room!


-- Edited by Delia Rosa on Thursday 31st of March 2011 12:45:12 PM
 

Attachments

  • mike 025.jpg
    mike 025.jpg
    252.3 KB · Views: 356
Here is my dream engine room.* 2009 Krogen 44 @ 799K.

JohnP
 

Attachments

  • 2292767_37.jpg
    2292767_37.jpg
    80.2 KB · Views: 360
Dan, That is SOOOOooooo not fair you have all that space!
 
North Pacific 39, 2008, @ <<$300K
 

Attachments

  • pict0102.jpg
    pict0102.jpg
    209 KB · Views: 334
superdiver wrote:SeaHorse II wrote:superdiver wrote:
.... battery box and put it ON THE FLOORBOARDS, so going from front to back is near impossible!
******** I had a similar battery location years ago on my Ocean Alex 42 Sedan. It was a real PITA.

*

*for as often as you have to change the batteries, i cant see why you would want them in the middle... maybe if you had to replace them every year.... maybe...lol

*

*

*

*I like mine in the middle so it's easy to service them every 2-3 months.*
 
Patricia Louise II- a work in process
smile.gif
 

Attachments

  • dscf2953.jpg
    dscf2953.jpg
    253.9 KB · Views: 327
  • dscf2951.jpg
    dscf2951.jpg
    223.8 KB · Views: 338
Seems like many boats (including mine) have the diamond plate ER flooring.* That kills my knees and I had been wearing volleyball kneepads any time I went down there, but recently I bought the interlocking closed cell foam pads which I will cut to size and put down there.** Looks like Flywright has discovered this already and I must say it is a great idea.* Before that just threw a yoga mat down there and figured why not make that permanent?

Will post pics this weekend.
 
6'6" of head room.* And my back doesn't ache anymore.......
 

Attachments

  • dscn3893.jpg
    dscn3893.jpg
    165.5 KB · Views: 327
Well here's mine , notice the wide open spaces, opps some one has stolen my engine.

*

Benn


-- Edited by Tidahapah on Friday 1st of April 2011 04:11:07 AM
 

Attachments

  • p1000875.jpg
    p1000875.jpg
    115 KB · Views: 323
  • p1000873.jpg
    p1000873.jpg
    103.6 KB · Views: 323
  • p1000872.jpg
    p1000872.jpg
    123.9 KB · Views: 337
  • p1000871.jpg
    p1000871.jpg
    96.4 KB · Views: 327
My home away from home.* By the way, I still can't make the thumbnail feature work on image insertion, so sorry for the size....

*

 
Delfin,* How sweet it is!** This one takes first place in my book!

Cheers.* JohnP
 
That's not just an engine room...that's part workshop, part barn!! I love it. Great blog, too.
 
What you can't see from the pictures is that there is only about 4' 11" of headroom, but no problem.* I just had by legs shortened by a foot so I'm good to go.

 
Love the work shop area and the RO mounted near the sink.
Good thinking.
Benn
 
Delin, re the posting of thumbnail pics.* Using the advanced editor, instead of clicking on the little tree icon for insert/edit image, scroll down to the bottom and click on the 'attach image' box, just below the 'Email me whenever there is a new post to this topic' box.* Then when the browser options boxes (plural as there is a list of blank ones), called File Upload appears below that, click the cursor in the top one, then click on 'Browse', which takes you to your photo file, select the one you want, then click on 'Open' and it's file name and file location is added to the box.* You can then add another if required and so one down.* When you have all the ones added you want, then click on 'Upload files' which is right at the bottom, then, once you are happy with the edit, spelling, no typos, etc, select 'Submit Post' and Bob's your Uncle, they appear.... Sorry to inflict myself on you, but did that just to go thru the motions to illustrate.* Yeah, not a pretty sight....


-- Edited by Peter B on Saturday 2nd of April 2011 05:23:02 AM
 

Attachments

  • dsc04433.jpg
    dsc04433.jpg
    52.5 KB · Views: 163
Peter B wrote:
Delin, re the posting of thumbnail pics.* Using the advanced editor, instead of clicking on the little tree icon for insert/edit image, scroll down to the bottom and click on the 'attach image' box, just below the 'Email me whenever there is a new post to this topic' box.* Then when the browser options boxes (plural as there is a list of blank ones), called File Upload appears below that, click the cursor in the top one, then click on 'Browse', which takes you to your photo file, select the one you want, then click on 'Open' and it's file name and file location is added to the box.* You can then add another if required and so one down.* When you have all the ones added you want, then click on 'Upload files' which is right at the bottom, then, once you are happy with the edit, spelling, no typos, etc, select 'Submit Post' and Bob's your Uncle, they appear.... Sorry to inflict myself on you, but did that just to go thru the motions to illustrate.* Yeah, not a pretty sight....


-- Edited by Peter B on Saturday 2nd of April 2011 05:23:02 AM
*That's what's got me baffled.* That is exactly what I do, but when I click Insert, they go in big.* Lightbulb!* You must not be clicking Insert, which I thought was a necessary step....Here's an experiment....

*EUREKA!!* It worked.* And to think I make my living in software design and development.......


-- Edited by Delfin on Saturday 2nd of April 2011 10:20:58 AM
 

Attachments

  • delfin (2).jpg
    delfin (2).jpg
    87 KB · Views: 182
  • delfin 7.12.10 (3).jpg
    delfin 7.12.10 (3).jpg
    61.2 KB · Views: 169
Delfin wrote:*EUREKA!!* It worked.* And to think I make my living in software design and development.......
******* No help on the photo attaches but MAN!, that's a great looking boat!

*
 
I don't have an engine room. I have an engine compartment. Good thing my engine is small. In the 1st pic see the floor support cut away by a PO. Nothing seems to have suffered from it's loss. Notice my heat exchanger is on the aft bulkhead. Normally it's inside the exhaust manifold but I don't like sea water in/on my engine. Has caused problems before. There is no sea water on/in my engine. In the 2nd pic see the oil and fuel filters on a custom bracket. I have a 500 series Racor also. The custom SS high rise exhaust riser is/was money well spent ($750). By National Marine Exhaust in Marysville Wash. In the 3rd pic see the steel exhaust manifold to port. Since there is no heat exchanger inside there's a large volume of coolant. The orange and white thing on the side of the exhaust manifold is a Murphy Switch. It senses the coolant level and when it's a bit low an alarm sounds. This device saved our bunnies already. At the upper right is just a winter heater.

*******************************************************
 

Attachments

  • sth71434.jpg
    sth71434.jpg
    209.5 KB · Views: 182
  • sth71436.jpg
    sth71436.jpg
    204.4 KB · Views: 187
  • sth71438.jpg
    sth71438.jpg
    206.7 KB · Views: 181
One of my tasks will be to figure out what all the specific valves,*wires and tubes are for, as well as hoping I'm not too fat to enter and maneuver in the engine compartment!
 
It's still a work in progress but I am getting there.* Finished painting the fuel tanks and plumbed the new filter/fuel polishing/transfer pump.** Had to rebuild 3 stringers, completely rotted away.* Tanks are orginal, good shape except the tops rusted, cleaned them and* I think I can still get a few more years out of them.* The steel was VERRY Thick!.

*
 

Attachments

  • engine room before.jpg
    engine room before.jpg
    132.3 KB · Views: 197
  • rotten stringers.jpg
    rotten stringers.jpg
    146.7 KB · Views: 203
  • 3 beams rebuilt.jpg
    3 beams rebuilt.jpg
    106.3 KB · Views: 188
  • new filter polisher.jpg
    new filter polisher.jpg
    99.9 KB · Views: 204
  • another view.jpg
    another view.jpg
    114.4 KB · Views: 205
  • freshly painte fuel tank.jpg
    freshly painte fuel tank.jpg
    75.2 KB · Views: 200
Bill,
Looks like you have put some work in there.
Looking good , how much longer until you complete it.

Benn
 
Bill, very nicely done.* Post pics as you make progress, please.
 
I hope to have everything done by the end of summer. Things still left to go:
1. Haul out, bottom job, new prop shaft, service thru hulls, replace rotted away rub rails.
2. Build new cabinets for galley, et-al.
3. Build new setee with storage and space for air conditioner air handler.
That's about it for the major stuff left to go, here are a couple pix of the interior that is completed so far.
Pix of the aft SR and Head, Fwd head, Electrical distribution, and Salon. Built a complete new closet on the starboard side in the aft SR,
that is the mirrored doors, the doors below the aft extit door hides the washing machine.
Built new medicine cabinets for both heads and redid the formica in both as well.
 

Attachments

  • aft head.jpg
    aft head.jpg
    87.4 KB · Views: 177
  • aft sr looking fwd.jpg
    aft sr looking fwd.jpg
    94.1 KB · Views: 177
  • aft sr looking aft.jpg
    aft sr looking aft.jpg
    118.4 KB · Views: 183
  • fwd head.jpg
    fwd head.jpg
    70.3 KB · Views: 185
  • salon looking fwd.jpg
    salon looking fwd.jpg
    104.1 KB · Views: 192
  • wiring panel.jpg
    wiring panel.jpg
    135.7 KB · Views: 193

Latest posts

Back
Top Bottom