Matching Shaft & Prop Tapers

The friendliest place on the web for anyone who enjoys boating.
If you have answers, please help by responding to the unanswered posts.
Tab washer should be ok. Should also be able to drill the cotter pin hole in the shaft while installed. It might be a tough SS, but it is not that tough. A good bit and proper cutting fluid and a battery drill should do it.

Domed nut may be fine, as it has held up for a long time. Just would rather see a very positive restraint should a nut loosen. Two nuts and a cotter are dead reliable.
 
Ok I don't fully understand the risk in changing from a locking screw thru the domed nut's flange into the prop hub (ie along length of shaft) as was original; vs putting the lock screw through the side of the dome nut into a dimple recessed into the shaft thread (ie perpendicular to the shaft). I'm thinking of supporting this second arrangement with a tab washer & blue loctite to the nut's thread. Maybe at the next haul out I can get a pre-warned yard to drill cotter pin holes thru the shafts in situ. Sound like a reasonable approach?
 
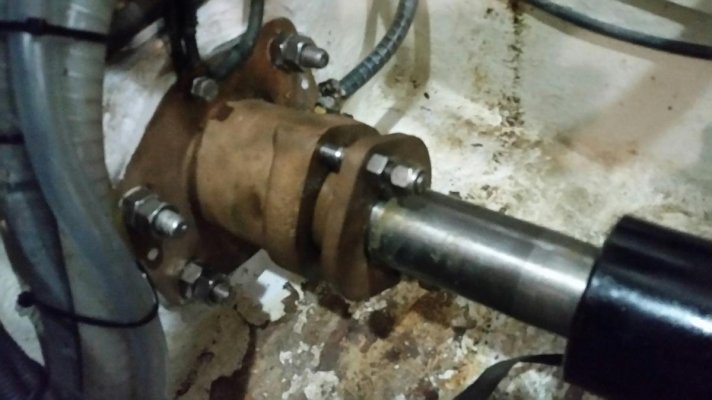
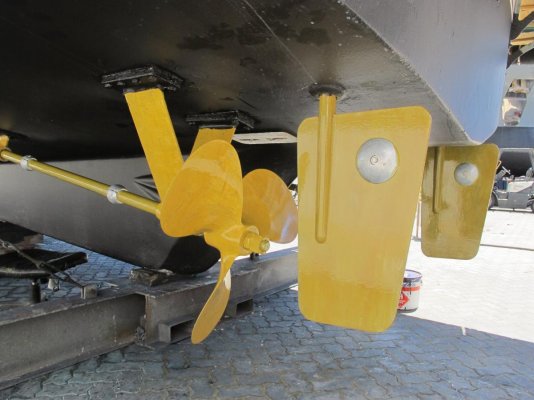
OK, I can now close out this project. Stuffing box was cleaned up and new/previously unknown bearing within it was replaced (it is only 3" long so was cut down from a 9" cutlass bearing). Box was re-packed with 3 rounds of 10mm GFO stuffing. Boat was splashed and with the engineers on board, I re-filled water tanks and the shaft coupling was mated to the transmission via a 'rubber' DriveSaver. Snr engineer wasn't wild about doing this work with the DriveSaver in place; said best practice was to remove the DriveSaver and insert a custom-made steel or aluminium 'filler' of same dimension. I wasn't willing to be without the boat for another week while this was done so I told him to do the best he could off the DriveSaver. In the end, he was satisfied with the alignment result he got and he stayed in the engine room while I took Aquabelle out for a gallop over a range of rpm's. He tinkered with the stuffing box while observing the shaft. No vibration, no run-out on dial indicator and no drips, with box remaining cool to the touch. Disembarked the engineering team and then did the 4hr run back to Sydney Harbour @ 1800rpm & 10kts. Stuffing box checked every 30min and remained cool and drip-free throughout. Some photos attached below.
 

Attachments

  • Prop Hub Nut1.jpg
    Prop Hub Nut1.jpg
    73 KB · Views: 35
  • reinstalled stuffing box2.jpg
    reinstalled stuffing box2.jpg
    73.2 KB · Views: 42
  • Running Gear Stb Qtr.jpg
    Running Gear Stb Qtr.jpg
    96.1 KB · Views: 31
  • coupling1.jpg
    coupling1.jpg
    79.5 KB · Views: 33
Good outcome!

I could not see any rudder or shaft zinc anodes - don't you use them?
 
Eagle eyes Brian! I use shaft brushes immediately fwd of the stuffing boxes...they just hadn't been re-installed when I snapped the photos. I used to use conventional shaft anodes but after having them come off on one side once and only discovering it was missing when I went swimming beside the boat, I changed to the brushes. The rudders are tied into the bonding system internally.
 
Interesting! I have shaft brushes and rudders bonded, but still use anodes. The anodes do dissolve so I think its good to have them. I don't know whether its caused by other boats in the marina are creating stray currents via their electrical systems or not. So I just replace the anodes when hauling for antifoul.
 
The sparkie at my previous marina (Bobbin Hd) came aboard annually and connected up to the bonding system and then dropped the test anode over the side and took readings. Everything was always perfect post the shaft brushes. Haven't had that done at Cabarita (there's no resident sparkie) but now you've reminded me, next time I see a contractor-sparkie at the marina (a couple seem to be regulars) I might get them to do the proper test, just to be safe. Certainly a visual inspection of the below-waterline metals all looked good this haul-out, but one never knows without actually do the proper micro-voltage test. (nb: I do have 2 x big aluminium 'maddox' anodes on the transom to which the bonding system ties back; they last about 24-30 months)
 
Late on the prop nuts but mine is very alike.
Domed bronze nut but has a hole, 5/8" , centred so a stub thread shaft can be run into a thread hole in the shaft end. Then two nuts are run onto the stub shaft a jammed onto the dome nut and each other for a lock.
 
C lectric...thanks for that. I guess the 'stub thread shaft' goes through the nut, jamb nut and dome nut and then on into the tapped hole in the shaft centre...have I got that right? If so, I suppose a hole could go through that 'stub thread shaft' right after the last nut, to take a cotter pin...if one wanted to be belts-&-braces?


For me, I wonder if it would be easier for a yard to shallow-drill and tap a thread into the end of each shaft to take a 'stub thread shaft' vs drilling right through the shaft to take a cotter pin, with the prop shafts remaining in the boat? (Obviously all is easier to do if the shafts were out and at a shop...but I really don't want to pull shafts out of the boat if I can avoid it.)


But you have given me another idea. Why not just drill the centre of the dome nut as you have done and tap THAT hole (easy to do on the bench); screw in a threaded rod to where it butts up against the shaft end but without drilling into the shaft end; two locking nuts outside the dome nut as you have; and a cotter pin behind the aft nut to secure all? That would be easy to do....and I think would achieve a positive lock of the dome nut?
 
All sounds complicated. Conventional pair of nuts does it for me.
 

Attachments

  • IMG_1480.jpg
    IMG_1480.jpg
    113.2 KB · Views: 36
Aquabelle,.

That would work too. The stub shaft centre line is in line with the main shaft centreline. The threads in the main shaft are about 2" deep. The stub shaft is ss as mg brze rod not available so the threads are HEAVILY Antiseize coated. No cotters.


Insequent,.

You work with what you have. To change for me would be a new shaft since the length is not present to do as your is done. Since mine is now 39 yrs. old and my setup was used in thousands of fish boats here it has stood the test. It is no more complicated than yours.
 
Last edited:

Latest posts

Back
Top Bottom