You are using an out of date browser. It may not display this or other websites correctly.
You should upgrade or use an alternative browser.
You should upgrade or use an alternative browser.
Introducing me and my boat (Thom301)
- Thread starter Thom301
- Start date
The friendliest place on the web for anyone who enjoys boating.
If you have answers, please help by responding to the unanswered posts.
If you have answers, please help by responding to the unanswered posts.
Cigatoo
Guru
No! Really nice boat and really nice engineNice boat! Nice engine!
")
You can be proud of your boat, your accomplishments, and especially of your relationship with your grandfather. Well Done!
Last edited:
healhustler
Guru
- Joined
- Oct 2, 2009
- Messages
- 5,198
- Location
- USA
- Vessel Name
- Bucky
- Vessel Make
- Krogen Manatee 36 North Sea
I don't think I've seen a boat with so much rudder power. That's impressive.
Agree, and wait till you see the range of axis on that rudder. Even more impressive!
OP
OP
Thom301
Veteran Member
- Joined
- Oct 21, 2016
- Messages
- 39
- Location
- The Netherlands
- Vessel Name
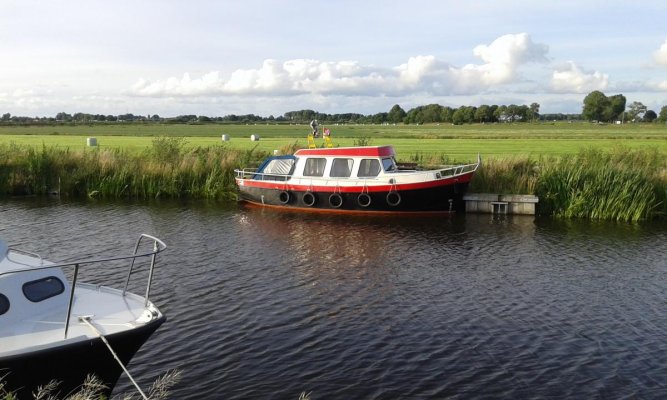
- Opa Hein
- Vessel Make
- Ex-workboat
Many thanks for all your kind words everyone!
@ Cappy208, The engine is coupled by a friction gearbox which has a 1:1 ratio. Switching gear is done by a big 'stick' coming out of the floor. The gearbox is connected to a 2 inch propshaft. Also that would indeed be my channel. I'm trying to get familiar with the camere so hopfully by next summer I can upload some better video's.
@healhustler, Hi there Tex! I thought I might run into some familiar [STRIKE]faces[/STRIKE] trawlers here. I have indeed since then found a lot about the history of the boat. Still no picture's from 'way back' sadly but I hope to find them one day.
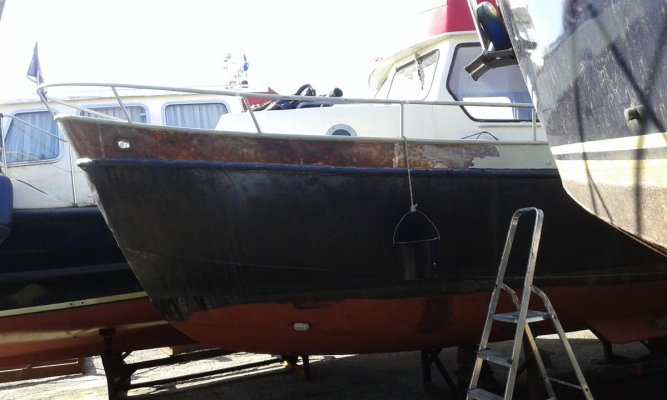
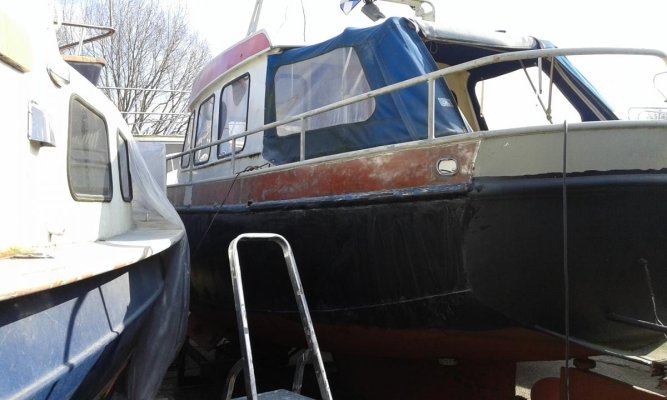
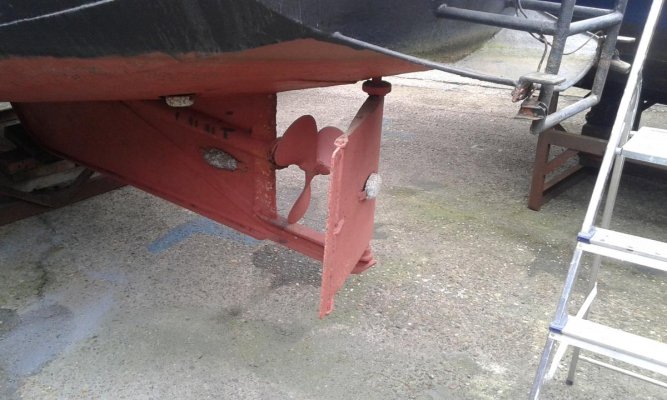
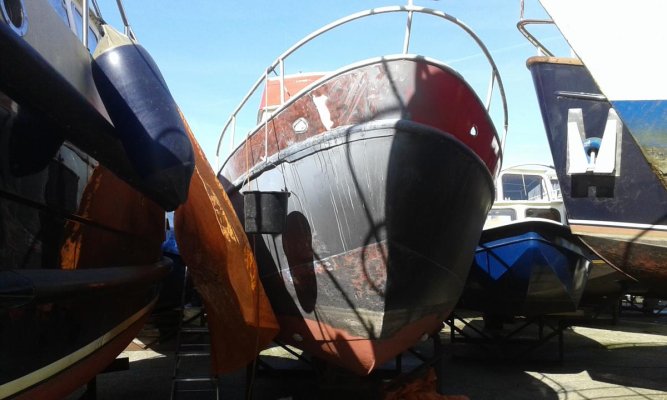
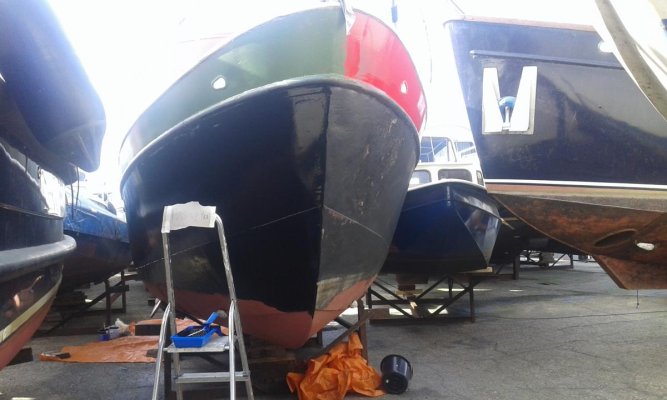
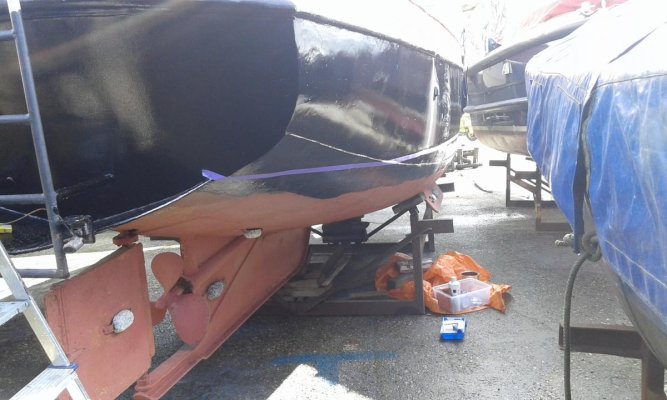
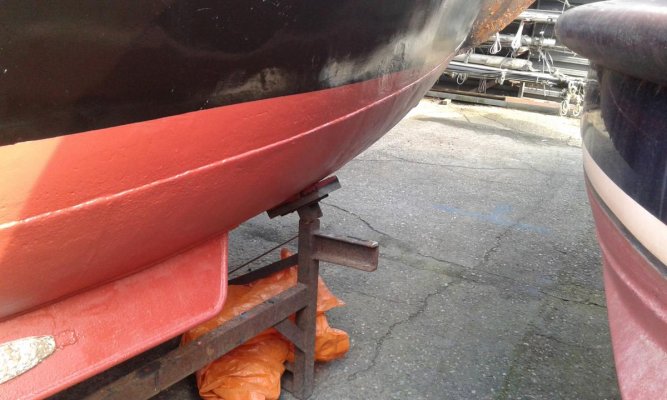
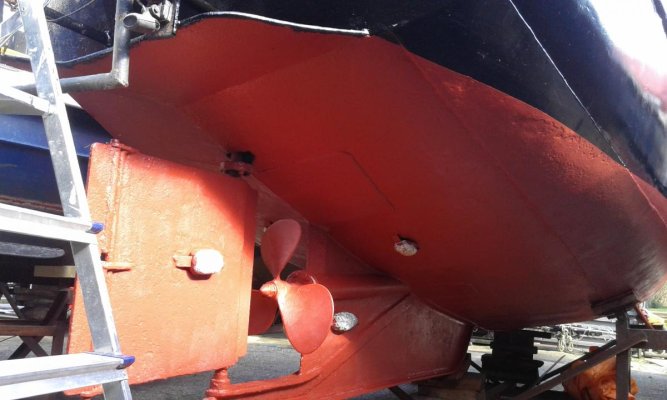
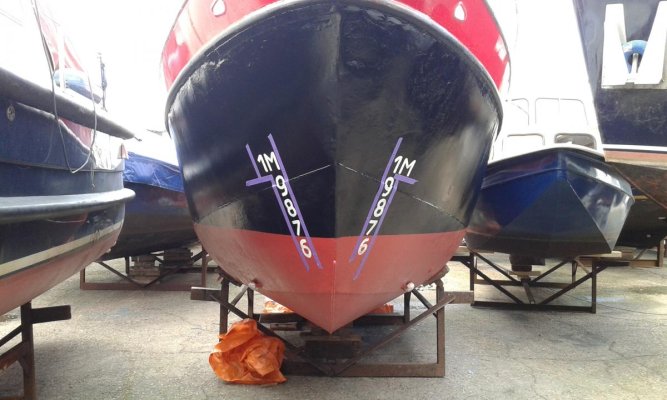
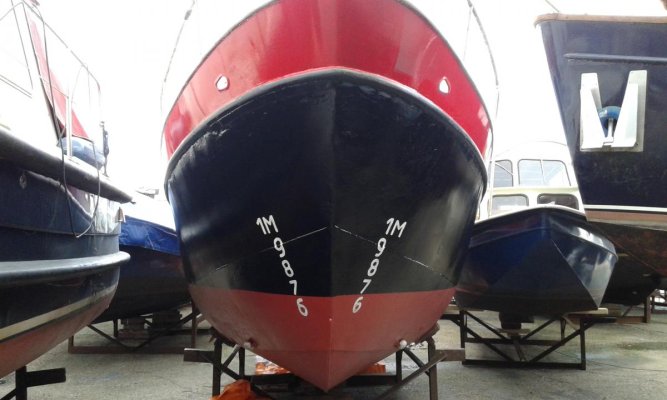
@Moonstruck, I'm a 'bottom kindof guy' myself. :lol: So here are some pictures from the hull during the first winter.
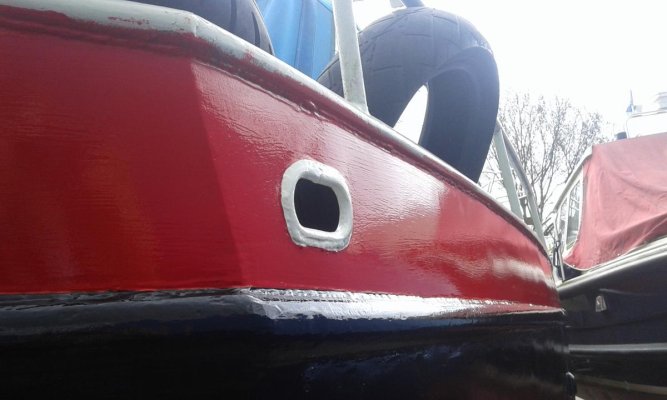
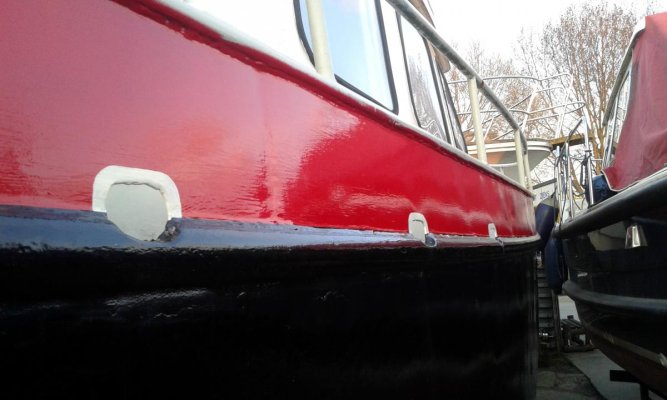
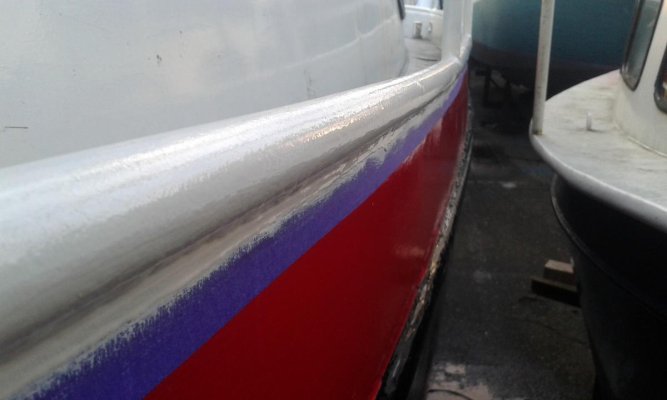
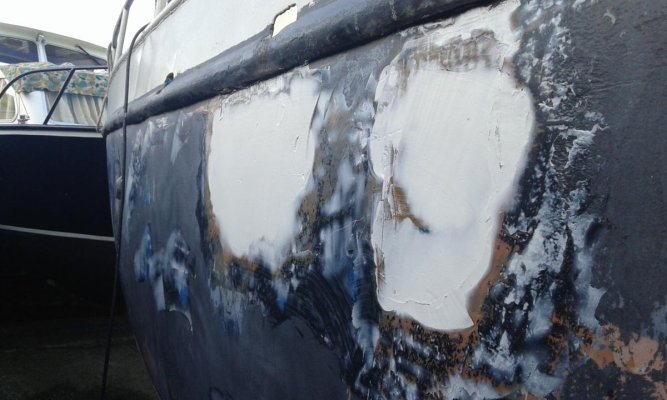
One of the first things the boat desperatly needed was a new paintjob. Both above and under the waterline. So I sailed the boat back home and had it lifted out of the water. During the first winter I spend a lot of time working on the outside of the boat. Mostly painting, fixing some damages on the hull and so on. On a few parts of the boat the paintjob was so bad I had to remove all the paint, primers and filler and get it back to blank steel. This was a lot of work to do but I'm happy I did it as the results were much better.
One of the things I did not do was use filler on the entire hull. There were 3 places were using filler was inevitable to get a smooth hull. Most of the dents and 'bruises' in the steel of the hull I kept. Not because it was too much work but because I find that an old boat should show a bit of her history. She was made as a workboat and probably was 'thrown' around a lot. A few dents display this which is what gives the boat character in my opinion.
The hull itself I painted with Tenco bottompaint, below the waterline are six layers of professional grade antifouling. The 'nasty stuff' but stuff that actually works. After the hull was painted I painted 'draft' markings by hand.
I have a lot ( By this I mean A LOT. ) more pictures. Too many to post them all. So if you'd like to see some specific pictures please ask.
Regards,
Thom
@ Cappy208, The engine is coupled by a friction gearbox which has a 1:1 ratio. Switching gear is done by a big 'stick' coming out of the floor. The gearbox is connected to a 2 inch propshaft. Also that would indeed be my channel. I'm trying to get familiar with the camere so hopfully by next summer I can upload some better video's.
@healhustler, Hi there Tex! I thought I might run into some familiar [STRIKE]faces[/STRIKE] trawlers here. I have indeed since then found a lot about the history of the boat. Still no picture's from 'way back' sadly but I hope to find them one day.
@Moonstruck, I'm a 'bottom kindof guy' myself. :lol: So here are some pictures from the hull during the first winter.
One of the first things the boat desperatly needed was a new paintjob. Both above and under the waterline. So I sailed the boat back home and had it lifted out of the water. During the first winter I spend a lot of time working on the outside of the boat. Mostly painting, fixing some damages on the hull and so on. On a few parts of the boat the paintjob was so bad I had to remove all the paint, primers and filler and get it back to blank steel. This was a lot of work to do but I'm happy I did it as the results were much better.
One of the things I did not do was use filler on the entire hull. There were 3 places were using filler was inevitable to get a smooth hull. Most of the dents and 'bruises' in the steel of the hull I kept. Not because it was too much work but because I find that an old boat should show a bit of her history. She was made as a workboat and probably was 'thrown' around a lot. A few dents display this which is what gives the boat character in my opinion.
The hull itself I painted with Tenco bottompaint, below the waterline are six layers of professional grade antifouling. The 'nasty stuff' but stuff that actually works. After the hull was painted I painted 'draft' markings by hand.
I have a lot ( By this I mean A LOT. ) more pictures. Too many to post them all. So if you'd like to see some specific pictures please ask.
Regards,
Thom
Attachments
-
 20160312_115807.jpg.eeffbd92011238b1ed61ab06b5424677.jpg91.9 KB · Views: 77
 -
 20160312_141106.jpg.67cb834e92906b21e7afdd32df04702f.jpg99.3 KB · Views: 73
 -
 20160318_131223.jpg.d0c6b064a1acc01bee1b803539ca84f5.jpg133.5 KB · Views: 82
 -
 20160326_105628.jpg.48636a29f0684337dd4ff2d48373e807.jpg96 KB · Views: 81
 -
 20160326_152335.jpg.bf90911b800d06de9ea1dd5f2566463a.jpg95 KB · Views: 83
 -
 20160327_123041.jpg.98648a05e513ebf093cd877789ce4412.jpg116.4 KB · Views: 90
 -
 20160327_152530.jpg.d79582e18c4a29e41e1073e2444ebabe.jpg120.2 KB · Views: 90
 -
 20160327_152539.jpg.57f69d9a678d23054f4841feb9c9d80e (1).jpg95.5 KB · Views: 79
 -
 20160327_160423.jpg.713484bcbdca98438f58f233e912df07.jpg112.7 KB · Views: 82
 -
 20160327_160754.jpg.7f540ead6a3c75675f93fd5a8fc34d96.jpg89.9 KB · Views: 87
OP
OP
Thom301
Veteran Member
- Joined
- Oct 21, 2016
- Messages
- 39
- Location
- The Netherlands
- Vessel Name
- Opa Hein
- Vessel Make
- Ex-workboat
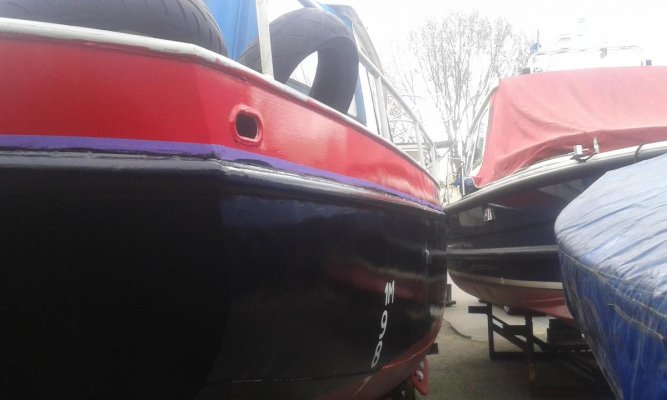
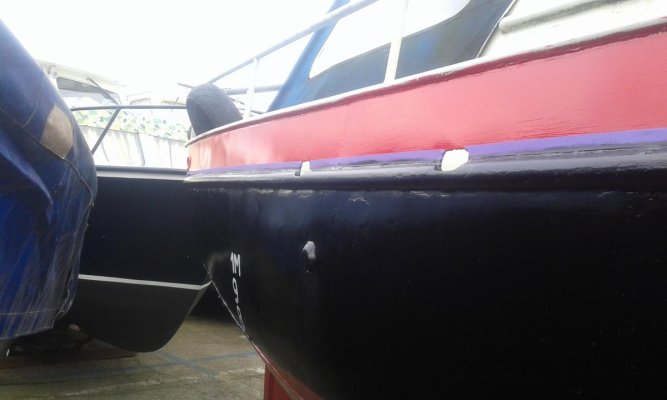
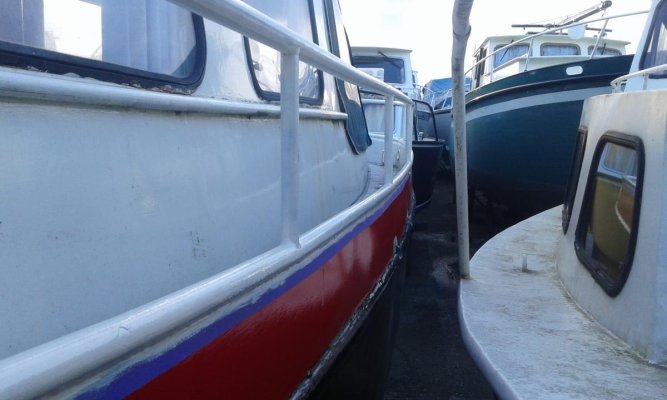
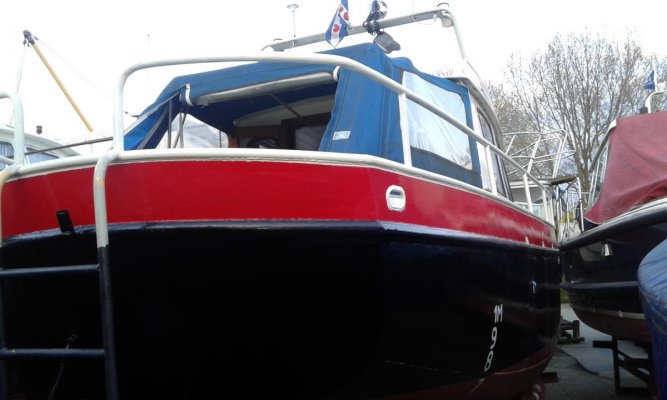
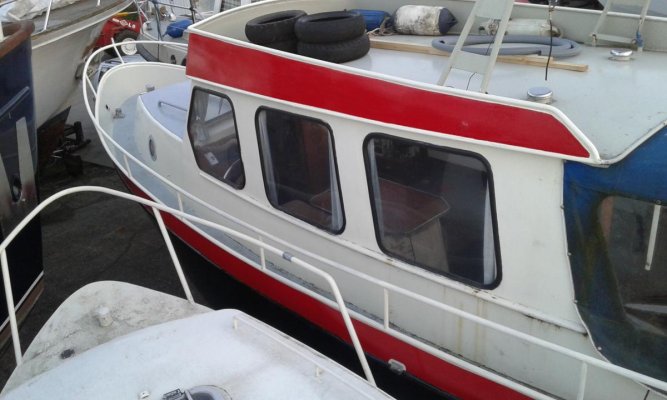
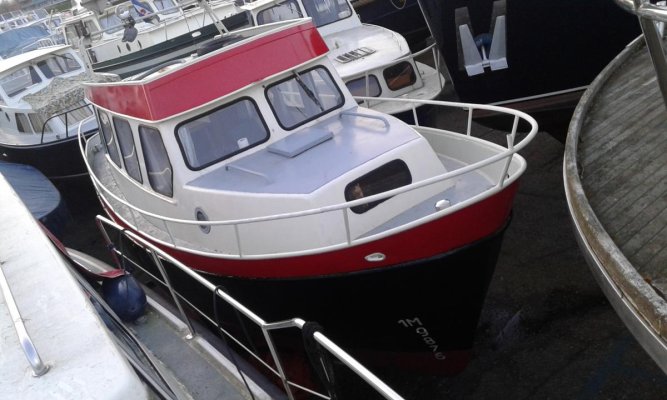
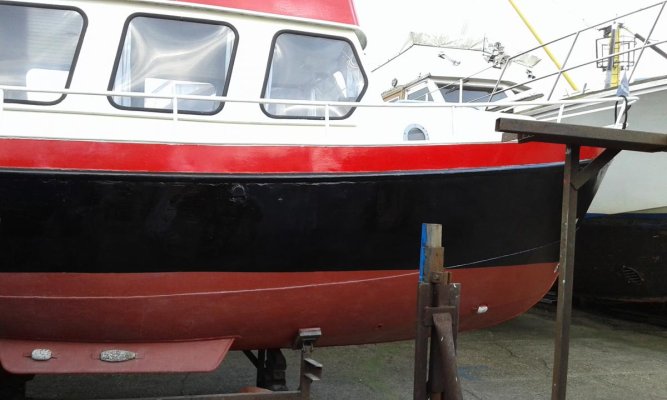
Next steps were to paint the part between the black and red part of the hull, paint the railing and add some details.
After that I got started on the roofsection. The part which we in Holland call 'pet' the so called 'hat' of the boat. :lol: I painted it red and again added some white edges around it.
Regards,
Thom
After that I got started on the roofsection. The part which we in Holland call 'pet' the so called 'hat' of the boat. :lol: I painted it red and again added some white edges around it.
Regards,
Thom
Attachments
-
 20160404_101009.jpg.5ca56483ec3a7dbfd014f844f10d385a.jpg77.6 KB · Views: 65
 -
 20160404_101021.jpg.d0ef310e094710a2a6a8f7506d5fce1c.jpg64.4 KB · Views: 76
 -
 20160404_124704.jpg.36e9e83ee8691728d078fa1a240b11b3.jpg86.8 KB · Views: 80
 -
 20160404_195632.jpg.99f84d2ec7891c8bd6a54f5aedd25a08.jpg92.3 KB · Views: 73
 -
 20160404_195613.jpg.d47d77dff4af0ec8768632067f9b18b0.jpg69 KB · Views: 75
 -
 20160405_192859.jpg.e0f5d360261799c257bb1d5c1e314e78.jpg88.5 KB · Views: 77
 -
 20160405_192907.jpg.ca8c2dd556a78de2240f813dae9f76da.jpg58.9 KB · Views: 84
 -
 20160407_201028.jpg.f7fb5ff118e0268d570c2ccaccb9699b.jpg87.1 KB · Views: 78
 -
 20160407_201207.jpg.3f4e4698961a4337c6c374a17e4913ff.jpg99 KB · Views: 79
 -
 20160407_201414.jpg.e400f6f4e074754e5b74cdc9a33aa61c.jpg113 KB · Views: 78
OP
OP
Thom301
Veteran Member
- Joined
- Oct 21, 2016
- Messages
- 39
- Location
- The Netherlands
- Vessel Name
- Opa Hein
- Vessel Make
- Ex-workboat
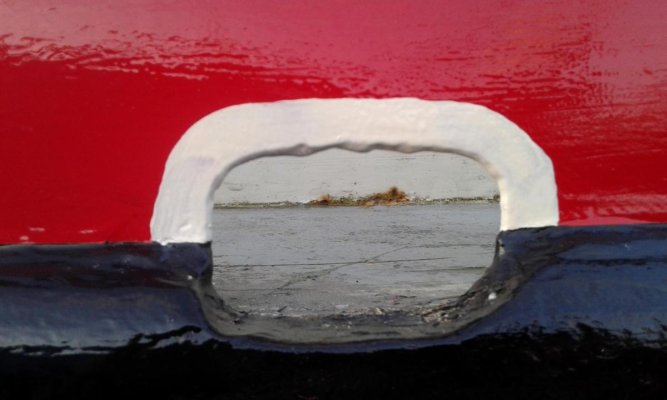
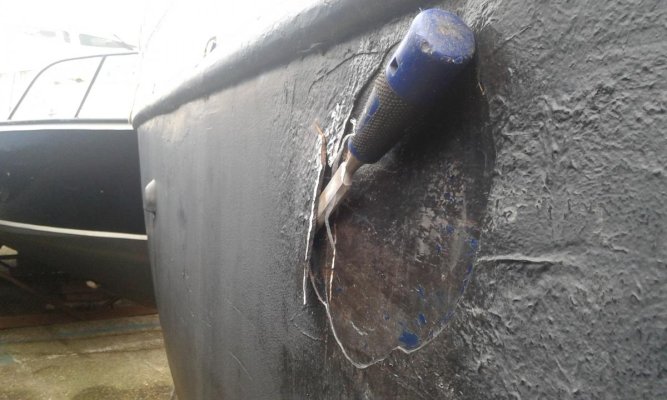
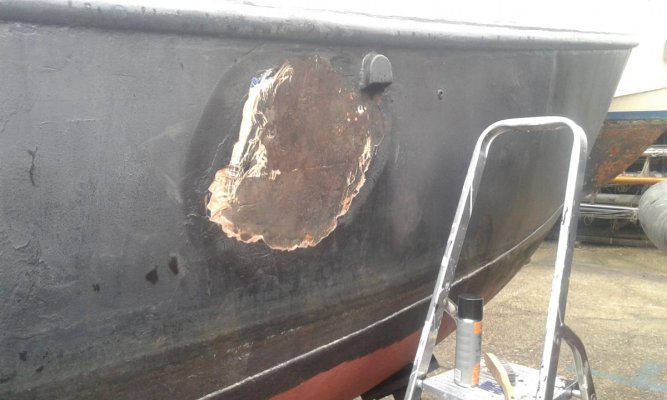
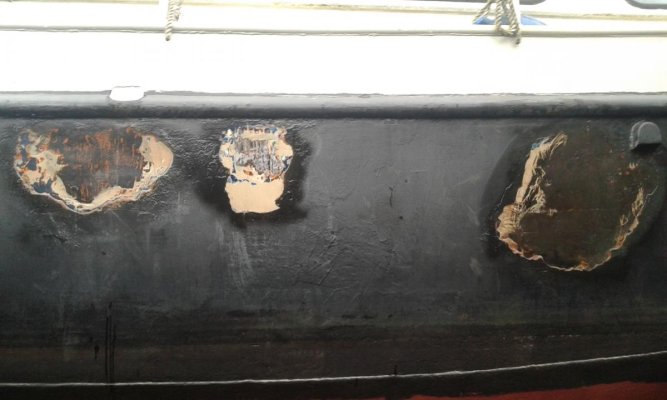
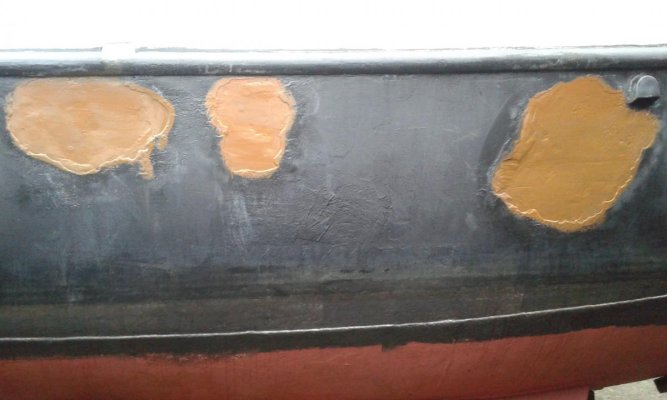
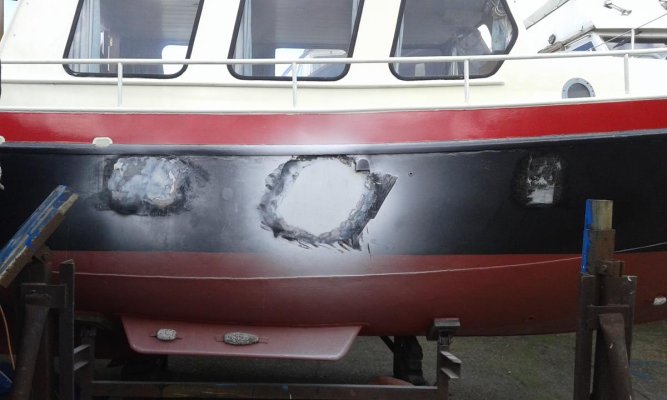
A few more pictures of the state the hull was in. There were a few places where bad quality filler was used. So after removing all the bad (loose) filler I applied a new 2 component filler, sanded it back to a nice smooth surface and painted it.
Regards,
Thom
Regards,
Thom
Attachments
-
 20151219_111312.jpg.1cfb4246f19941f14360f0d53da91888.jpg109.7 KB · Views: 72
 -
 20151219_133806.jpg.e4143ae23010851c318ed11bb10997dc.jpg99.8 KB · Views: 75
 -
 20151219_135200.jpg.256225aa4fa9b4421c94715f35de2d37.jpg84 KB · Views: 77
 -
 20151227_145153.jpg.00c2907b677f6391fd5ed465e328935c.jpg81.7 KB · Views: 79
 -
 20151228_143500.jpg.db1da73da54eb8164fdd3b129887d1a1.jpg107.7 KB · Views: 82
 -
 20160412_135948.jpg.a45b35cf40c357923a8c7248207181f8.jpg87.3 KB · Views: 80
 -
 20160412_144808.jpg.97f1dfbfbc67de4c5dd080df7c25c916.jpg91.2 KB · Views: 82
Nomad Willy
Guru
Thom301,
First thanks for the "bottom" pictures. I like the easy lines aft and the deep and full forefoot. Like the cabin too. And I positively love that duckbill bottom extension (lip) aft!
Regaurding the engine do the pistons rise and fall together or do they alternate like one up one down. I'd guess probably together.
Our boats are quite similar as Trawler Forum boats go. My WLL is about the same as yours.
You bring a nice worldly flair to Trawler Forum. Thanks
Last edited:
OP
OP
Thom301
Veteran Member
- Joined
- Oct 21, 2016
- Messages
- 39
- Location
- The Netherlands
- Vessel Name
- Opa Hein
- Vessel Make
- Ex-workboat
Many thanks Eric!
The hull has a very nice shape indeed. It makes the boat 'listen' to it's rudder perfectly! Only downside is that these types of hulls do sway a lot. But that's something I've just gotta get used to. The deep forefoot is there because originally the engine was located in the forwards cabin. Later when they replaced the engine it was moved further back to the wheelhouse.
The pistons alternate, as in when cilinder 1 is at it's top dead center the second cilinder is at the bottom dead center.
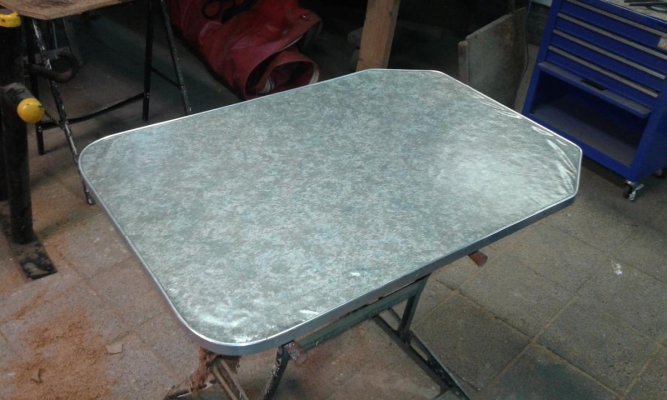
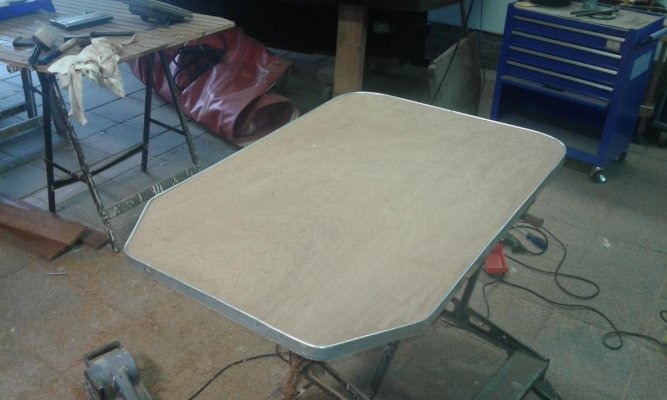
So when the paint was drying I would continue on the inside of the boat. A few small things I started with were the 'table' or the cover for the enginebay. Previous owner put vinyl on it. I'm personally not a big fan of this particular type of vinyl, it gets hard because of the UV from the sun. So I replaced it with mahogany wood.
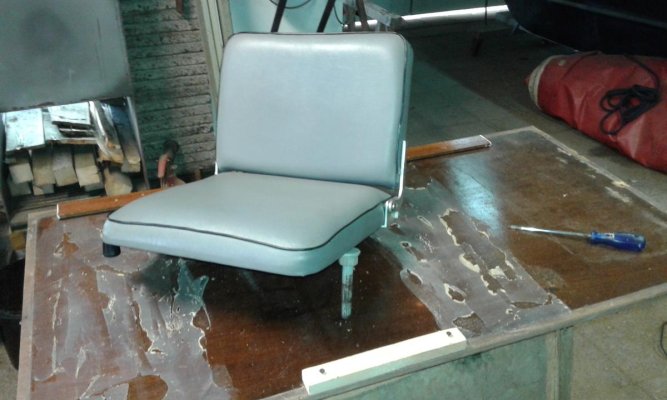
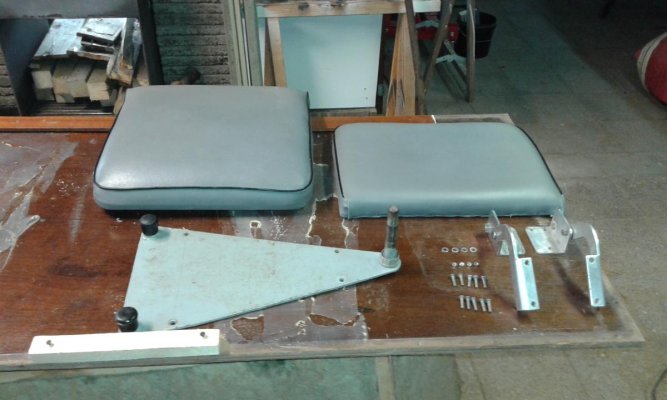
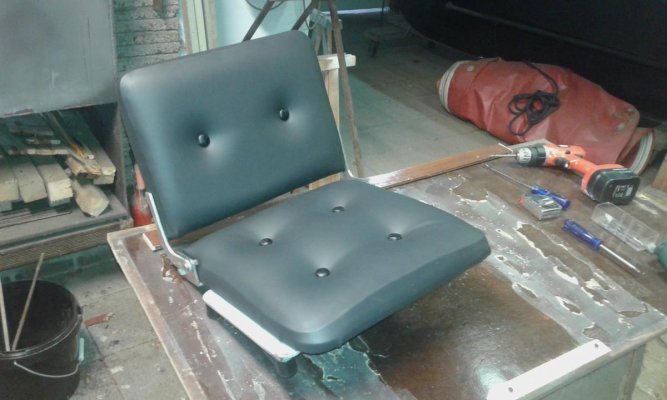
After I gave the pilot chair a quick fixup by covering it with black leather and adding some buttons to give it that 'old fashioned' look.
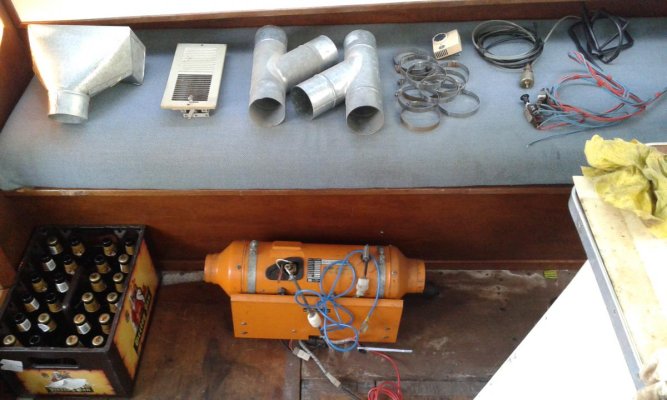
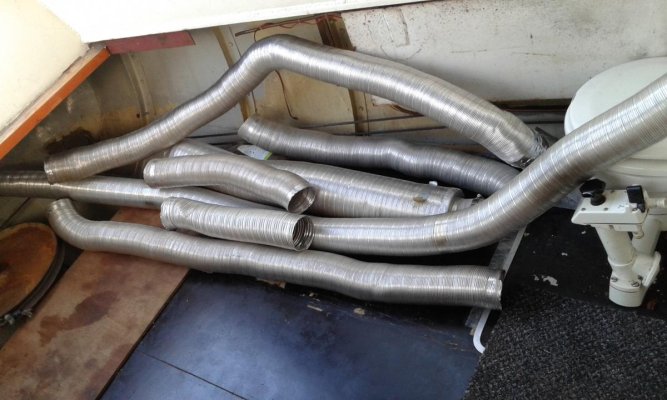
As some of you might know it's often cold in Holland. Well, cold and rainy. So one of the first purchases I did was an old Ebenspacher dieselheater which is currently still waiting to be placed.
Regards,
Thom
The hull has a very nice shape indeed. It makes the boat 'listen' to it's rudder perfectly! Only downside is that these types of hulls do sway a lot. But that's something I've just gotta get used to. The deep forefoot is there because originally the engine was located in the forwards cabin. Later when they replaced the engine it was moved further back to the wheelhouse.
The pistons alternate, as in when cilinder 1 is at it's top dead center the second cilinder is at the bottom dead center.
So when the paint was drying I would continue on the inside of the boat. A few small things I started with were the 'table' or the cover for the enginebay. Previous owner put vinyl on it. I'm personally not a big fan of this particular type of vinyl, it gets hard because of the UV from the sun. So I replaced it with mahogany wood.
After I gave the pilot chair a quick fixup by covering it with black leather and adding some buttons to give it that 'old fashioned' look.
As some of you might know it's often cold in Holland. Well, cold and rainy. So one of the first purchases I did was an old Ebenspacher dieselheater which is currently still waiting to be placed.
Regards,
Thom
Attachments
-
 20150914_104317.jpg.f8028383a64ad5527e91afd94f900614.jpg105.9 KB · Views: 73
 -
 20150914_133632.jpg.bb37ff44b0c483cf8e8072d0c62ce651.jpg111.7 KB · Views: 77
 -
 20150914_153953.jpg.d94fba74be7d99433c19cbf9cc3b5f55.jpg91.8 KB · Views: 74
 -
 20150918_132007.jpg.dfb9e8cbd83dbde1e8345d7a2646035a.jpg92.6 KB · Views: 77
 -
 20150918_133035.jpg.2ff0c33b6a26bf901136f3497484146c.jpg92.7 KB · Views: 82
 -
 20150918_193338.jpg.27815035978dc62946115bf8b98603bf.jpg87.3 KB · Views: 69
 -
 20151101_153608.jpg.1182f5577aada5649c3f54c60064202a.jpg107.6 KB · Views: 80
 -
 20151101_153658.jpg.47d5ddcd47ea57ce048b4da9050dd95b.jpg117.6 KB · Views: 77
OP
OP
Thom301
Veteran Member
- Joined
- Oct 21, 2016
- Messages
- 39
- Location
- The Netherlands
- Vessel Name
- Opa Hein
- Vessel Make
- Ex-workboat
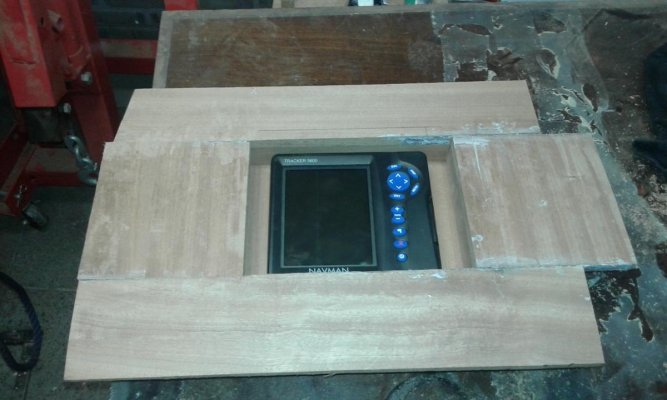
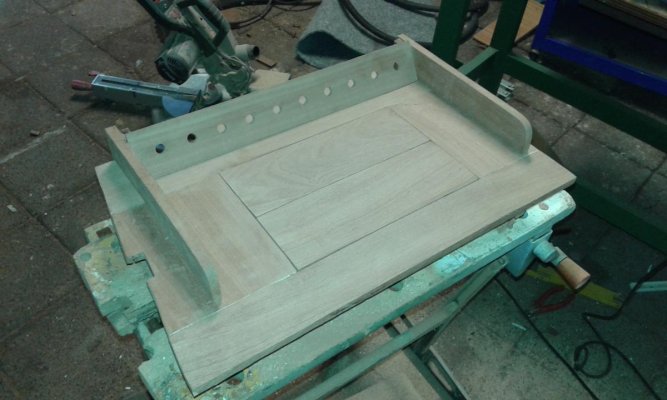
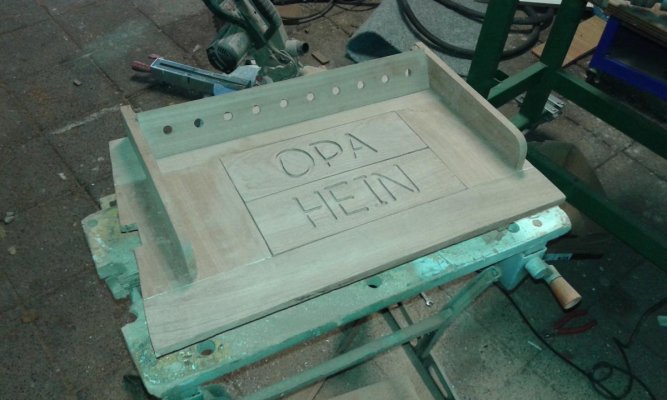
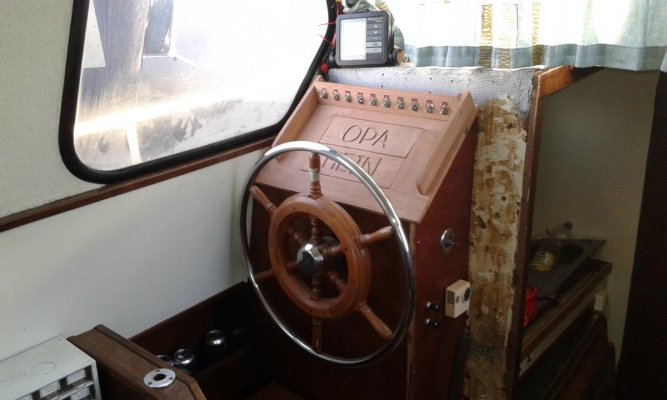
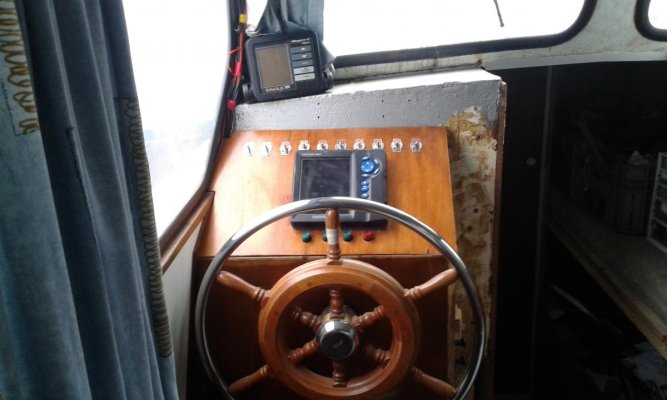
After replacing all the wiring and electronics I had to make a new dashboard. For navigation I use an old Navman chartplotter. The only problem with it is that it does not look good in an old styled boat. Obviously getting rid of the Navman was not an option. It's too useful for that. So I made a mahogany dashboard where I'm able to hide the plotter underneath a cover.
Regards,
Thom
Regards,
Thom
Attachments
-
 20160115_171953.jpg.5050c49caaea24d5a75fb123e5c26701.jpg90.3 KB · Views: 75
 -
 20160127_152442.jpg.cbcd5ab16c442443c4aa013f68eb88b5.jpg95.5 KB · Views: 74
 -
 20160127_155508.jpg.860606d4a1fbad425404948a57ffe1f4.jpg100.4 KB · Views: 72
 -
 20160128_103450.jpg.7d25d0d66e53ec1f86d0472c0257ac30.jpg99.7 KB · Views: 80
 -
 20160128_103407.jpg.676da9e5089088afc61913c3719a2871.jpg84.8 KB · Views: 81
Nomad Willy
Guru
Thom,
Great account.
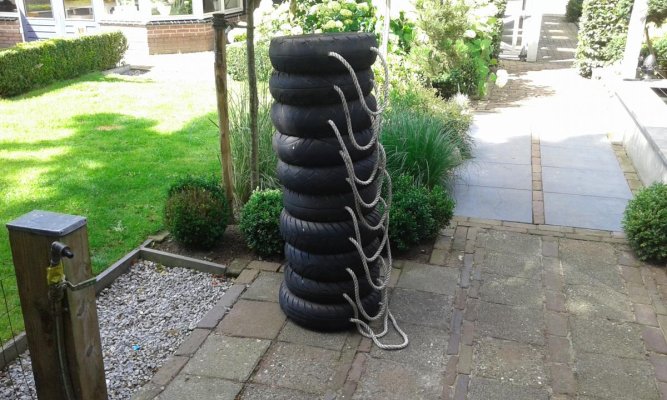
I see motorcycle tires.
You a rider?
When I was your age I rode a 750 Royal Endfield.
Great account.
I see motorcycle tires.
You a rider?
When I was your age I rode a 750 Royal Endfield.
OP
OP
Thom301
Veteran Member
- Joined
- Oct 21, 2016
- Messages
- 39
- Location
- The Netherlands
- Vessel Name
- Opa Hein
- Vessel Make
- Ex-workboat
Thanks Ted, Eric,
Haha not really. I'd like to get my motorcycle license though.
I used the tires to make some 'workboat' fenders. :lol:
Haha not really. I'd like to get my motorcycle license though.
I used the tires to make some 'workboat' fenders. :lol:
Attachments
Diesel Duck
Senior Member
Why do I like this little ship so much? Ahh... I know why, because its made of steel!
Congrats on transforming this well loved 'trawler' into a great looking little ship. Kudos to you and welcome to the forum.
I especially enjoyed the story about your grandfather and how you paid homage to him by naming your vessel after him. Touching for sure.
Again, welcome aboard!
.
Congrats on transforming this well loved 'trawler' into a great looking little ship. Kudos to you and welcome to the forum.
I especially enjoyed the story about your grandfather and how you paid homage to him by naming your vessel after him. Touching for sure.
Again, welcome aboard!
.
Diesel Duck
Senior Member
Thanks Ted, Eric,
Haha not really. I'd like to get my motorcycle license though.
I used the tires to make some 'workboat' fenders. :lol:
If you ask me, more boats should have 'workboat' fenders. Gives them character for sure! Just Sayin'.

.
OP
OP
Thom301
Veteran Member
- Joined
- Oct 21, 2016
- Messages
- 39
- Location
- The Netherlands
- Vessel Name
- Opa Hein
- Vessel Make
- Ex-workboat
Thank you very much!
The main reason for these fenders was that I mostly sail alone. Because we have quite a few locks here I wanted fenders that I could keep hanging overboard. Because leaving the 'normal' fenders overboard is a social no-no here I thought I'd make some nice tirefenders.
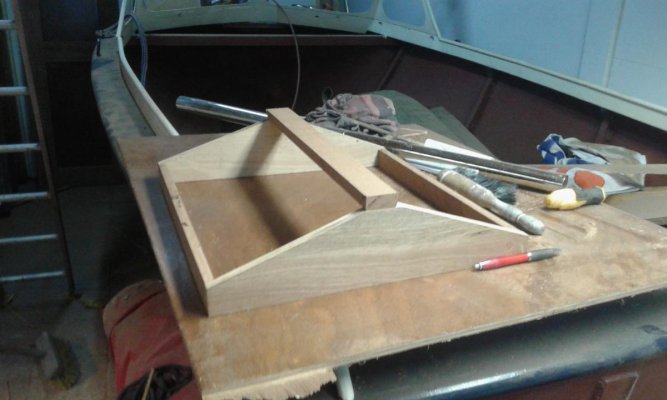
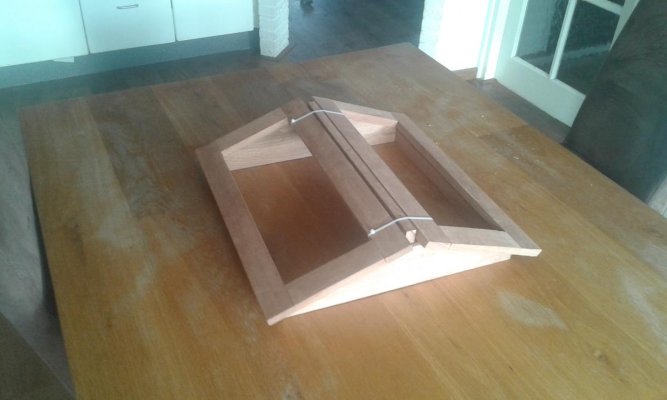
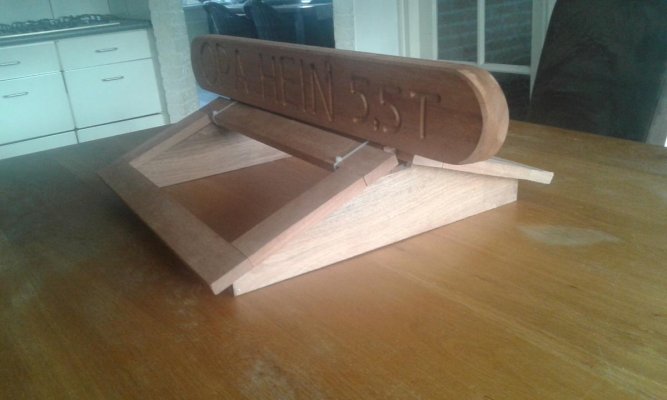
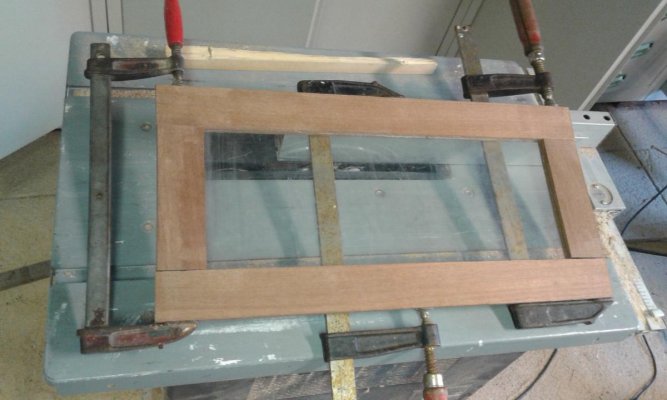
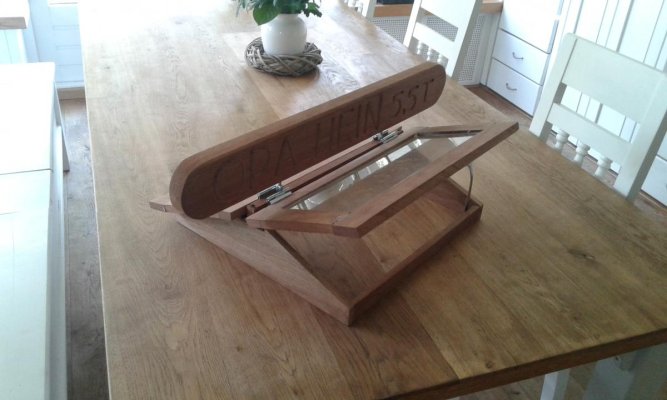
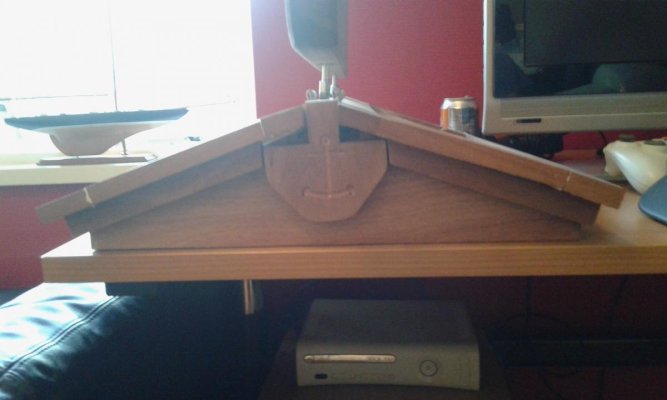
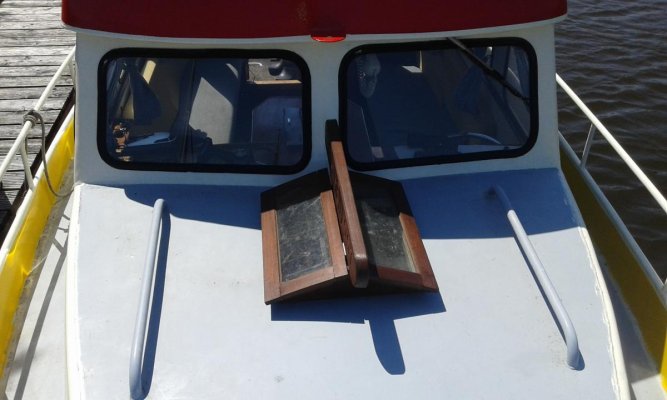
One of my next projects was making an old fashioned skylight because of two reasons,
1.- I wanted a bit more light into the galley.
2.- Before I could not stand upright when cooking. Because the skylight is a bit taller than the old hatch I now can.
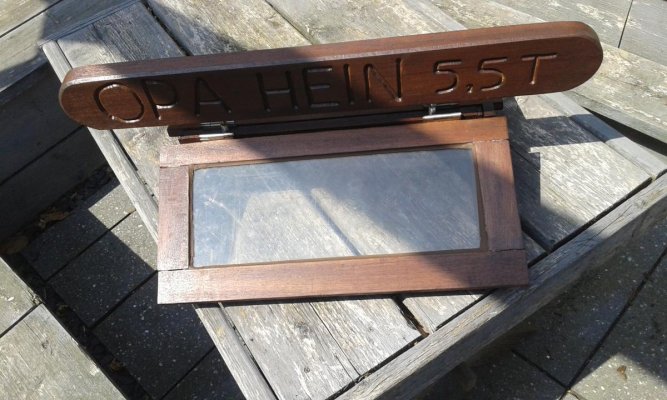
After buying a few 100 pounds of mahogany wood I could get started.
Regards,
Thom
The main reason for these fenders was that I mostly sail alone. Because we have quite a few locks here I wanted fenders that I could keep hanging overboard. Because leaving the 'normal' fenders overboard is a social no-no here I thought I'd make some nice tirefenders.
One of my next projects was making an old fashioned skylight because of two reasons,
1.- I wanted a bit more light into the galley.
2.- Before I could not stand upright when cooking. Because the skylight is a bit taller than the old hatch I now can.
After buying a few 100 pounds of mahogany wood I could get started.
Regards,
Thom
Attachments
-
 20151221_165707.jpg.36a3731b3f1d27bc6ec8b6fba28b7afa.jpg79.1 KB · Views: 230
 -
 20151223_134404.jpg.b6c6f57f1b5c79cddac0d4d89992603a.jpg66.3 KB · Views: 68
 -
 20151223_134424.jpg.edc040ef06de08e2fad652767aa7ad9d.jpg69.4 KB · Views: 76
 -
 20160411_121809.jpg.ed367796c1c350f5a1cb175979567d90.jpg85.1 KB · Views: 73
 -
 20160531_153734.jpg.99cf526862206ece7790bc4ea8b12c53.jpg87.3 KB · Views: 76
 -
 20160531_174040.jpg.e507b1f2d5cb0c397d860f47af0610e8.jpg86.6 KB · Views: 74
 -
 20160531_210447.jpg.1169fb8c5cb5bd5242a790a7ba04bd17.jpg60.5 KB · Views: 76
 -
 20160602_143131.jpg.fb8b6d7d6ffaa8fdc6433e70ce9acf4d.jpg144.6 KB · Views: 82
 -
 20151222_145228.jpg.b8c5af1adec57405b1190d551aa5474c.jpg71.9 KB · Views: 77
 -
 20160605_120606.jpg.1735959ce8dcaf35aa3d76702e7bf94a.jpg86.3 KB · Views: 75
ranger58sb
Guru
Thom, how old did you say you are? 23? I think that means you're "punching above your age group" here with all this wonderful work you've been able to do!
And if you have to have a day job to support all this, you must never sleep, right?
-Chris
And if you have to have a day job to support all this, you must never sleep, right?
-Chris
OP
OP
Thom301
Veteran Member
- Joined
- Oct 21, 2016
- Messages
- 39
- Location
- The Netherlands
- Vessel Name
- Opa Hein
- Vessel Make
- Ex-workboat
Haha thanks Chris!
23 is correct, Although some pictures are already an year old.
I've made an agreement with myself, all the work that has to be done I do myself. Sometimes that meant learning how to weld, basic engine workings and basic electronics. But they are usefull skills! And when something breaks, which it will because I made it. I know exactly how it was made, where certain cables are and where every screw and nail is.
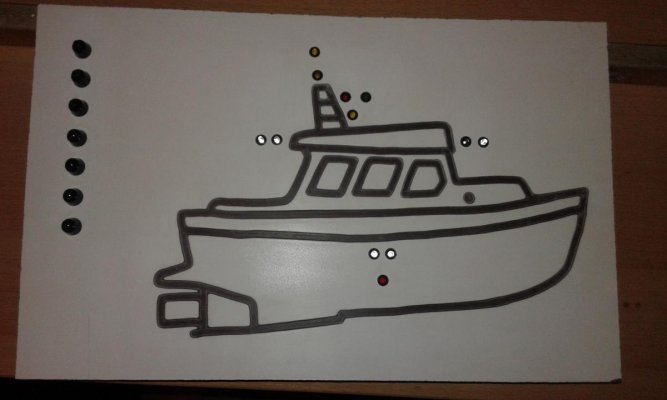
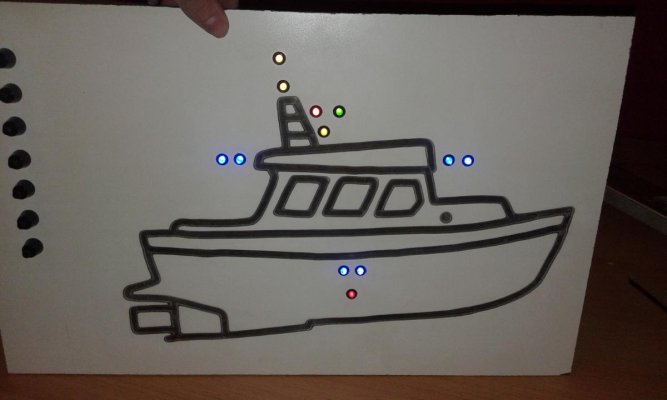
One of the next little projects was a panel from which I was able to turn on and off the navigation, deck, and search lights. I made a panel with the appropriate size and used a router to achieve the right shape and look of the boat. I tried to keep my hands as steady as possible which, with my ADHD, is difficult but it came out fine! Some aspects that could have done with a bit less 'shaky hand syndrome' After I recieved the ordered LED lights I drilled holes in the panel for all the lights and buttons. Currently there are:
Red/green/yellow - Running lights
yellow - Anchor light
yellow - Searchlight
Blue - 2x Forward deck lights, 2x aft deck lights, 2x engineroom lights
Red - Bilge sensor
Each LED for the navigation and deck lights ar connected in such a way that, when the navigation or decklight is turned on the LED also burns. When one of the lights fails the LED for that particular light also wont come on.
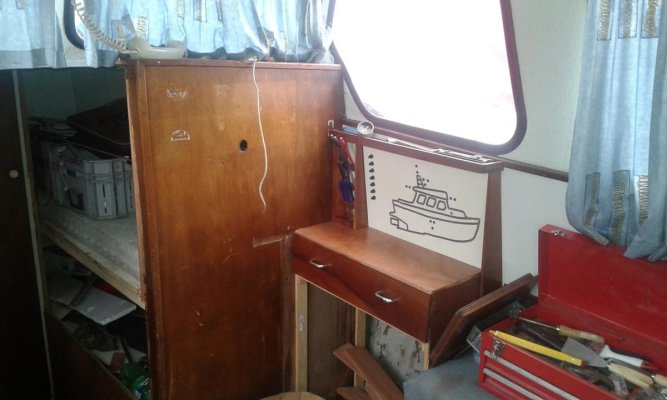
The table I started building around the panel has a deep drawer for my charts and nautical almanac. On top and around the LED panel is space for some small items and a holder for several pencils. Underneath the drawer is space for one of the two fridges that I want to build in.
Regards,
Thom
23 is correct, Although some pictures are already an year old.
I've made an agreement with myself, all the work that has to be done I do myself. Sometimes that meant learning how to weld, basic engine workings and basic electronics. But they are usefull skills! And when something breaks, which it will because I made it.
I know exactly how it was made, where certain cables are and where every screw and nail is. One of the next little projects was a panel from which I was able to turn on and off the navigation, deck, and search lights. I made a panel with the appropriate size and used a router to achieve the right shape and look of the boat. I tried to keep my hands as steady as possible which, with my ADHD, is difficult but it came out fine! Some aspects that could have done with a bit less 'shaky hand syndrome' After I recieved the ordered LED lights I drilled holes in the panel for all the lights and buttons. Currently there are:
Red/green/yellow - Running lights
yellow - Anchor light
yellow - Searchlight
Blue - 2x Forward deck lights, 2x aft deck lights, 2x engineroom lights
Red - Bilge sensor
Each LED for the navigation and deck lights ar connected in such a way that, when the navigation or decklight is turned on the LED also burns. When one of the lights fails the LED for that particular light also wont come on.
The table I started building around the panel has a deep drawer for my charts and nautical almanac. On top and around the LED panel is space for some small items and a holder for several pencils. Underneath the drawer is space for one of the two fridges that I want to build in.
Regards,
Thom
Attachments
-
 20151128_124426.jpg.396a9d3b7d47276f6bb4d3b7915fdb70.jpg88.3 KB · Views: 72
 -
 20151128_141659.jpg.069c208cc0adbd46e298b397243dbb53.jpg109 KB · Views: 76
 -
 20151129_155308.jpg.efa4dd88a3f1fc2cebae02aaa78e41b3.jpg70.5 KB · Views: 73
 -
 20160130_175400.jpg.36fb2f10c26a187b605c3bf13b89fe7e.jpg61.4 KB · Views: 77
 -
 20160130_214533.jpg.9dc8843c93a80b1975ac00d9d566160b.jpg61.2 KB · Views: 77
 -
 20160131_142310.jpg.e1a87c077624c653fada85d52b676755.jpg87.2 KB · Views: 85
Panhandler
Senior Member
I am very impressed! Great job and beautiful boat.
healhustler
Guru
- Joined
- Oct 2, 2009
- Messages
- 5,198
- Location
- USA
- Vessel Name
- Bucky
- Vessel Make
- Krogen Manatee 36 North Sea
Affirmative on the shaky hand syndrome, Thom. I've had what the call an Essential Tremor" since late 20's. Takes me four or five tries to get the end of the screwdriver on the screw head. You ought to see my writing and sketches. Still, I manage.
Still, I manage.
Last edited:
jjorgenson3
Senior Member
This is definitely my favorite post of all. Keep the passion going and welcome aboard.
Goldenstar38
Senior Member
Fantastic boat and stories! Great job you have done!
Going back a little, do you know the operating RPM of the engine and the weight of the flywheel?
Going back a little, do you know the operating RPM of the engine and the weight of the flywheel?
OP
OP
Thom301
Veteran Member
- Joined
- Oct 21, 2016
- Messages
- 39
- Location
- The Netherlands
- Vessel Name
- Opa Hein
- Vessel Make
- Ex-workboat
Thank you all again for your great comments! I'm already liking it here a lot!
Goldenstar38,
RPM at top speed is around 1000 RPM with a top speed of 9 knots. Mostly I cruise around 600 - 700 RPM while doing around 6-7 knots. When stationary or 'in gear' the engine makes around 150 - 200 rotations.
The old Samofa's were available with two type's of flywheel, a normal one and an extra heavy one. I have the latter which weighs 250 kilo's or 551 lbs. The 'normal' flywheel was around 200 kilo's or 441 lbs.
Larry,
Sounds very familliar! I had a car accident last year which gave me my 'shaky' hands. Though I must admit I always had restless hands. On the plus side I never have to 'shake' a pack of juice before opening again.
Regards,
Thom
Last edited:
BruceK
Moderator Emeritus
- Joined
- Oct 31, 2011
- Messages
- 13,347
- Vessel Name
- Sojourn
- Vessel Make
- Integrity 386
Many of us have passion and affection for our boats, but yours, combined with a youthful ability to work and learn new skills, is truly impressive. Enjoy your boating!
dhmeissner
Guru
- Joined
- Sep 26, 2012
- Messages
- 1,569
- Location
- North America
- Vessel Name
- The Promise
- Vessel Make
- Roughwater 35
Hi Thom,
Simply fantastic, thanks for sharing your story!
Simply fantastic, thanks for sharing your story!
Doug
Senior Member
- Joined
- Aug 15, 2009
- Messages
- 264
- Location
- Victoria, BC Canada
- Vessel Name
- Timeless
- Vessel Make
- CHB 34
Thom thanks so much for sharing your experiences. I am very impressed with your creativity and your devotion to the memory of you grandfather.
Looking forward to more posts about you4 interesting boat.
Looking forward to more posts about you4 interesting boat.
OP
OP
Thom301
Veteran Member
- Joined
- Oct 21, 2016
- Messages
- 39
- Location
- The Netherlands
- Vessel Name
- Opa Hein
- Vessel Make
- Ex-workboat
Thank you all again!
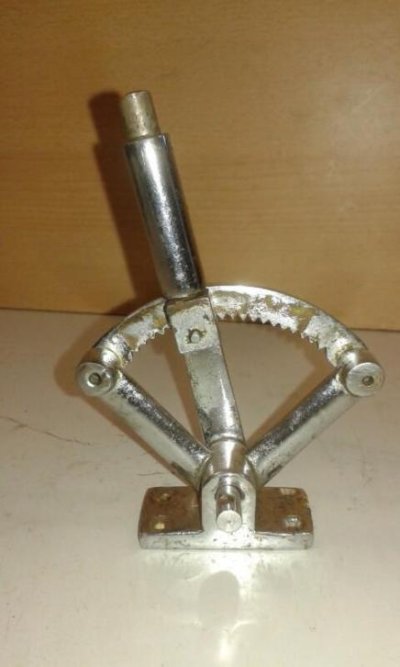
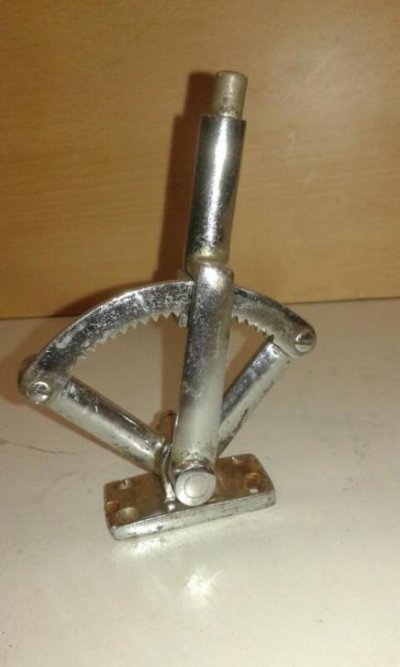
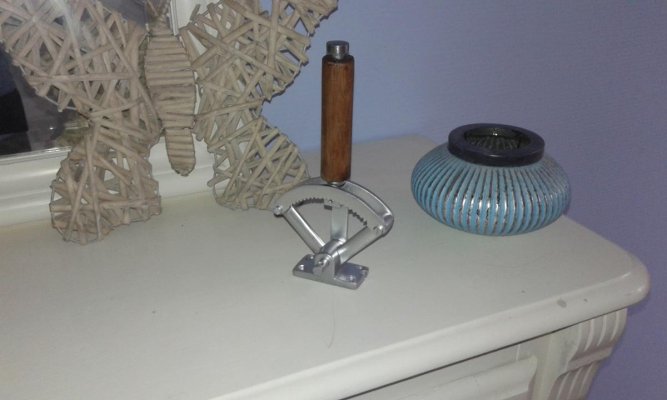
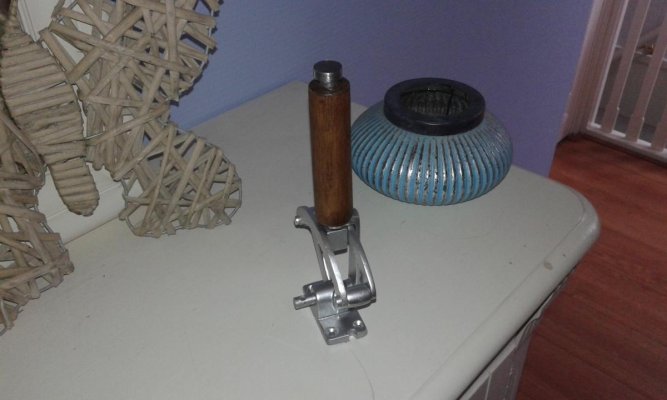
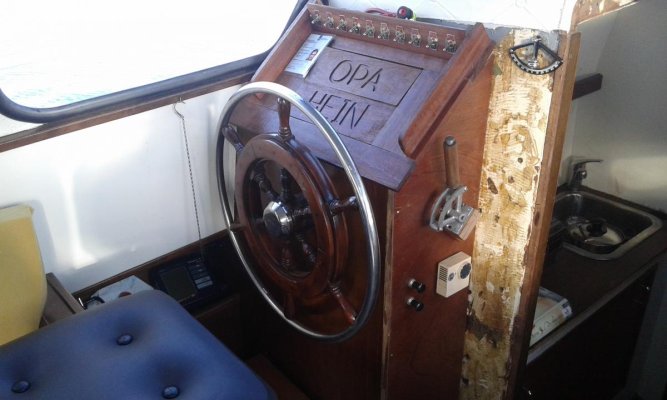
To keep the character of the boat I try to use some vintage 'details'.
A few of which were an old throttle control from the 1920's and a steeringwheel from 1974. Both needed some work. A few pieces from the throttle were missing so I remade them using thin steel. Then made the handle a bit bigger so it's easier to grab. Then gave it a quick paintjob, I like to have it coppered.
The steeringwheel needed some care too. It needed to be sanded and had to be varnished again.
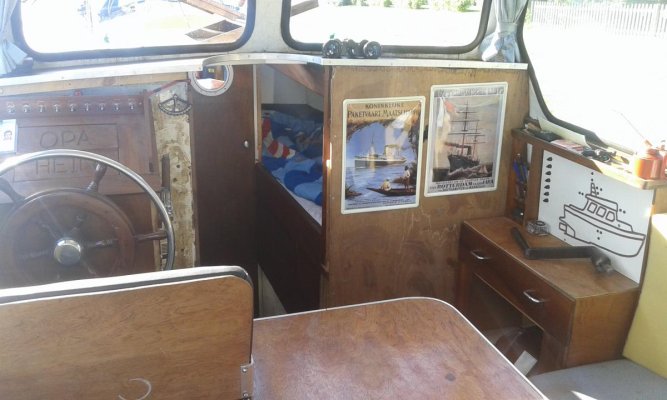
When visiting a event here in Holland I came across some old commercial plates of famous dutch shipping companies. I bought two of them to fill some empty space. They need to be removed again when I'm ready to rebuild the wall behind them.
Regards,
Thom
To keep the character of the boat I try to use some vintage 'details'.
A few of which were an old throttle control from the 1920's and a steeringwheel from 1974. Both needed some work. A few pieces from the throttle were missing so I remade them using thin steel. Then made the handle a bit bigger so it's easier to grab. Then gave it a quick paintjob, I like to have it coppered.
The steeringwheel needed some care too. It needed to be sanded and had to be varnished again.
When visiting a event here in Holland I came across some old commercial plates of famous dutch shipping companies. I bought two of them to fill some empty space. They need to be removed again when I'm ready to rebuild the wall behind them.
Regards,
Thom
Attachments
-
 5612c806ec9fd__85_(1).JPG.028e3dc24e1ee9ec7cde4f57da5eeb01.JPG.b3118a300a1b5f01ad2c09b36b4439c9.JPG25.9 KB · Views: 68
 -
 5612c8078c9a3__85.JPG.f2e04134f103cad7ae99b04b2d22fab0.JPG.05084d37b389028105da0823c4bdca83.JPG24.3 KB · Views: 64
 -
 20160727_155351.jpg.fb997bd1667bfb3018ad08a6288373be.jpg69.4 KB · Views: 68
 -
 20160727_155401.jpg.ad993a8ba464b448ff00fea363a61b2f.jpg73.4 KB · Views: 68
 -
 20160113_143231.jpg.a0af9f51fb00b9e4601a9bf7d64908b1.jpg84.8 KB · Views: 70
 -
 20160731_193323.jpg.82c8d1cafebdeee66e946ad566fa1ccc.jpg94.2 KB · Views: 71
 -
 20160818_174921.jpg.adaa86df31a92b629f4cd1c2ab43c918.jpg104.1 KB · Views: 77
OP
OP
Thom301
Veteran Member
- Joined
- Oct 21, 2016
- Messages
- 39
- Location
- The Netherlands
- Vessel Name
- Opa Hein
- Vessel Make
- Ex-workboat
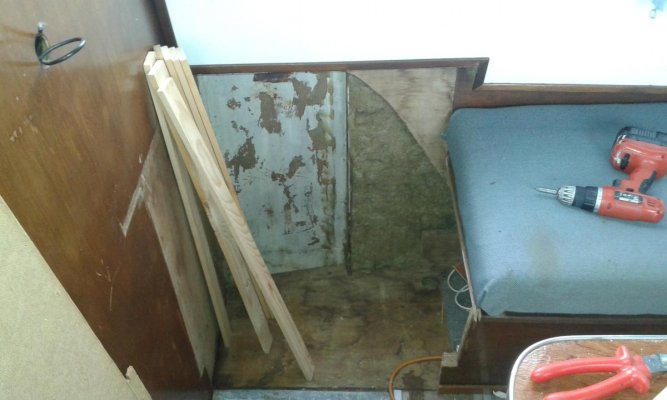
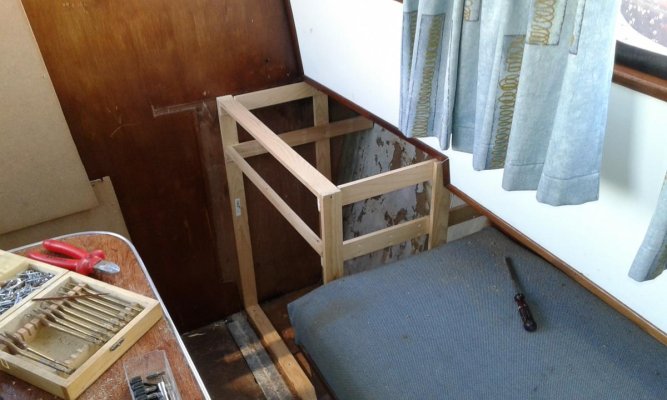
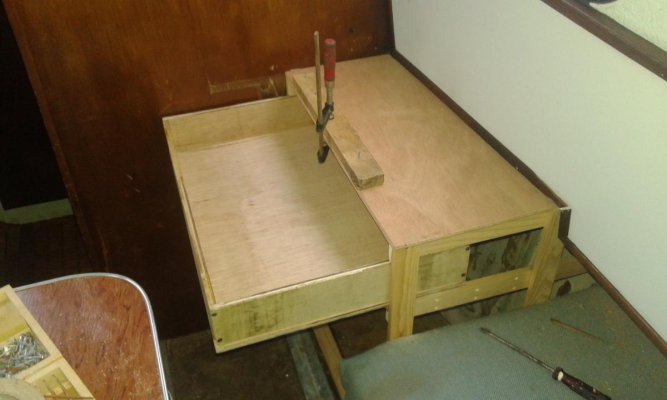
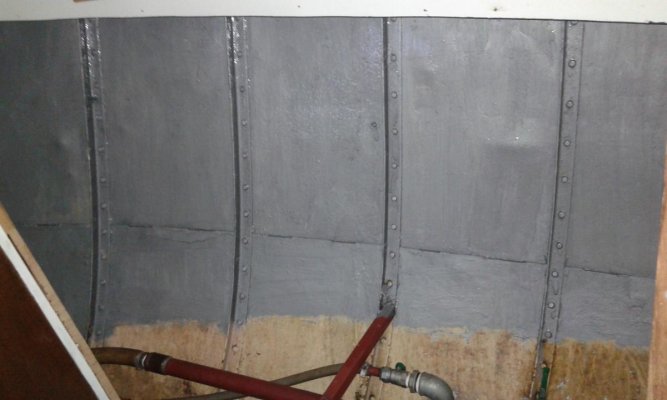
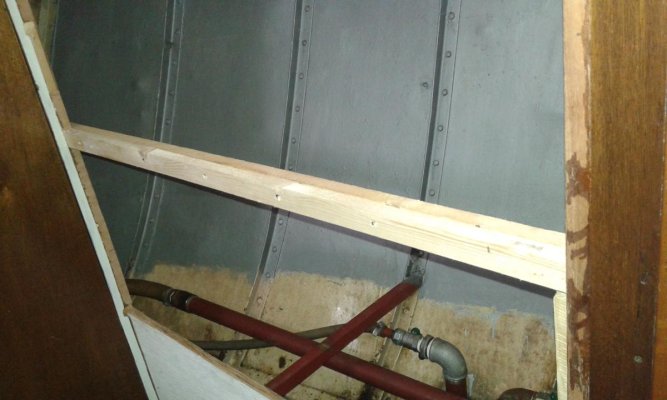
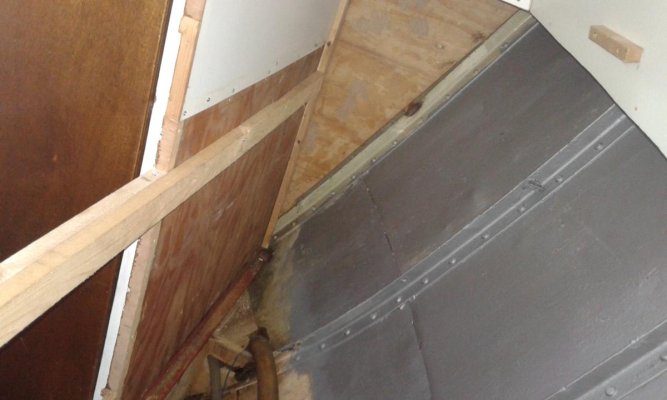
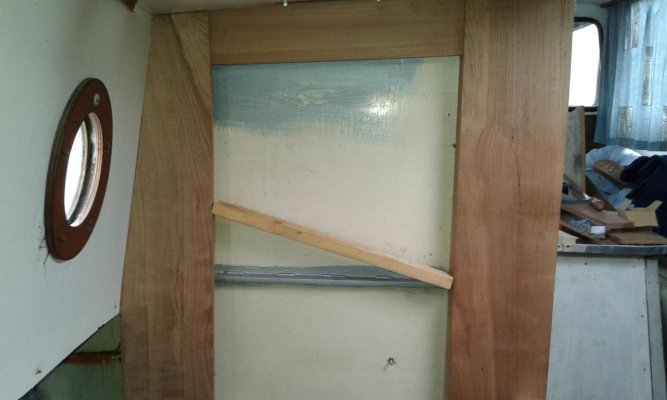
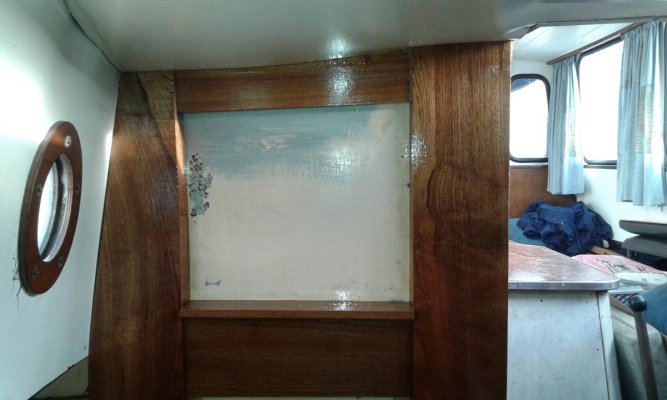
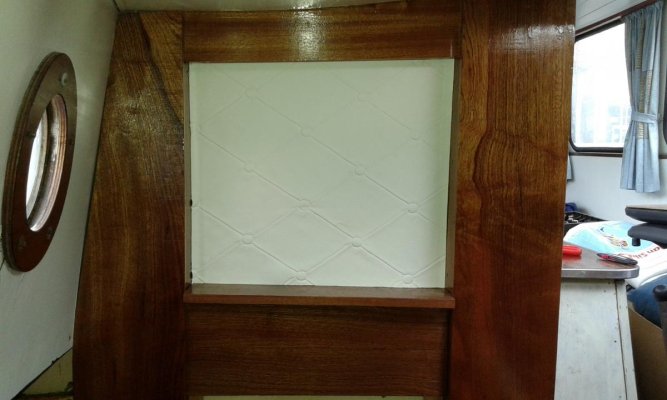
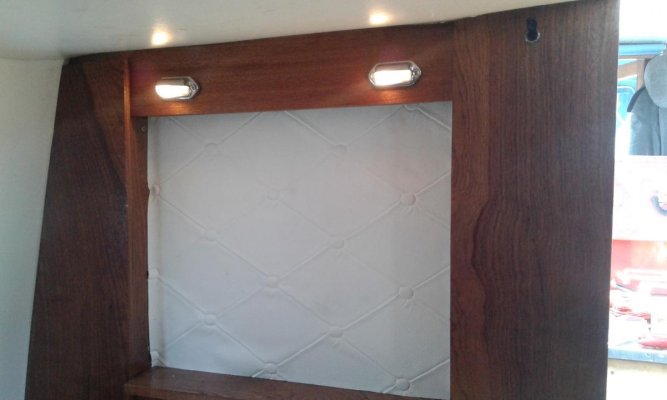
Next up were the 2 'kooien' or berths.
The bottem one was way to small to fit a normal size human so I've decided to keep only the top bunk and make the bottom one as storage.
Removed all the wood and primed the steel surface.
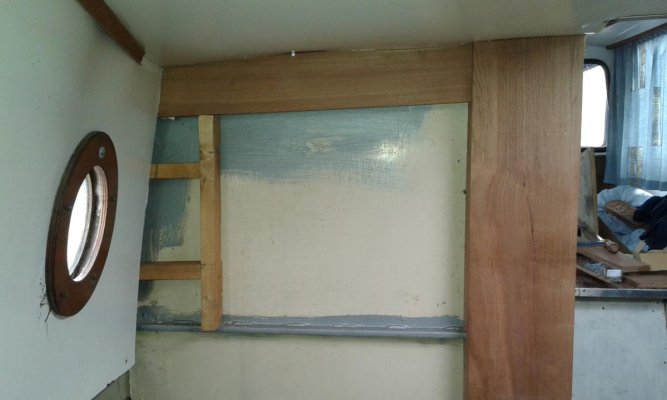
Used mahogany wood for the wall and a piece of vinyl in the middle. Then added 2 small lights.
The bottem one was way to small to fit a normal size human so I've decided to keep only the top bunk and make the bottom one as storage.
Removed all the wood and primed the steel surface.
Used mahogany wood for the wall and a piece of vinyl in the middle. Then added 2 small lights.
Attachments
-
 1200_wo_(12).jpg.8fc478e7b95aec81d3fd7940e4a25e10.jpg85.7 KB · Views: 56
 -
 2015-11-07_16.19.18.jpg.dd758adc2d978903386ceda6245e5d3a.jpg73.5 KB · Views: 63
 -
 2015-11-10_15.35.43.jpg.9ef5eb63d91d358abefe504050a37b7b.jpg75.7 KB · Views: 69
 -
 2015-11-11_12.59.03.jpg.670e71985834f048df3ce5d7b00b818e.jpg88.6 KB · Views: 66
 -
 2015-11-11_12.59.16.jpg.0d202782774cd22c71322ee951e3e414.jpg77.3 KB · Views: 68
 -
 20151114_120559.jpg.a42838c0e01a1f1109bd423249350f6c.jpg71.4 KB · Views: 73
 -
 20151114_121533.jpg.0e271dbb5600e78adffab15feab3567e.jpg72.4 KB · Views: 67
 -
 20151120_144254.jpg.3f8d591303a8dd082f1afe4d0c4c3cb1.jpg88.9 KB · Views: 63
 -
 20151121_131020.jpg.44859acdd7718a1ab3e7b2b1891cd6e3.jpg90.1 KB · Views: 62
 -
 20160316_144617.jpg.f83a7c2ec59e45de39df039d7d4edd17.jpg62.3 KB · Views: 65
Similar threads
- Replies
- 18
- Views
- 1K