Forkliftt
Guru
- Joined
- Oct 6, 2007
- Messages
- 2,450
- Location
- USA
- Vessel Name
- KnotDoneYet
- Vessel Make
- 1983 42' Present Sundeck
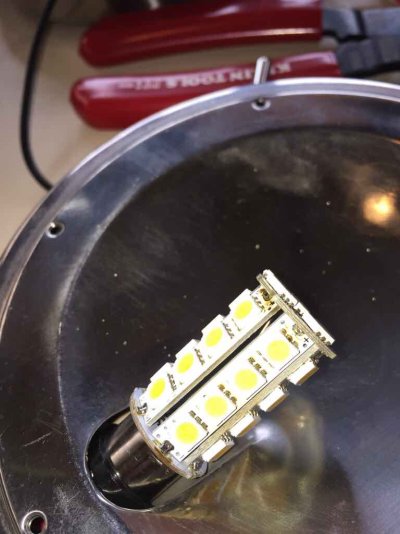
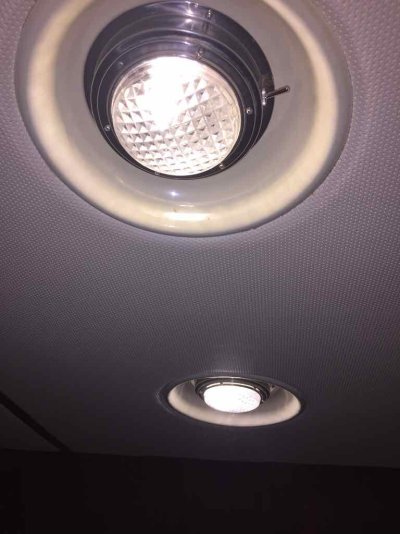
I realize this may not interest everyone on the board, but for the last 11 years I have spent the effort to keep my original issue stamped SS/ cut glass cabin and deck fixtures operable. Initially I was replacing the spring loaded socket with a Cole Hersee M432BX part along with a CH toggle switch as well. As I slowly moved out of incandescent bulbs I had purchased several of the "replacement upgrade" bulbs with the barrel shaped 12 volt warm white. These were around $12 from Amazon as I recall for a pair, so about $6 each. I still was having issues with poor socket connections, even with a new socket installed occasionally. I tried something several months back that solved the problem. I've done 6 already, no failures at all. Today I reworked three more so grabbed a few pics in the event some of you are interested in the process.
•First, I remove the old switch and socket assembly from the base and discarded. On my light base there is a "tab" that the socket fastens to. I bend this slightly closed. I'll explain shortly.
•Next I use a stepped drill bit (HF has them) and I enlarge the hole for the switch enough to accept a 161U toggle switch with wires from Lowes. A little over $3, in the electrical department. Don't mount it yet.
•I slip a short piece of heat sharing over one wire on the switch, route this wire through the hole where the tab is, then solder the end of the wire (leave about 1/4" stripped) onto one of the contacts onto the base of the bulb. Yes- the base of the bulb. Attach a second tinned/ stranded wire about 4" long onto the other contact on the LED bulb. I face both wires the same way. Warm heat shrink on both wires you just installed for wiring protection.
•Now, install the switch and tighten. Then slip the base of the bulb onto the tab, it should hold itself in place it the tab is bent correctly. I use a tie wrap to keep it firmly in place. I follow up by soldering the wires to the original supply wiring and heat shrink. Be sure to test before soldering- it will only work one way.


1983 Present 42 Sundeck
Twin Lehman 135's

•First, I remove the old switch and socket assembly from the base and discarded. On my light base there is a "tab" that the socket fastens to. I bend this slightly closed. I'll explain shortly.
•Next I use a stepped drill bit (HF has them) and I enlarge the hole for the switch enough to accept a 161U toggle switch with wires from Lowes. A little over $3, in the electrical department. Don't mount it yet.
•I slip a short piece of heat sharing over one wire on the switch, route this wire through the hole where the tab is, then solder the end of the wire (leave about 1/4" stripped) onto one of the contacts onto the base of the bulb. Yes- the base of the bulb. Attach a second tinned/ stranded wire about 4" long onto the other contact on the LED bulb. I face both wires the same way. Warm heat shrink on both wires you just installed for wiring protection.
•Now, install the switch and tighten. Then slip the base of the bulb onto the tab, it should hold itself in place it the tab is bent correctly. I use a tie wrap to keep it firmly in place. I follow up by soldering the wires to the original supply wiring and heat shrink. Be sure to test before soldering- it will only work one way.


1983 Present 42 Sundeck
Twin Lehman 135's
