Proud Mary renovation status

The friendliest place on the web for anyone who enjoys boating.
If you have answers, please help by responding to the unanswered posts.
Cut and dry fitted the new floor joists.
IMG_0988.JPGIMG_0987.JPGIMG_0986.JPG
 
Looking good.
Isn't that coal tar epoxy fun stuff. I could barely use the roller it was so thick. It brought back memories of my mom putting frosting on a cake. :rolleyes:
 
Yeah the coal tar epoxy was thick but worth the preparation. We took the cans to Home Depot and had them shaken first, then we used a drill mixer for several minutes before mixing the epoxy and hardener in small batches.
 
Just found this thread, I looked at your boat just before you did. Great little boat.
Passed on it due to the tank problem and the work needed to bring it back in shape and the time it would take to get it down to Fort Myers FL.
I found my MT in FL., only a two day trip. Will be following your refit.
Good luck and happy boating.
 
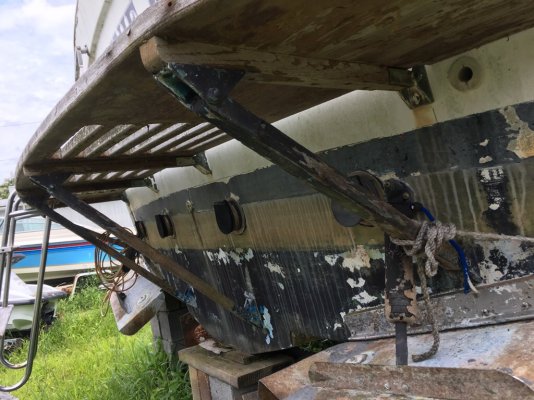
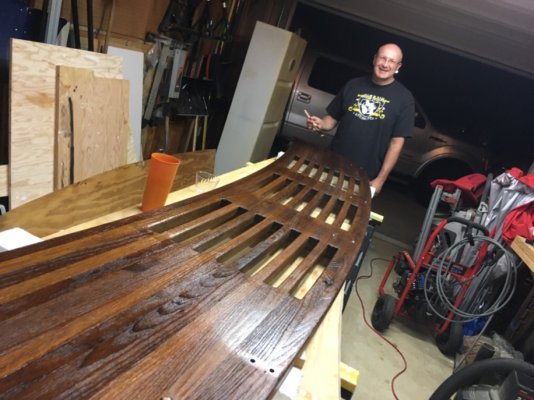
A kindly fellow at the marina offered to sell his swim platform as he is parting out his boat.
IMG_0691.JPGIMG_0693.JPG

After pressure washing and a hefty application of Odies Oil it's looking new again.
IMG_1159.JPG
IMG_1160.JPG

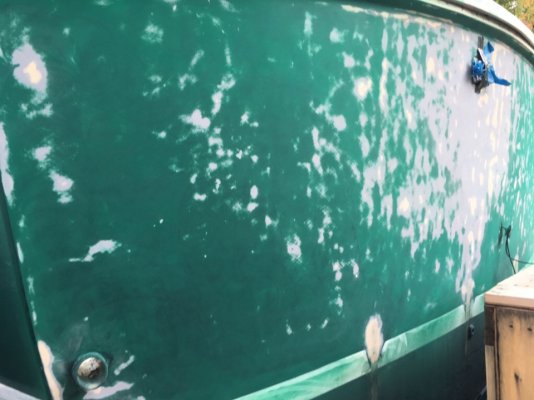
Now we have to prep the transom for paint before we install new stainless steel brackets and the platform.
IMG_0816.JPG
IMG_0814.JPG

Tomorrow we'll see how well we can apply the primer with a roller and brush tipping.
 
That looks awesome. Very nice work. Looking forward to seeing it installed.
Did you not have a swim platform on the boat prior to this one?
 
Yes, there was an existing swim platform but it was unsafe. So we knew we had to replace it.
 
Yes, there was an existing swim platform but it was unsafe. So we knew we had to replace it.

I have a similar situation. I have purchased a fiberglass swim platform on Craig's List that I may use to replace my current teak wood swim platform.
So I'll be watching your progress with some vested interest.
 
I measured twice and thrice then carefully cut a 3 1/2" hole to add a city water connection in the transom. It had to be lower than the cockpit deck but higher than the planned swim platform location. What do you think?IMG_1039.JPGIMG_1040.JPGIMG_1041.JPG
 
My better half has taken on the task to sand, mix and paint the boat. She's starting with the transom so that I can mount the swim platform. We have a learning curve on paint prep and application.
IMG_0882.JPGIMG_0884.JPGIMG_0888.JPG
 
That is a beautiful roll and tip job. Impressive. Keep up the pics!
 
Nice work! I always like to learn from others. I have just learned I have a leaking starboard side aluminum fuel tank on my boat (Oh Joy!). I was wondering what the coal tar epoxy does for the aluminum tank. It seems to me the most likely cause of corrosion would come from water in the fuel. That is of course if the tank was installed with an air gap all around so water can't collect. (Mine wasn't). My tanks aren't coated with anything as far as I can tell but seem to have lasted a pretty long time. My boat is a '78 model.

Kevin
 
At some point we realize what we are doing is more for the next owner than ourselves.
 
Nice work! I always like to learn from others. I have just learned I have a leaking starboard side aluminum fuel tank on my boat (Oh Joy!). I was wondering what the coal tar epoxy does for the aluminum tank. It seems to me the most likely cause of corrosion would come from water in the fuel. That is of course if the tank was installed with an air gap all around so water can't collect. (Mine wasn't). My tanks aren't coated with anything as far as I can tell but seem to have lasted a pretty long time. My boat is a '78 model.

Kevin

When I had my aft starboard tank replaced last year I asked the tank fabricator what is used to coat the tank and he said coal tar epoxy. So I bought a gallon and coated it my self.

I also noticed the other aft port tank had a black coating but all of the other tanks were bare aluminum. The PO said they had one tank replaced but couldn't remember which one. I assumed it was the black coated one.

Foam was glued to the tank bottom and sides and I believe water/moisture got between the foam and the tank. Most of the foam fell off when the tank was removed. There was corrosion on the bottom of the tank in several spots in addition to the leak. I had the bottom of the tank cut off and there was no corrosion to the interior of the tank.
 
I have single 125 gal tanks on each side. The port tank was repaired a few years ago by cutting an inch or two off the bottom and welding in a new one. The deck had to be cut some to get it out and back in. Now I'm looking at the same job on the strb. side. Hoping to get it without cutting the deck or removing the galley. I may even pull the engine rather than do that. I imagine having 2 smaller tanks on each side would make things a little easier.

Kevin
Cross connected too
 
We are installing a new 110 gallon diesel tank on the port side. On the starboard will be a 40 gallon diesel fuel and a 50 gallon polyethylene water tank. We used coal tar on the exterior of both aluminum tanks and we’ll raise the tanks on 1/4 inch urethane rubber strips for an air gap.
 
Instead of urethane strips, why not use starboard strips and some boatlife adhesive? Rubber might eventually breakdown/compress.
 
An update on our progress. IMG_1169.jpgIMG_1170.jpgIMG_1171.jpg
With the fall weather we have up on exterior painting and attached the refurbished swim platform.
 
We finally installed the plywood boards between the engine compartment and the rear cockpit. We used six ten at the seem with two layers of fiberglass and epoxy.
IMG_1156.jpgIMG_1159.jpgIMG_1160.jpg
 
Then I cut and drilled the support boards for the rear water tank platform.
IMG_1163.jpg
I️ previously extended the starboard side support platform and it was too long so I️ had to do some trimming.
IMG_1168.jpg
A small notch was all that was needed.
 
ProudMary!
AS the winter goes on and on and on...how goes the renovation?

I really like what you are doing to your vessel.

Tim
 
The excessively cold temperatures have slowed the renovations as it’s too cold to use epoxy. And I screwed up by ordering marine plywood before the holidays. It wasn’t delivered until the new year. So we’re waiting on a warm up to get back in the groove.
 
Warm weather....what is that again!?

This winter is brutal for the mid east coast......but glad you are trying to move ahead and bring your vessel to a wonderful state for your dreams.

Tim
 
Back to work. All the deck boards are cut and time to epoxy.
IMG_1412.jpg
IMG_1411.jpg
Soon we’ll be installing the new tanks and hoses.
 
At last, back to work and progress.
 
Yes, we have starter doing fiberglass rapairs now since it is finally warming up. Good luck with your work.
 
Nice work. Almost like putting a jigsaw puzzle together.
Many of us are springing back to work with the better weather.
 
Back
Top Bottom