Our boat deck has been removed.

The friendliest place on the web for anyone who enjoys boating.
If you have answers, please help by responding to the unanswered posts.
Didn’t make too much progress this weekend despite putting in about 12 hours of labor. So many small things take a ton of time.

I finished all of the dry fitting l, prepped the frames and epoxied the three sections where the stanchions weren’t well bedded and got into the frames. Since these will be through bolted and backed I mostly needed to fill the voids and ensure no further deterioration.

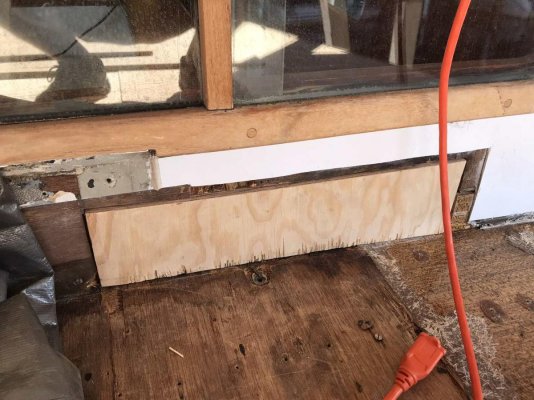
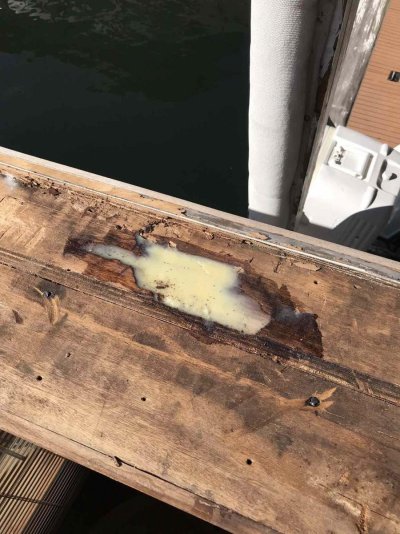
I also decided to patch that small section of rot on the back of the Pilothouse. It turned out to be about 12” x 4” so I’m just dealing with it now.

Travel this week means no weeknight progress but next week should be when I screw and glue the plywood down.
IMG_2966.jpg

IMG_2965.jpg

IMG_2968.jpg

IMG_2959.jpg
 
Yep it’s all the small stuff that eats up your time, but it all has to be done. I hate it when the work thang gets in the way of boat work progress. Hang in there. Thanks for taking us along.
 
WOW. Inspiring. I may have same problem and NOT looking forward to the project. Your bravery will be rewarded. Keep posting.
 
Great progress. What will you use for final finish over the plywood? Back to Teak or ?
 
Greetings,
Mr. A. I can sense your frustration in dealing with the "small things" BUT they really do have to be done don't they? No sense what-so-ever in undertaking such a project and not doing it properly. The more you can eliminate the "coulda', woulda', shoulda'," items, the happier you AND your boat will be. Trust me. Picky is good sometimes...


200w.webp
 
Thanks all, I appreciate the kind words and encouragement. I thoroughly enjoy the work - it’s rewarding to see progress after a hard days work - so very different than my corporate job.

RT - couldn’t agree more. I look at ownership as stewardship and would like to think I do things well and right with the best interests of boat and any future owners in mind. I also like to know things are done correctly as this is OUR boat right now.

This deck lasted almost 40 years, the one I’m putting down now should last at least that long.
 
Last edited:
Great progress. What will you use for final finish over the plywood? Back to Teak or ?

Fiberglass, paint, non-skid. Teak would be nice but it's too expensive in today's dollars for this old boat...not to mention de-teaked, 80's trawlers appear to be more desirable if/when we sell her down the road.

I wish I could find a decent looking, well priced synthetic teak but the good stuff is approaching the cost of real teak and the cheap stuff....well it's cheap.
 
Last edited:
I would never go back with teak decking, too much ongoing maintenance to say nothing about the cost. Painted nonskid works. I used Kiwigrip on my decks 2 years ago. Great stuff. I had to do a couple of repairs from PO work. It took a long time with 40 grit in my belt sander to get the Kiwigrip off. I was amazed how durable it was.
 
2nd vote for Kiwigrip. Easy to use; wears well; easy to do small section coating repairs

Ted
 
Deck Non-skid

I've enjoyed reading your thread as we did a complete deck replacement on our 47' sailboat. Our schedule of materials was different, however the non-skid we chose was a latex based compound called Restore Advanced 10X. We've had it on for maybe three years now and can discern no wear. In particular, when at a dock we use the starboard gate and always travel the same path. Recently I wrote a product review on Amazon with two pictures Rust-Oleum-Zinsser-Restore-Advanced-Concrete/dp/B06XWD5MRQ/ref=sr_1_fkmr0_1?keywords=rustoleum+restore+advanced+10+x&qid=1554342629&s=gateway&sr=8-1-fkmr0 Another choice. Good work, Doug
 
Great job and you'll feel great when its all done knowing you did it, standing up there - your chest will puff out just a little further! lol
 
"Yep it’s all the small stuff that eats up your time, but it all has to be done.

This is known as the 90/90 rule.

90% of the work takes 90% of the time,

The remaining work also takes 90% of the time.
 
90/90 rule, that makes perfect sense! [emoji6]

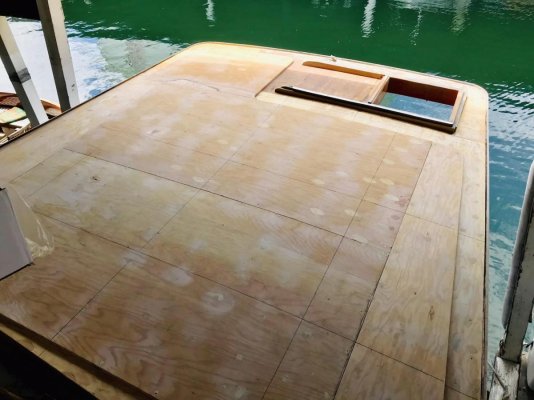
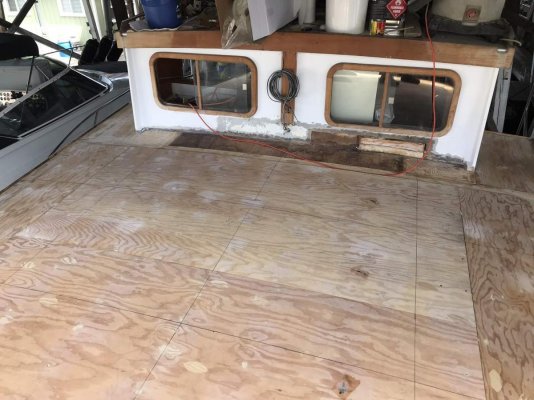
Doesn’t look like much progress was made but this weekend we hit a milestone: the new decking is glued and screwed onto the frames.

I also decided to add a second layer of plywood laterally that will end about 8” shy of the edges of the boat deck - further stiffening the deck and creating a “gutter” to help shed rainwater out and aft (I still need to cut long plywood triangles to fit between the two laterally installed full sheets.

It’s almost time to start rounding over edges and prepping for fiberglass.

I can see the end and hope to be back out on the water in late May early June.

IMG_2979.jpg

IMG_2982.jpg
 
Last edited:
It's been a minute since I last posted about this project. Progress was stalled for a few weeks in April because we were traveling but we got back at it in May. These pics don't show too much progress but the carpentry is complete, everything is glued, screwed, rounded, filled, faired and sanded. Fiberglass supplies are onboard and if we get a decent weather window this coming weekend the glass will go on.

I also finished the decommissioning of the upper flybridge controls, wiring, hydraulic steering systems, lines and gauges.

Can't wait to get everything done and get back out on the water.

IMG_3347.jpg

IMG_3344.jpg

IMG_3341.jpg

57991412276__21235416-D437-4DAE-B3F3-3302887FCEA0.jpg

FEE0230B-5B49-47ED-82D4-EF767C7DEEF4.jpg
 
Last edited:
Work looks great so far. Keep us in the loop and keep the photos coming, they are great.
 
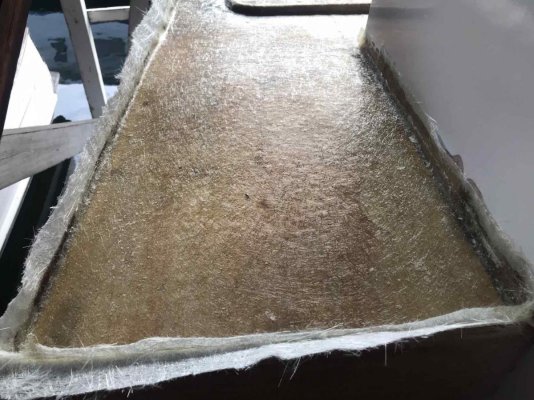
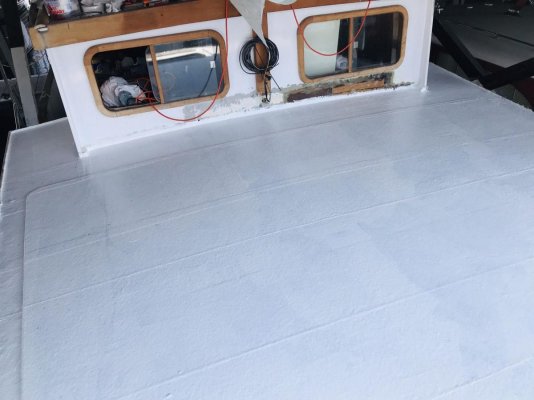
Glass is down. 2 layers of 1.5 ounce bixaial cloth and about 8 gallons of resen later this is the result. Gelcoat and final coat (wax) does on today.

Lots of trimming, sanding, filling and fairing ahead. And sanding followed by more sanding.

IMG_3392.jpg

58079047619__677D7536-3968-47F9-9E6D-8DA96E0F802C.jpg
 
First coat of gelcoat down. Hope to a get the second coat on today and then the cure coat.

This part goes super fast. Clearly the gelcoat is tricking me into believing that I’m almost done. [emoji6]

IMG_3401.jpg

IMG_3399.jpg

58085768154__F5AE9195-97EA-4418-9F3E-4C617A12A9B9.jpg

58085773309__6D0D7D42-2F9F-4A09-814E-8350E02E18EB.jpg
 
Last edited:
That's gonna make one heck of a dance floor. :dance:
 
Looking good. We just refinished and recaulked our teak sundeck, your way may have been the way to go.
 
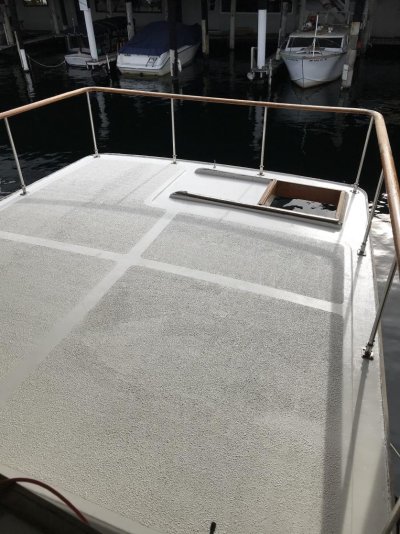
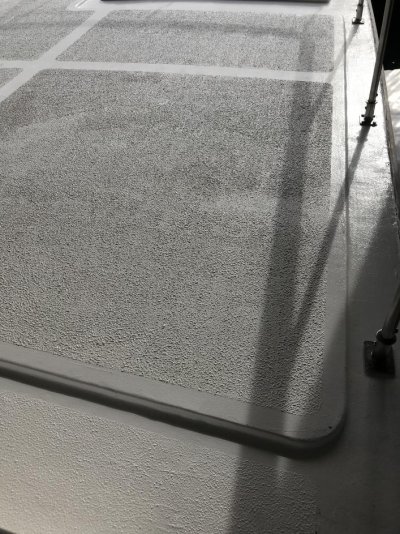
After lots of grinding, sanding, filling, sanding, filling, sanding....we have the three coats of gelcoat down on the "gutters" and smooth areas. Today is re-attaching the railings and putting down KiwiGrip.

Then end is near.
 

Attachments

  • IMG_3483.jpg
    IMG_3483.jpg
    136.2 KB · Views: 42
Looking good. We have Kiwigrip on our decks and love it. Just don’t have to sand it off, it is really tough. I had to use 40 grit in a belt sander to get some off to do a glass repair under it. Impressively tough.
 
Funny you ask...we just put KiwiGrip down today. An amazing product, easy to get good results (pro tip = use a LOT of KiwiGrip) and we're blown away at the results.
 

Attachments

  • IMG_3492.jpg
    IMG_3492.jpg
    157.2 KB · Views: 61
  • 58182112719__BEAF8B80-E1B8-481D-B02B-1F26264EA434.jpg
    58182112719__BEAF8B80-E1B8-481D-B02B-1F26264EA434.jpg
    192.5 KB · Views: 40
  • Image.jpg
    Image.jpg
    193.5 KB · Views: 66
  • IMG_3496.jpg
    IMG_3496.jpg
    198.2 KB · Views: 46
  • IMG_3499.jpg
    IMG_3499.jpg
    187.7 KB · Views: 48
Very nice! Have been very happy with my Kiwigrip decks.

Ted
 
Great work. The Kiwigrip sure looks like the way to go. This project turned out very nice.
 
It looks great! I know you're happy to be able to start enjoying the fruits of your efforts now. It's more satisfying to be able to do the work yourself. Or at least that's the excuse I have because I couldn't afford to pay someone to do the work that we needed done on our boat! Gotta love the fiberglass grinding labor that Kiwi grip saves. I rebuilt our Carolina Skiff and I barely had to sand and fair the floor repair because the Kiwi (or whatever equivalent non-skid I used) completely hid the seams.
 
Back
Top Bottom