Foredeck cleat vs bollard for anchoring

The friendliest place on the web for anyone who enjoys boating.
If you have answers, please help by responding to the unanswered posts.
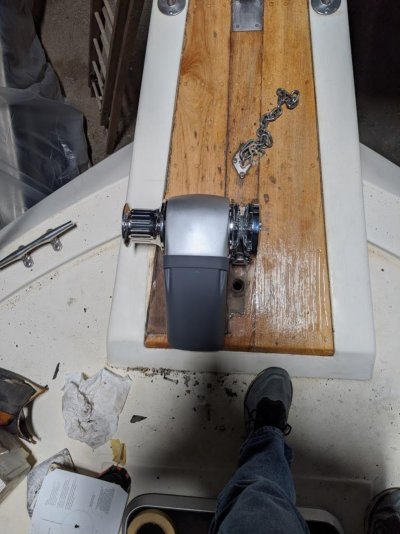
Countersinking is great anytine you are attaching something to the boat. Makes an O ring of caulk and also prevents gel coat from chipping out. Win, win all around. I keep a couple of countersinks in my drill index so they are always handy. Need to have 2 drills and a driver at the ready, 1 drill for drilling, 1 drill for countersinking and the driver to drive the screw. At least that is why I tell my wife that I need multiple drills and drivers...
 
Last edited:
There is a 2008 boat on our marina with a substantial stainless steel Samson post,and a widely soft foredeck. Normally well built boats similar to North Pacific(they may share the builder). Owner thinks it is due to overloading on the post in severe weather, before he bought,without survey.Of course the cause may be otherwise but, food for thought.
 
I'm with Ted on this one - backing plate underneath the pulpit and a plate between the cleat and the pulpit. If you don't want to weld the cleat to the plate, you can either thru-bolt the cleat to the plate with 1/2" bolts and countersink the pulpit so the nuts fit down in the wood. Alternately, use long 1/2" bolts to secure the cleat thru both plates and the pulpit. Goop the plates up with 5200 if you want them permanent, otherwise use another sealant to keep water from migrating between the plate and the wooden pulpit. Then, thru-bolt the plate thru the pulpit and the bottom backing plate with 1/2" bolts at the corners. At this point, I would think your pulpit would fail before the cleat! Your cleat failing when it hits the fan in a o'dark-thirty 60+kt squall is the last thing you want to have to worry about!
 
At this point, the parts are already on the way for the samson post. I've got a set of nice, long 1/2 bolts for it here and the post is on the way. Once I have the final positioning figured out and marked for the post and windlass, then the pulpit comes off for reinforcement and wood refinishing. Only thing left to figure out after that is exactly how I'm doing the backing plate underneath. But however I do it, it's going to be big.
 
For the backing plate, I use 1/4” aluminum plate. Easy to cut on a table saw with a carbide blade, easy to drill and light enough so it can be held up in place while you bolt it in.
 
For the backing plate, I use 1/4” aluminum plate. Easy to cut on a table saw with a carbide blade, easy to drill and light enough so it can be held up in place while you bolt it in.

Interesting thought. Aluminum is definitely easy to work with and slightly cheaper than stainless. I was originally planning on stainless or maybe G10. But for this size plate, given large fender washers, aluminum bedded on with epoxy should be plenty stiff / strong.
 
Last edited:
I definitely would not use S/S due to cost, harder to drill, etc. G10 would be fine also. I just use aluminum because a friend of mine gave me a huge sheet of 1/4”. If you rip the bolts out through 1/4” aluminum then you have bigger problems...
 
I always use 1/4” or 3/8” G10 for backing plates. Easier to cut and drill than thick aluminum. No risk of corrosion with the stainless fasteners. If you want to glue it to the underside of the deck with epoxy, you get a much stronger bond than aluminum. So strong in compression you also really don’t need washers - although I put some in from habit.
 
I always use 1/4” or 3/8” G10 for backing plates. Easier to cut and drill than thick aluminum. No risk of corrosion with the stainless fasteners. If you want to glue it to the underside of the deck with epoxy, you get a much stronger bond than aluminum. So strong in compression you also really don’t need washers - although I put some in from habit.


1/4” G10 is great. McMaster Carr has sheets of it; it took me about 10 years to use it all.
I have also use 16 gauge SS under cleats. Bring a print to the machine shop so u wont learn how tough it is.
 
Generally for SS, I try to order pre-cut pieces for anything I do unless it's cost prohibitive. Then I only have to drill holes in it. I'll check on G10 vs aluminum for cost, etc and decide. G10 is looking tempting, I think.
 
Defender stocks G10 in small pieces. 12”x12” 1/4” thick is $18
 
We used use duralumin(which we call and spell duralium)for skid plates under the rally cars. Very tough stuff, but I suppose it would not get on nicely with ss fixings.
 
I installed the same Maxwell on my Jefferson 42’. I do have a Sampson post mounted right behind the pulpit mounted to thru the deck. I am now all chain and use a snubber that is tied off on the Sampson post. One problem I had was the deck beneath the pulpit had spaces not sealed /caulked that allowed water over several years to eventually cause me expensive repairs to deck and pulpit area. All this to say the holes under the pulpit need to be sealed. Apparently the windlass had been changed a couple of times and the other holes not sealed.
 
Defender stocks G10 in small pieces. 12”x12” 1/4” thick is $18


That's what gave me the G10 idea. And they're cheaper than McMaster too. I'm going to start marking out the top of everything for me to drill the initial holes before the pulpit comes off, so I'll measure what size backing plate or plates I'll need.
 
I installed the same Maxwell on my Jefferson 42’. I do have a Sampson post mounted right behind the pulpit mounted to thru the deck. I am now all chain and use a snubber that is tied off on the Sampson post. One problem I had was the deck beneath the pulpit had spaces not sealed /caulked that allowed water over several years to eventually cause me expensive repairs to deck and pulpit area. All this to say the holes under the pulpit need to be sealed. Apparently the windlass had been changed a couple of times and the other holes not sealed.


The sealing on the factory holes on my setup wasn't great. That's a good chunk of why the pulpit is coming off for better access. Fortunately, the most I've found so far in any of the holes is slightly damp wood that's been getting slowly dryer over the winter (so probably not wet all that far in). And no rot found so far. Holes will all be over-drilled, epoxied and re-drilled for waterproofing to avoid any future issues.
 
long bolts

Look at Bolt Depot, they have extra long bolts. Have used them before with great service.

Chuck

Northern Exposure
 
Look at Bolt Depot, they have extra long bolts. Have used them before with great service.


That's exactly where I ordered my long 1/2" flat head bolts for the samson post. The post will arrive Monday, so I'll get that mocked up and the holes drilled after work.

I did the windlass holes and pilot holes for the chain pipe and cable hole today. Finish work on the holes will happen while the pulpit is off, but of course it has to be in place for the initial drill so that everything lines up.

See the pictures for the test fit of the new windlass in its home.
 

Attachments

  • IMG_20200125_133855.jpg
    IMG_20200125_133855.jpg
    104.1 KB · Views: 24
  • IMG_20200125_134103.jpg
    IMG_20200125_134103.jpg
    190.7 KB · Views: 23
Reinforcing an earlier post re: terminology -

'Bitt' is on the boat, 'bollard' is on the dock.
 
From the conversation above it sounds like many are mounting cleats and similar hardware that is much stronger that the deck.
Personally I prefer plywood, SS bolts, a square of steel and numerous SS flat washers. But my boat is relatively small.
Re the topside hardware I much prefer galvanized steel cleats.


Any reason for the galvanized steel preference? The existing stainless cleats on my boat have given good service for 34 years.
 
Something to think about when mounting cleats etc. on deck: a few years ago, I hauled my boat out on its trailer to do a prop switch. The boat didn't have a bow eye at the time (it does now). I ran the winch strap up over the bow to the bow deck cleat. As the boat came out of the water, the stern settled down onto the trailer, putting the strap
under a lot of tension. A minute later, it came loose. Yup, it pulled the cleat right out of the deck. There was just a little of the plywood substrate and the fiberglass top surface attached to the four relatively small bolts.
As I was repairing the deck and installing a new cleat, it occurred to me that Chris Craft may have intentionally built it that way (designed to rip out and not take much more with it) as a means of preventing more substantial damage. In other words, do you want the cleat to come out with minor damage, or maybe pull the entire deck off? I took a moderate approach with the new cleat, it is bolted in with a mahogany backing plate and some Starboard on the topside. Just my $.02
Something I was also thinking. The damage that could occur if there is no breakaway point built in. Anchoring should always be done with extra scope to allow the rode to absorb the shock, not the cleat.
 
In my case, due to the nature of where this thing is mounted, building in a breakaway point would be hard to do unless I used bolts that would fail before anything else. But realistically, getting the thing to fail at all should be hard with a good size backing plate (it'll probably be about 3 square feet) and the deck thickness involved, plus the pulpit to spread loads to the top of the deck. I know that a single bow cleat is enough to hold the boat in 30 kt gusts with no sign of anything flexing, etc. and that has a far smaller backing plate in a thinner area of deck and much smaller bolts, so this should be many times that strength, even if it's expected to hold more force.

Chances are, by the time I could put enough force on the thing (without doing something massively stupid) that caused it to fail, the conditions would have presented other serious problems.
 
I have never heard of deliberately designing in a point of failure. I think that is not reasonable. Build it as strong as possible and then have fun.
 
I have never heard of deliberately designing in a point of failure. I think that is not reasonable. Build it as strong as possible and then have fun.


That's my thought. Just build it strong enough that by the time it fails, you were already screwed.
 
I have never heard of deliberately designing in a point of failure. I think that is not reasonable. Build it as strong as possible and then have fun.
You have not had a car designed to accordion to absorb an impact?
Earlier the OP asked for help in that the bolt size needed was not long enough to fit the application thickness, but the bolt size is what fits the cleat. The cleat was made to use that size of bolt and then along comes all these remedies to make it stronger than the design. By all means make it as strong as you want, but don't suggest that it is needed.
 
Well we are not discussing cars. Next someone will bring up how they design aircraft. We are talking about how to bolt on a bitt on a boat. You don’t design in a deliberate failure point. At least not on any boat I want. When you talk about crumple zones it is to protect the occupants of a car. Apples and oranges.
 
Feet Don't Fail Me Now!

You've heard the expression, "only as strong as the weakest link." And so it is with cleats. Whether you're using a cleat for docking, mooring, towing a dinghy, or securing a halyard, it's important to think of the cleat as only a single part of an entire system (and not necessarily the most important part of the system).

https://www.boatus.org/findings/16/
 
With how strong they show a stainless cleat with 1/4 inch bolts being, it shouldn't be hard to reach the point where the anchor rode will fail first, at least on my size boat. A bigger, stronger cleat or bitt with bigger bolts will take quite a lot given good enough mounting based on their numbers.
 
Back
Top Bottom