The Finer Points of Heat Gun and Scrape

The friendliest place on the web for anyone who enjoys boating.
If you have answers, please help by responding to the unanswered posts.

Capn Craig

Guru
Joined
Oct 16, 2010
Messages
519
I am about to undertake the project of exterior teak refinishing on my Californian. I have decided to finish it with Cetol, after reading all I could find here on the subject. But before I can refinish anything, I need to get rid of the badly peeling varnish I have, I have decided that the best approach is to heat with a heat gun and scrape followed by sanding. Anyone have any finer points of heat and scrape advice? I have a good heat gun, and bought a selection of scrapers, stiff and flexible. I'm sure there is a learning curve here/ What stuff, material makes a good shield for keeping the heat away from stuff you don't want to burn off, the Awl Grip paint etc. How much do you heat before scraping etc? Thanks in advance for any advice. I have a hired guy helping me but he is no boat repair guy. He is capable of following instructions though.
 
My wife is the heat gun artist on our boat. But do small areas at a time, apply just enough heat to get the varnish to bubble, use several applications of heat and scraper to each area rather than overdo the heat in an attempt to get everything off the first time, keep the nozzle of the heat gun moving, don't gouge the wood with the scraper (we just use two kinds), and have a heat sink to protect the adjoining fiberglass or other surfaces-- if there are any-- from the heat. My wife uses several different sizes and shapes of old Formica for this.
 
Last edited:
If you are going to be heating areas close to glass, you need to use a heat sink for sure. You can crack the glass if it gets to hot. (voice of experience?) Also, make sure you use the type of scraper that you pull toward you instead of one you push away from you. You can keep it sharp with a file or a sharping stone. This will prevent any gouging of the wood and save n the sanding afterwards. You will find the job will go faster with the heat gun. Also keep a shop vac at ready to keep the mess cleaned up as you go. PS: I have a wood boat!!!
 
I used a heat gun for years to remove old varnish but last year tried a new method. I found a water based gel varnish remover called Dads. It goes on with a paint brush, let it sit for a few minutes and varnish wipes right off. When done, wash everything with soap and water......I love that stuff.
 
I trad Dads several years ago. In our experience it is just as weak, messy, and ineffective as all the other so-called finish removers on the retail market today. It used to be that up through the 1980s you could get some really effective finish removers. I used to refinish gunstocks as a sort of sideline and some of the finish removers still available then were terrific. But safety and environmental regulations have watered them all down to the point where you need to use half a can and several hours just to get a bit of finish off and they make a big mess in the process.

So after finding Dad's was just as ineffective as all the others we went back to the heat gun. Fast, thorough, and no big sloppy mess.
 
If that blue hull is painted, the heat will remove it too. Just saying....
 
Also, make sure you use the type of scraper that you pull toward you instead of one you push away from you.


<Big Sigh> If I had only known then what I know now. What a difference using the correct tool makes! :facepalm:
 
I think the biggest mistake people make when using a heat gun for projects such as this or removing decals is to try to heat one spot, do whatever it is you're trying to do, and then move to the next spot and heat it.

You will do far better to heat a foot or two of linear distance and keep moving and heating along the area you'll be working. Put another way, don't have one little "hot" spot, heat evenly. Trial and experience will tell you when the surface is hot enough, but beginners usually don't get the surface hot enough to do the job effectively. Usually when you think it's hot enough (you can lift the corner of a decal, forinstance), it should be a little hotter than that.

You don't want a "heat sink" to protect adjacent surfaces, you want a heat shield. An asbestos shingle would be great but they're hard to come by these days. A piece of drywall should work. Even a piece of wood as long as you don't set it on fire. Wet rags are good for cooling things down if need be.

If you can practice on something cheaper than your boat, that's ideal. Otherwise, start in the least noticable place to get some experience.

I have a hired guy helping me but he is no boat repair guy. He is capable of following instructions though.

This process is as much an "art" as it is a matter of following instructions. Turning someone like this loose with a sanding block or scraper is one thing. I don't think I would turn him loose with a heat gun on a boat.

Another thing - Scrape with, not against the grain.
 
Last edited:
Ron thanks for the great info!
 
This is very timely info as I'll be tackling some varnish stripping after the winter fishing season and have never used a heat gun/scraper before.

Does anyone have a picture of some of the more useful pull-type scrapers they use? I get lost in the selection options at the woodworkers websites and stores. I'm picturing something like this, but could sure use some advice.

00002104.jpg


Sandvik / Bahco Double-handed 655 Ergo Scrapers

The trick is to learn to move along with the heat gun with one hand while scraping with a good single hand pull scraper (I use a Sandvik type) with the other hand, never keeping the heat gun in one spot for very long or you will burn the wood.
 
Last edited:
I started to remove the Bristol finish on my Trawler today. What I found is that if I keep the heat gun blowing on the blade of the putty knife, there is no damage or burns to the glass or wood. The hot blade cuts right through it. I had 10 coats of finish and it peels off easy, did the entire starboard cap in about 5 hours.
 
Ron,
Thank you very much for the very helpful advice. I do not own a boat so perhaps I am not supposed to post in a forum such as this, but I am trying to remove the varnish from about 20 pieces of outdoor teak furniture that I recently bought secondhand. I am using a putty knife and a heat gun to do so, and based on your comments, see that I should instead be using a pull one like the photo posted by FlyWright. However, I do have a couple additional questions. When trying to strip yesterday, I never saw the varnish bubble. I had the heat gun on it first on low setting, then on high, for quite a while - 30 seconds? Maybe more? and I was working in ~3" sections (clearly too short per your comments). Since I never really saw any change, I thought I better try scraping anyway since I didn't want to burn the wood. When I did so, I saw some of the varnish come off, but it also seemed to turn matte/white-ish and fill the grain. So the surface was completely smooth, albeit a different color that before I scraped. What does one do then? Use a steel brush or something to try to scrape it out of the grain? Or was it just not melted enough? Or...? Any detailed insight would be most appreciated as I have no idea what I'm doing.

For that matter, if anyone else has feedback, I'd love to hear from you.

Thank you very much in advance.

GES
 
I have used this company before, I get my linseed oil paint from them. I'm sorry that the photos will not copy.

Customer Service
Call 1.866.516.7787 toll free. Order online or by phone.
Sans frais – on parle Francais info@swedepaint.ca

Scrapers

Quick Links (to Scraper Products below):

Stainless Steel:

2 1/2" Stainless Steel Blade Scraper
Hardened Swedish Steel:

Triangular Scraper (Full Size)
Contractors' Triangular Scraper Kit
Oval Scraper
Compact Triangular Scraper
Profiled Scraper
Boomerang Scraper
Clapboard Scraper
NEW Big Dawg
NEW Window Scraper
NEW German Siding Scraper
Tungsten Carbide:

2" Two-Handed Scraper with Reversible Blade
2" Flat Scraper
1 1/4" Scraper
1/2" Flat Scraper
1/2" Fluted Column Scraper
1 1/4" German Siding Scraper
1" Crown Molding Scraper
2" Scraper with Vacuum Attachment
NEW 1 1/4" Cove Scraper


Falun Red Paint
Genuine Pine Tar
Painting Accessories
Scrapers
Scraper Blades
Scraper Kits
Other Accessories
The Silent Paint Remover™

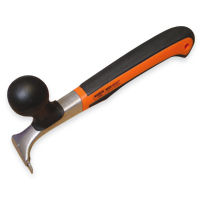
What makes a good scraper?

One important factor is how the blade is attached to the handle. If the blade is moving just slightly, this will make the scraper significantly less effective. You need a scraper with a blade that does not flex. Our scrapers have blades that are attached with a strong bolt on top of a flat washer and a split washer preventing the blade from flexing.
This thickness of the blade is also important. A thicker blade will reduce the flex and transfer the power directly to the sharp edge, making it much more effective. Our scraper blades are at least twice the thickness of most other brands on the market.
A long handle means better leverage. Extra long handle will increase the power, you can apply onto the painted or varnished surface. These scrapers have 12� long handle allowing great leverage for scraping.
The angle of the sharp edge is also important. You may have noticed if you have ever used a chisel, that it was very sharp when it was brand new but after it was sharpened it became significantly less effective. This problem appears when you sharpen a scraper as well. If you change the angle of the edge during sharpening, you will loose some of the scrapers effectiveness. You must maintain the same angle. Because our scraper blades are so much thicker it is easier to maintain the correct angle. A sharpening guide or blade sharpening jig of some sort can be very helpful to keep the correct angle.
A sharp blade is also very important. Allowing the scraper to get very dull will result in great effort to bring the sharpness back. It is simply much easier to sharpen a blade that is slightly dull than extremely dull. Sharpen your scraper regularly.
How do you use these scrapers?

You need both hands with this hand tool. Position the scraper handle parallel to the painted surface or closer. Grip one hand on the rear of the scraper handle and apply pressure with your other hand close to the blade. Holding the scraper with only one hand is not as effective.
 
When I got my Sabre, the cap rails had varnish that was thin, peeling, bubbling and just plain gone. I used a pull type scraper without any heat and in my case it scraped off easily. My guess is the PO didn't prep well before applying varnish.
 
<Big Sigh> If I had only known then what I know now. What a difference using the correct tool makes! :facepalm:

The job also goes faster if you keep the scraper sharp and burnish the edge of the scraper. Most people miss this step when they sharpen their scrapers and burnishing makes a night and day difference in how well the scraper works and how smooth of a finish it leaves behind.
 
Ron,
Since I never really saw any change, I thought I better try scraping anyway since I didn't want to burn the wood. When I did so, I saw some of the varnish come off, but it also seemed to turn matte/white-ish and fill the grain. So the surface was completely smooth, albeit a different color that before I scraped. What does one do then? Use a steel brush or something to try to scrape it out of the grain? Or was it just not melted enough? Or...? Any detailed insight would be most appreciated as I have no idea what I'm doing.

GES

It sounds like you are working with a poly finish. They do not always bubble up and the can leave behind that whitish residue in the grain. To get the residue out you'll need to either sand the wood down or scrub it out then sand the wood smooth again.
 
It sounds like you are working with a poly finish.

That sounds exactly like my issue! What would you suggest, then, as an overall process? Forget the heat gun/scraper and just sand or use chemical stripper instead? Or heat gun/scrape first, then sand?

Many, many thanks to you and the other folks who have replied thus far!

GES
 
That sounds exactly like my issue! What would you suggest, then, as an overall process? Forget the heat gun/scraper and just sand or use chemical stripper instead? Or heat gun/scrape first, then sand?

Many, many thanks to you and the other folks who have replied thus far!

GES

It's kind of hard to say with out knowing just what type of finish is on the chairs. But I would at least try a stripper made to remove polys. Or perhaps consider taking them to a professional finish remover and the refinish then yourself.
 
It`s unfortunate the "heat and scrape" followed by sanding method is not working. Try persisting with heat on an unseen area to see if you can get the varnish to bubble ready to scrape.
I dislike the mess and dangers of chemical stripper but there may be no alternative. Do not use a commercial stripper (of any kind) to do the job without knowing how it will be done. Here things went into a caustic soda bath, the finish came off but the white residue left in the grain of some valuable pieces of Australian red cedar furniture(nothing like pine type cedar) was ugly.
 
Thanks to all of you for your replies

Before I invest in the pull scraper I will experiment with Citristrip and report back with results.
Thanks again!
GES
 
My favorite scrapper has a 1" blade. If you get much more than 1.25", you'll have a harder time cutting through the varnish.

As others have said, keep the blade sharp with a big flat file.

Sharpen often, but don't sharpen on the boat. The filings will leave rust stains. I usually get off the boat, and sharpen while holding the scrapper over the edge of the dock.

I've used citrus based strippers as well. They're great for curved work, but often require a couple of overnight soakings to remove everything.


I concur!
 
I've just gone through this procedure. I have the Stanley Fat Max with the 2" flat attachment. I turn it on high power, and let it warm up. Once hot I put it right on the wood and keep it moving along slowly, pushing the putty knife 1" blade directly behind. No fancy scrapers or other stuff. All finish comes off in most cases. Very old and weathered finish is more difficult. Newer finish bubbles up and comes off easily. Sanding is ultimately required afterwards. It is a slow process and requires patience. Overall, I am pleased with the methods I use. There is no "cooking" or burning of the wood.


Jim
Sent from my iPad using Trawler Forum

Pretty much what I am doing too...

....doing a few feet every night instead of starting happy hour one drink earlier...:D
 

Latest posts

Back
Top Bottom