filling rotted core

The friendliest place on the web for anyone who enjoys boating.
If you have answers, please help by responding to the unanswered posts.

Rogerh

Guru
Joined
Aug 27, 2013
Messages
724
Location
USA
Vessel Name
At Last
Vessel Make
1990 Jefferson 52 Marquessa
I have been working on replacing my backer plate on my windlass. When I removed the windlass I found that the core of my deck in one section at the windlass was rotted. I removed the rotted core from edge of one section of the 5.5 " inch opening for the windlass. It is a 1/2 inch core. I removed about 2 to 3 inches back to get to good wood. It is a plywood core. Now I need to fill the void. I have used West Six-ten in the past and love the stuff. No muss, no fuss but expensive. But in my book the fuss is worth the cost. I will need to inject what I use into the void to get good coverage and the nozzle on six-ten is good for that. My question is should I use six-ten or is there something else that would be more appropriate. I have done some epoxy work before but I am far from experienced. Thanks for your inputs.
 
I have always used glass (not phenolic) micro-balloons and epoxy resin w/ slow hardener for this and with very good results. You can control the viscosity, rather than buying a fixed product. I have used syringes, empty caulking tubes, and even a grease gun to inject holes usually putting some straight resin in first and pushing it along with the thickened mixture.
 
Greetings,
Mr. R. Can't help you with exactly what epoxy to use but the first thing that springs to mind is why fill all the void with epoxy? Could one not shape a piece of plywood or several pieces to the appropriate size and bed the "insert" in epoxy? Seems it might have better compressive strength than epoxy alone particularly if the "patch" has a bolt passing through it.
 
I've always used West epoxy, slow cure, thickened with colodial silica for this type of project. Inserted as described above. That said, while a bit more expensive, I don't see why the 6-10 wouldn't work.
 
I concur with RTF as cored areas do tend to flex and handle weight and compression differently than solid epoxy. In smaller areas, yes, but in larger areas I would want the deck to be of "similar" flex characteristics. The area you are proposing would probably be my max area to fill with epoxy, but for any thru-bolts, I'd want to do some similar core. Just my thinking.
 
I concur with RTF as cored areas do tend to flex and handle weight and compression differently than solid epoxy...

I agree. Also, one of the issues in filling with straight epoxy is the exothermic reaction. In confined spaces or filling large areas you shouldn't fill it all at once, use multiple steps/layers. It's hard to control the heat and in some cases you'll get thermal degradation if you flood to large an area with epoxy.
 
Second RTF. Build up the underside with stacked laminated plywood and epoxy, then cover with a layer of glass/epoxy to seal. Injecting glue/filler/whatever does not provide strength, and a windlass can pull hard.
 
I ran into this same problem installing our windlass but the bad coring area was much larger.
Check out uscomposites.com they sell a small kit that will fill one cubic foot area in the 4 lb density for $22.50 plus shipping.
Bill
 
Second RTF. Build up the underside with stacked laminated plywood and epoxy, then cover with a layer of glass/epoxy to seal. Injecting glue/filler/whatever does not provide strength, and a windlass can pull hard.

I agree. You need both strength and flex because of the significant strain the bow pulpit places on the attach points. Rebuilding with properly laminated and sealed plywood is the way to go. You might also look at whether the manner in which the bow pulpit is attached is allowing the area to 'work' over time as the anchor is employed, contributing to the cause of your original problem. Could you re-engineer it a bit to reduce strain? If you haven't alredy gotten into the habit of using an anchor bridle, you might consider it. It reduces the strain on the bow pulpit when at anchor.
 
FWIW, I did something similar, though on a larger scale

In addition to what's been talked about above I had a larger backing plate made up to ensure some of the load was distributed to the original core ,not just the new work.

Disclaimer: I Can't say that it was based on any specific knowledge or expertise in this area, it just seemed a logical thing to do.
 
I have been working on replacing my backer plate on my windlass. When I removed the windlass I found that the core of my deck in one section at the windlass was rotted. I removed the rotted core from edge of one section of the 5.5 " inch opening for the windlass. It is a 1/2 inch core. I removed about 2 to 3 inches back to get to good wood. It is a plywood core. Now I need to fill the void. I have used West Six-ten in the past and love the stuff. No muss, no fuss but expensive. But in my book the fuss is worth the cost. I will need to inject what I use into the void to get good coverage and the nozzle on six-ten is good for that. My question is should I use six-ten or is there something else that would be more appropriate. I have done some epoxy work before but I am far from experienced. Thanks for your inputs.
I guess I have a contrary opinion, but you asked. I would definitely use epoxy, thickened with whatever you like although I prefer wood dust. I don't think that a flexing deck is really what you are looking for when mounting a windlass, which is what the backing plate is all about. So stabilizing the deck above the backing plate is hardly going to diminish flex, since the backing plate is supposed to eliminate that anyway. The caution on overheating is well made, but in my experience, a thin layer like you are talking about is not enough to cause a problem. I doubt you would successfully be able to do this in stages, so if I understand the situation correctly, here is what I would do. First, drill 1/4" pilot holes from the top down into the void at the outer edge of the void and about 1/2" from the cut edge. I would make sure it was bone dry, then mix up epoxy and thin it with MEK until it was the thickness of paint thinner and squirt this into your pilot holes first. This will hopefully saturate any rot you missed. The next day, tape off the cut edge and inject thickened epoxy into the outer holes until it starts to come out the inner holes. The thickening should be so that the material will slump to 1/8" or so on its own.

Hope that helps.
 
Holy mackerel guys...unless I missed something the area we are talking about is fill pure and simple...flex and etc?????? A couple inches to be made up?????

Geez...fill it with epoxy and/or mix it with bits of wood filler or whatever....just make the new holes through it go through something that won't absorb moisture again.....

Of course I am talking filler...if the top/bottom structure is violated...then some structural rebuilding must be thought out.
 
I agree that a wood/epoxy filler is easy, effective, and cheap. For the ply core consider strips of luan ply (approx 1/8"). For your 1/2" thickness about 4-5 strips bedded in epoxy will be killer strong.
 
It seems to me that given the strains imposed by the windlass on this area of the deck, I would consult with a shipwright. That's what I would do if I were in your shoes. I agree with RTF, and others. I would cut back the top deck, expose the plywood underneath replace with plywood and then do some FRP on top. I'm guessing that's what my shipwright would suggest and do for me.

I've got a guy who has done some work for me in the past and I work with him as he does the job. I've learned so much from him on my projects and the projects go so much faster with someone like that.

On my boat, the PO installed a new beafy windlass and used epoxy to "fill" the original holes where the anchor chain drops into the chain locker. There is a fine crack revealed where these are located. This was identified as an issue on survey last year on purchase. We (shipwright and I) will grind that out to see what is revealed underneath and then re glass the area properly. That's the plan. Right now there is no evidence that water is intruding into the core but we will learn more when we open things up.
 
Last edited:
Windlass job done!

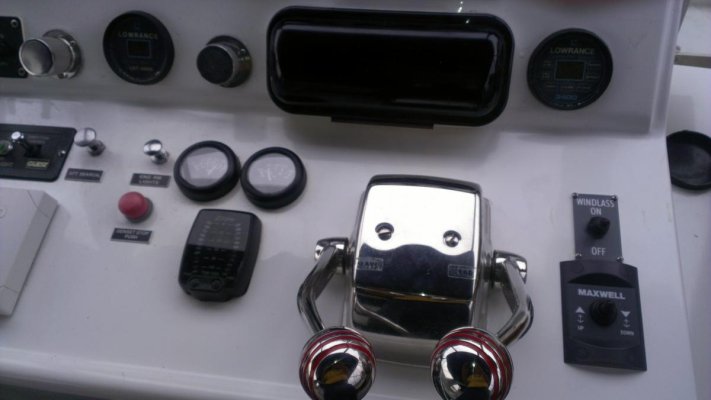
Thanks to all of you for your comments and suggestions! I have completed our windlass job. After getting into it I found that I only had about 2 inches of bad core around the opening for the windlass. I pumped six-ten thickened epoxy into the voids, redrilled the mounting holes which were filled with the thickened epoxy, made sure core was solid all the way around and a layer of epoxy at the large openeing for the windlass. Then I used a 12 inch by 12 inch by 3/4 inch for the backer board. Man that stuff is fun to work with. Then I installed the Solenoid and switches so that I have up and down control both at the flybridge helm and at the foredeck. Before I just had up control only at the foredeck. Finally I installed a new bow roller which was a pain to find. Thanks to Hop Carr we were able to get one. Hopefully you can see the photos that I have attached.
Thanks again to all for all the help!
IMAG0625.jpg

IMAG0626.jpg
 
Great job! And thanks for sharing the result. Is that G10 for the backer? If so, good choice. That stuff makes great backing plates, but it will eat up saw blades like no tomorrow.
 
yes the G10 was the backer. I had to drill a 5.5 inch hole in it. It sure ate up the blade. But the stuff is incrdible strong and will not rot. Glad it is done and it turned out well.
 
Excuse my ignorance, but what is G10? I may be doing the same here shortly and I am vastly inexperienced with fiberglass and epoxy work.

Thanks to google it looks as if I have my answer.
www.polymerplastics.com/composite_g10.shtml
https://www.google.com/#
 
Last edited:
It is an extremely strong fiberglass like material. From one of the sites selling it... "is a high-pressure thermoset plastic laminate consisting of multiple layers of woven fiberglass mesh cloth impregnated with an epoxy resin". I can tell you this it is very hard and is very very strong. 3/4 inch is unbelievable. Recommended to use carbide blades and drill bits.
 
Nice job Roger. Glad the roller worked out.
 
Thanks for sharing and good work! Didn't know about the G10, thanks.
 
We've used G10 for backing plates, but in the 1/4 in. thickness. I usually order it form McMaster Carr. It isn't cheap but works great and easier to cut than stainless plate.
 
To repair something is to replace all damaged or worn parts to original configuration. Dosn't sound like anybody's thought about that or considered it. Just injecting some "stuff" into the void left by the rotted away plywood.

How big is/was the piece of plywood that partially rotted away? The whole foredeck or 2' square or 12" square or ??

It would seem to me one would need to remove the overlay holding the plywood in place, remove the partially rotted piece of ply. Then attach the new piece of ply and overlay as originally done during manufacture.

Plywood is very stiff and strong so just injecting some goo that hardens is no structural solution at all. Even if the goo turned solid is much stronger than the plywood. One could install a piece of steel in the "void" and be much weaker than the original plywood configuration.


From the last pic it looks like the backing plate could be large enough to regain most of the original strength .. perhaps all but I doubt it. Pictures can be deceiving. A deck is going to flex .. like it or not. A backing plate dos'nt eliminate flex of a deck. It reduces it and spreads it around to a larger area depending on how large the backing plate is. Ski in NC suggested a propper repair but was ignored. Andy G and Poach were definitely sniff'in up the right tree too IMO.

That said tear'in up the whole foredeck for a propper repair wouldn't be practical either and FAPP Rodgerh has fixed the problem but cracks could appear at the edges of the smallish (?) backing plate in the future. A larger plywood backing plate would have been better IMO.
 
We are only talking about a couple inches of wet core around the opening. I think his repair is spot on, and the backing plate is beefier the boat was from the factory.

We did a similar repair to several stanchions on our sailboat (dug out 1-2 inches of wet core, filled with thickened epoxy, redrilled holes and reinstalled with slightly larger backing plates). Never had any flex issues. A few years later we had an incident with another boat during a storm. One stanchion went right through their hull and another bent over 90 degrees. Yet, even with all that force, the deck came away with no problems at all. Not even any stress cracks in the gelcoat. That alone sold me on filling small areas with thickened epoxy. In fact, whenver we remove deck fitting to reseal, we now dig out a bit of core and fill with epoxy just to prevent any future water intrusion. I think Sabre and a few other high end builders do this from the factory. Anyway, just my personal experience.
 
It was 2to 3" estimated by the OP (Rogerh as I recall) and that was on the outside of a 5.5" hole .. round I assume.

That means the edge of the fill material and where the stress riser would presumably be is probably 8" outbd of CL. So if one put a backing plate 16" by 16" the backing plate would likely fall on or very close to the edge of the fill where a bending moment (or stress riser if you like that expression) could easily crack the deck. I'm think'in the backing plate should have been 20 X 20". Rodgerh's boat may last many years but I'd keep an eye on it and put a longer or longer and wider back plate on if any cracking or anything looking like cracking appeared. And of course all should be fine if the big loads are applied to a well backed dedicated cleat in some other place.

Rodger's fix looks real nice and he's probably good to go for the distance and my comments are basically ranging to the idealistic.
 
Last edited:
In my case the size of the backer is dictated by the flat surface available. I am restricted to that size. As far as "ignoring Ski's coment". I highly respect his input and he has helped me many times before. Using the six ten, thickened epoxy, that you refer to as "goo", was what was recommended to me by a highly respected fiberglass company after they looked at it. I would have gone with replacing the core if it was a bigger section but when we found that it was so much smaller than what I initially thought then it made sense to go with this approach. So now I have 1.5 inches of solid fiberglass. Not bad in my book and I am pleased with it. As stated in so many other post I always use the cleats to hold the load, not the windlass. This is also stated in the Maxwell manual. Thanks again to all for your inputs. On to the next project.
 
impregnated with an epoxy resin"

UV eats epoxy , so paint it after you are done.
 
Back
Top Bottom