Flying Bridge disassembly- experience anyone?

The friendliest place on the web for anyone who enjoys boating.
If you have answers, please help by responding to the unanswered posts.

Tangler

Senior Member
Joined
Jan 29, 2013
Messages
204
Location
canada
Vessel Name
Between boats
Vessel Make
38' C & L Puget Trawler
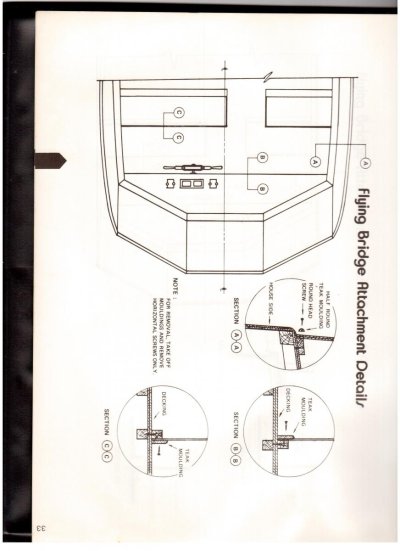
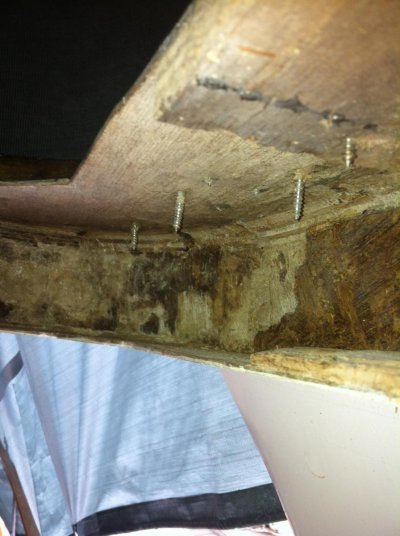
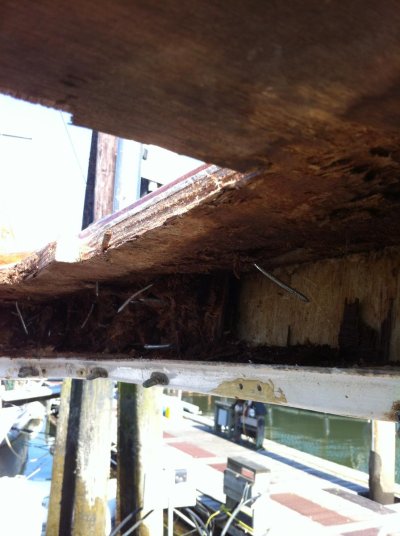
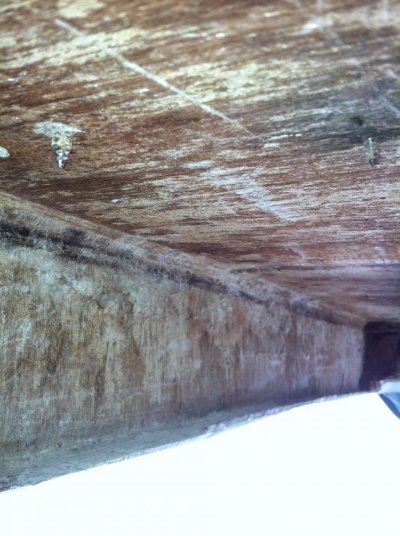
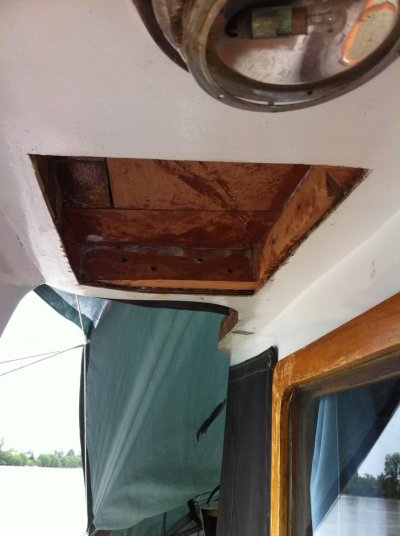
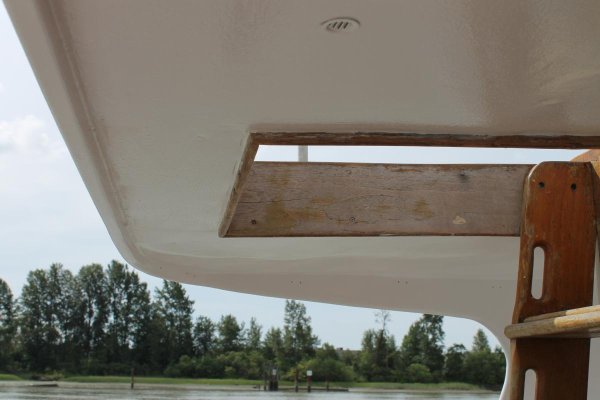
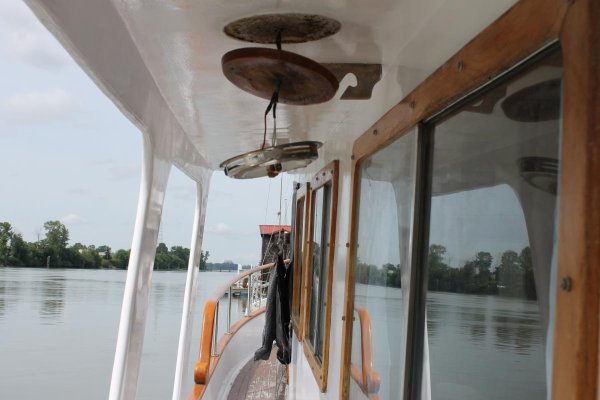
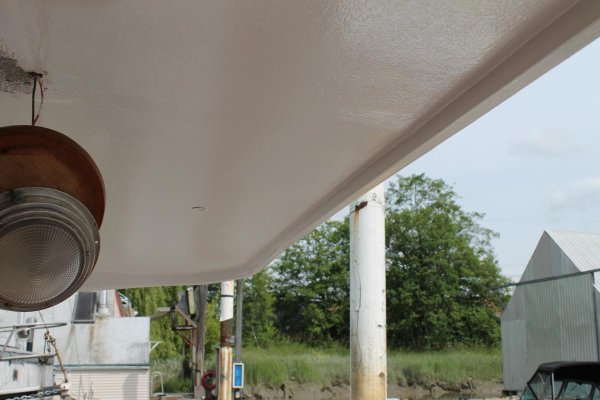
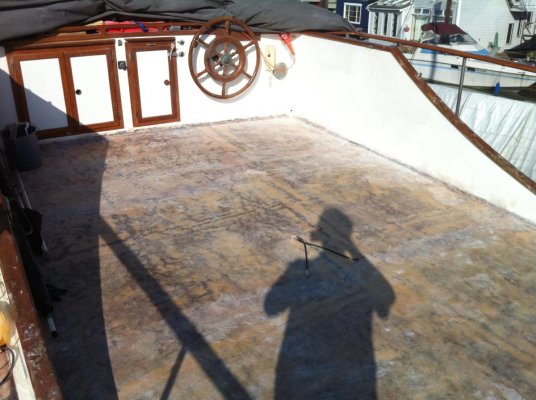
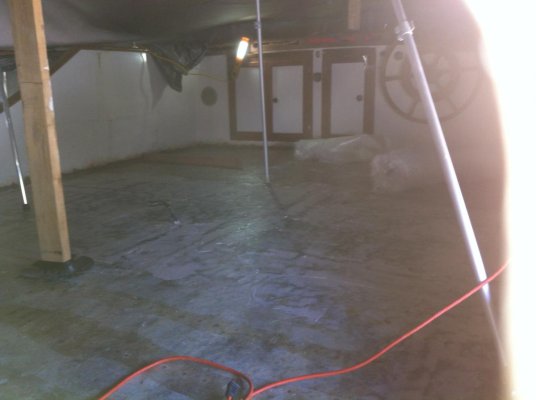
Hello fellow trawler owners!! my first time here. dont know how I missed this site before...probably refinishing teak or changing 7 various oil reservoirs or washing and cleaning or...TRYING TO STOP LEAKS! I will be removing the upper deck and glassing it over this year but now I have determined there is a leak problem under the band of teak that girds the flying bridge cowling around the front. I have removed the plugs and screws and tried to cut the sealant still binding the board to the fiberglass but it wont move. Has anyone had experience removing this board before? What did you use to cut the sealant or bedding goop? I was not very successful doing this but I am trying to avoid damage. Is the board flush at the bottom where it meets the fg or is it possible it is "sunk"1/2" or so into the fb beneath the board?
 
Greetings,
Welcome aboard. If you can get one end of the band free of the house you will be able to tell it's thickness. Depending on what "goop" is holding it on, you may try one of the caulk softener/removers used for that 5200 stuff (Haven't got a clue what it's called but if it dissolves 5200, it should work on anything). Just get a small crevice started at the top of the band and pour it in. Wait, pour some more...
 
Is there an "Owners Manual" for the boat? My IG Manual has a diagram with text of the attachment method.
My boat had a leak at the attachment line under the molding covering the joint. Repair involved sacrificing the moulding to remove it, resealing the joint with fiberglass and epoxy,and new molding. Fresh rain water forced into the defect by wind on the bow is a recipe for rot and the sooner you get in there the better.
 
no owners manual on construction and I have not been able to find any on the www. are you able to post a pic of the attachment method? I hate to take a saw or bar to it but thats the point I am at...sucker wont budge...
 
I removed mine.....screws inside the bridge and out...many times there were screws holding the wood trim on and some more screws buried under the goo that screw the bridge to blocks under the bridge fairing.
 
mine is a 1977. Brucek yours looks similar and there are many out there that look alike in that respect because of their common Taiwan ancestry...pardon if yours is not. - the board on mine measures 4.5" on the outside but the glassed in bulge it is attached to on the inside on the cowling is 5.5". even allowing for 1/4" fg it leaves 1/2' unaccounted for . thats why I ask if it could be bedded into a recess or??where it meets bottom of board to outside windshield overhang...
 
Greetings,
Ah, the plot thickens...Mr. T. It may be that the bulge on the inside is necessary to give the screws coming from the outside (under those bungs you removed) something to bed into unless I totally misunderstand what you are describing.
 
Additional greetings,
I removed some 4' of 1/4 round molding around a hatch last summer. Like yourself, I REALLY wanted to save that molding. Some Nimrod had used the goop from hell to "bed" the molding. I took a thin 1" putty knife, heated it up dull red hot with a propane torch and quickly jammed it into the minute gap between the molding and the FG deck thereby burning the goop. After I got about 2" burned out, I very carefully jammed a small flat screwdriver between the molding and the deck and created a small gap which I was able to increase by moving the screwdriver along as I did further burns. Took me 2 (easy) days but I saved the molding.
A few things to note: Try not to breath the combustion products. It ruins the palette for the single malt. Do a burn and wait for a few minutes. Even though the thermal mass of the putty knife blade is small, if you try to proceed too quickly, you're going to heat up the FG by too frequent applications of the hot blade and potentially cause damage. Keep careful but firm pressure on the band by judicious placement of your screwdriver/wedges.
The ox is slow but the earth is patient
 
Tangler,
I will try to scan and post from the Manual, when the IT hotshot gets home.
The brief text says you remove the molding. The shipwrights cut mine in sections, removing pieces until the whole of the joining defect was exposed to repair.The shipwright milled a new molding out of teak. And we found mold, of the other kind.
Surprisingly,the IG has no Taiwan origin, they were built in mainland China, and fitted out and finished in Hong Kong. Harvey Halvorsen is credited with the design.
 
Last edited:
thats exactly what it is - I guess that does not indicate the width of the board nessesarily I found another forum that shows a GB repair of the same joint but that boat did not have this wide board. it showed the cowling as just butting against the overhang. I thought it would be moulded around the overhang in one piece to avoid leaks but as per the GB,...perhaps not. and it was a terrible join...huge irregular gaps...I have not been able to see mine yet. any ideas yet on how to detach this piece? Magic tools?
 
the burning thing sounds interesting but the problem is with the scraper...which of course I have tried...scrapers are too short to reach the bottom of the back of the board when I drive it down there with a hammer...I need a blade that is 6" and able to take a hammering...you would be surprised how hard that is to find...thats why I ask about tool ideas...thanks for all the input guys...keep it coming..
 
Greetings,
Welcome aboard. If you can get one end of the band free of the house you will be able to tell it's thickness. Depending on what "goop" is holding it on, you may try one of the caulk softener/removers used for that 5200 stuff (Haven't got a clue what it's called but if it dissolves 5200, it should work on anything). Just get a small crevice started at the top of the band and pour it in. Wait, pour some more...

DEBOND is one of them

Marine Formula by DeBond

I have used it a couple of times it does help, as FT said put it on let it sit stick a knife point into it to loosen it up and let the Debond soak in then repeat.
Steve W
 
Steve beat me to it. Debond is what RTF was thinking of. Works pretty good.
Working a thin strong wire between the wood and fiberglass can be used to cut the bonding agent but doesn't sound like you have access to both edges of the wood.
Marin's idea might be worth a try. I've used heat to release metal fittings that were bonded to fiberglass with 5200.
 
Tangler, a 6" blade you can hammer, how about a stonemasons cold chisel.
Here (I hope) are the 2 attachment diagrams. One is for "GPR"(?GRP) boats, the other is unspecified, but IG built in wood too. I hope you have the skills to enlarge them. If not, I could resend to an email address, or even fax them.
My suspicion is you may have to accept doing irreparable damage to the molding while removing it, but if you do it in sections by making cuts in it, you may be more successful.
It`s not hard to imagine rain driven at 40kts into the defect. You won`t have imagine it for long. My PO of 25 years knew there was a leak but could not find it. We found a lump of a fungus. Good luck with it.
 

Attachments

  • Image.jpg
    Image.jpg
    88.6 KB · Views: 132
  • Image (2).jpg
    Image (2).jpg
    83.9 KB · Views: 137
look here and see if anything helps...
i doubt the bedding is what has it so securely unless the bridge has been off before and got 5200ed down.

The Albin Restoration
 
thanks so much Brucek and your techie for the diagrams..gives me valuable clues but not quite my installation - where your A - A detail shows a narrow teak strip to anchor to the fare of the cowling is where I have a 4.5" board double screwed and glued. As to the chisel it lacks the flexability of the scraper type bladeand I am concerned about damage. I have pretty much decided not to try and save the board...bad shape anyway...will be going to my favorite tool store today for more implements of destruction. Time to get serious...you guys have been great...will check out the Albin restore a little later and comment later today
 
the albin restore is great. good job. shows me again how the gridge is mounted to the top of the cabin. I went to Canadian tire believe it or not and found a couple of good possibilities for tools...one is a lethal looking bar from stanley called fubar that looks real promising...wont get a chance to try it out until the weekend. My boat is over an hour away so I try to go just once a week. I want to get all this floor and bridge work done before spring so I guess I will be overnighting as much as I can. fortunately so far this winter the weather is intermittantly ok and I can work under tarps. cant afford a boathouse or shop to work in but that may become a factor when all the prep is done...Thanks again and hope to see y`all on the water
 
I recently completed this project on my 38' MT DC.
Pulled the wood off with a prybar and hammer.
Then got into it with orbital sanders, coarse grit, finer grits, and went after it with West system thickened epoxy. Took quite a while to complete, but NO LEAKS!
Can send pics of the whole process if you want.
Easy process in retrospect.
Cheers,
Capt Tom
MT38 Carina
Clearwater Municipal Marina
 
Tangler, Happy to help. The diagrams are from the IG Owners Manual, they came in pristine condition with my 1981 boat (not in pristine condition).
The inevitable violence will be hidden by repairs and the new cover strip. From various posts it seems the fwd join attachment of the flybridge is a weak point. Maybe it starts ok but suffers facing into the weather, seems unlikely so many builders get it so wrong.
 
your right Bruce...I suspect most of our boats (trawlers), if not all, would have issues like this after what I have researched so far. I used to be in the RV industry as a younger man and leaks/repairs were a main source of business for us.I have also worked in home renos and wood rot in BC is incredible. -jobs you can pull apart with your hands! we live in a rain forest and you can grow moss on a billiard ball around here so it is inevitable.
 
Well, got the durn thing off...took 2 of us with pry bars and goop cutters about 5 hours. I would have loved to save that much teak but the boat is a 77 and the wood turned out to be in bad shape. The winning removal advise from above, therefore, was, prying it off screws and all and dont cry over split wood. Thanks Capttom for the pics too as yours were the closest to being the same as my installation. The board was bedded originally but subsequent improperly done re-seals and repairs etc over the years made it hard to remove. Once I got a piece of it off I could see where NOT to apply my prybars and we could then tear it out by the roots. Hope this info helps others with this common leak problem. My advise is to do a complete job...remove the board, dont just try to seal it because that will not work for long. Thanks again folks.
 
Well trawlerites, job is done at last...on the upper deck anyway. The fb was made to be assembled..or unassembled but there was no easy way in this case. Pried and destroyed the teak band off and you could see where the fb was 'slotted' into the fiberglass moulded receiving piece on the main upper deck. Sealed it with glass and west systems epoxy on the inside first accessed by crawling under the fb dashboard and cleaning and scraping all the old goop off the exposed outside. this was just the start as it became obvious their was rot inside the moulded slot or bolster that was under the removed teak band. I bought a fein multimaster oscillating tool of which there are many copies today but not one this good...used it every day and worth its weight in gold.
 

Attachments

  • IMG_0644.jpg
    IMG_0644.jpg
    76.8 KB · Views: 82
  • IMG_0642.jpg
    IMG_0642.jpg
    79.8 KB · Views: 68
Explored with drill holes around the front as shown and cut out sections of the glass using the fein..kept the pieces by the way and glassed and epoxied them back in when done repairing...that was easier than I thought it would be. The wood was removed using a variety of destructive implements. Very often it was just chipped out or pulled out by hand as there was little or no integrity left in the wood. As you can see, one thing led to another and sections of the ceiling and/or upper deck were removed to chase the damage. This was done on both sides of the wheelhouse and back a couple of feet and around the deck under the handrail until I found good wood I could work with.
 

Attachments

  • IMG_0620.jpg
    IMG_0620.jpg
    114.9 KB · Views: 81
  • IMG_0622.jpg
    IMG_0622.jpg
    142.6 KB · Views: 80
  • IMG_0623.jpg
    IMG_0623.jpg
    117.4 KB · Views: 79
As I worked my way down the arms of the fb it also became apparent that the teak deck was suspect and the wood inside the base of the arms was bad too. The debate became -should we keep the teak deck or toss it-after trying to save it for a few hours the toss it side won the debate and I conscripted my wrecking crew and we tore it off with a lot of effort. - a crying shame , I know, but life is too short to spend it trying to save 30+ year old wood. Wait for the end result before you judge me however! After the floor was off I could use a hammer to sound out the soft spots in the upper deck and the 2 front corners and mid sections 4 -5 feet each side along the handrail and the entire rear section from the aft door back ( about 3 feet by 11 )feet were removed. the glass was left in place where possible and the now weakened rear section was propped up and roped off for safety
 

Attachments

  • IMG_0573.jpg
    IMG_0573.jpg
    161.7 KB · Views: 64
  • IMG_0574.jpg
    IMG_0574.jpg
    135.5 KB · Views: 71
  • IMG_0598.jpg
    IMG_0598.jpg
    113.8 KB · Views: 71
  • IMG_0585.jpg
    IMG_0585.jpg
    133.8 KB · Views: 67
  • IMG_0582.jpg
    IMG_0582.jpg
    156.9 KB · Views: 78
  • IMG_0610.jpg
    IMG_0610.jpg
    132 KB · Views: 74
Repairs were shaped and crafted to fit into the original fiberglass or reinvented to be better than new and then epoxied and screwed into place. I used African mahogany which turned out to be great to work with. The rear section which included all around the hatch was the biggest challenge. I worked 2 weeks putting it together to be installed in one piece. Compound curves- the cant of the deck had to be maintained and the outward curve of the upper stern- was done with a lamination of black walnut which I had in my garage for years. It took 4 guys to lift it into place and secured it again with epoxy and screws. The original deck had no venting or drain holes for water to escape so that has been corrected. I suspect that at times there were gallons of water up there that could not even evaporate out.
 

Attachments

  • IMG_0603.jpg
    IMG_0603.jpg
    149.9 KB · Views: 62
  • IMG_0598.jpg
    IMG_0598.jpg
    113.8 KB · Views: 60
  • IMG_0602.jpg
    IMG_0602.jpg
    117.3 KB · Views: 68
  • IMG_0600.jpg
    IMG_0600.jpg
    63.5 KB · Views: 64
  • IMG_0607.jpg
    IMG_0607.jpg
    147.4 KB · Views: 58
  • IMG_0608.jpg
    IMG_0608.jpg
    140.7 KB · Views: 70
  • IMG_0609.jpg
    IMG_0609.jpg
    104.6 KB · Views: 76
Love these project posts, I regret not having taken more project pictures to share with others, though never did something this radical. Thanks!
 
Long story short when all the structural repairs were done I scraped and grinded all the old bedding material off the upper deck -strongly recommend a good respirator and hasmat suit for this- I sealed the hundreds of screw holes with epoxy and then 2 layers of fiberglass then grind and level with a fiberglass filler made up by a pro who does that sort of thing - sounds easy here but I assure you I worked on this project from early March to end of Oct last year almost full time...say 4 days a week average..sometimes 7 or 8 days running. I had a lot of help from a a good buddy but then he went back to a real job and I was on my own. The floor was professionally gel coated after that.
 

Attachments

  • IMG_0619.jpg
    IMG_0619.jpg
    117.8 KB · Views: 70
  • IMG_0618.jpg
    IMG_0618.jpg
    99.9 KB · Views: 68
  • IMG_0584.jpg
    IMG_0584.jpg
    117.7 KB · Views: 61
  • 011.jpg
    011.jpg
    75.4 KB · Views: 69
  • 009.jpg
    009.jpg
    82.9 KB · Views: 74
  • 010.jpg
    010.jpg
    88.4 KB · Views: 72
  • IMG_0666.jpg
    IMG_0666.jpg
    141.5 KB · Views: 66
  • IMG_0652.jpg
    IMG_0652.jpg
    71.8 KB · Views: 74
There are many more pics and stories about method and ideas if anyone wants to contact...one of my proudest is in the previous batch of pics along the aft edge of the deck...that 1x1 ridge that finishes the job was moulded with one of those mouldings you use to hang a suspended ceiling in your basement...the wall piece..filled with west systems and taped into place overnight...plastic came off without a hitch and all I had to do was take off the sharp edges! then one day I climbed up the hatch and the floor looked so big I thought it was like a dance floor. Then I thought it looked as big as one of those pontoon party boats...there's a website for everything! As you can see I also put on a hardtop. The canvas room is next...
 

Attachments

  • 012.jpg
    012.jpg
    79.9 KB · Views: 67

Latest posts

Back
Top Bottom