Teak Deck replacement on GB32

The friendliest place on the web for anyone who enjoys boating.
If you have answers, please help by responding to the unanswered posts.
Patience,


After skinning the deck the saturation lined up with the meter. Hopefully you don't find something like this.
 

Attachments

  • core.jpg
    core.jpg
    170 KB · Views: 34
Did most of your teak stay together as panels when you removed them?

Look forward to seeing your finished project.

I think they put the teak on in individual pieces back then.
 
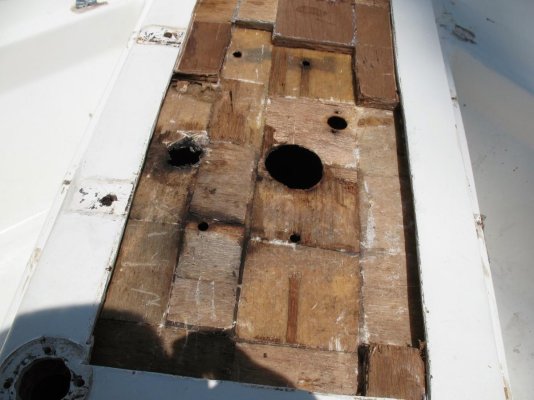
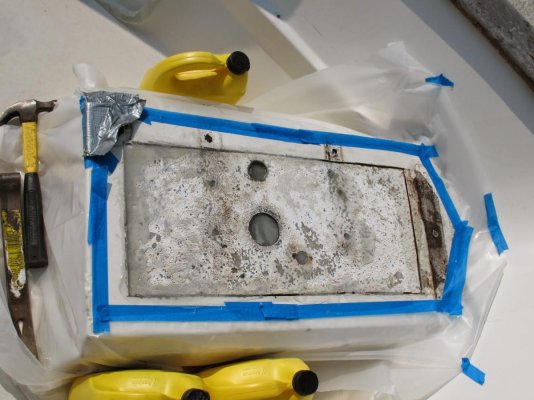
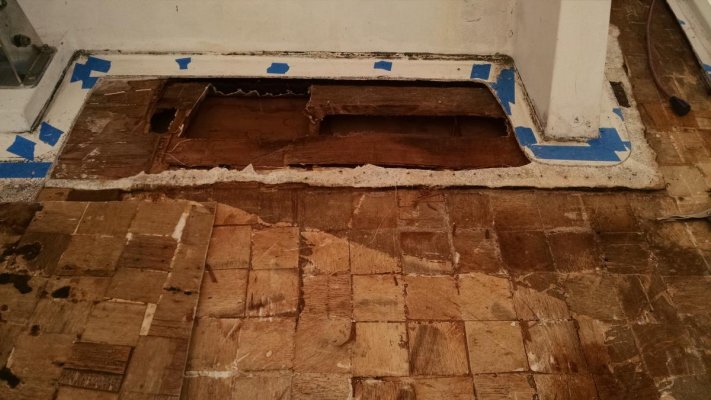
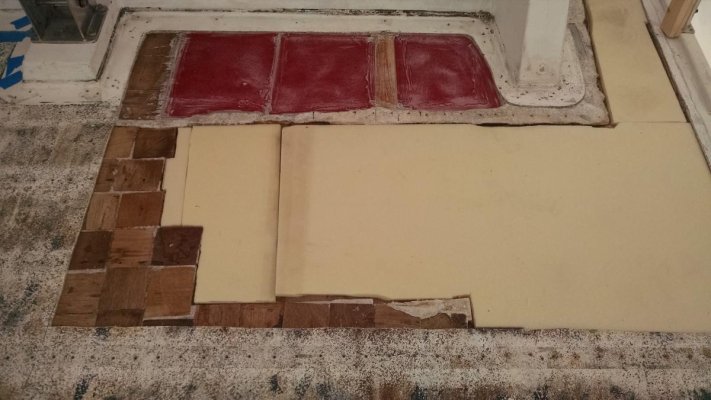
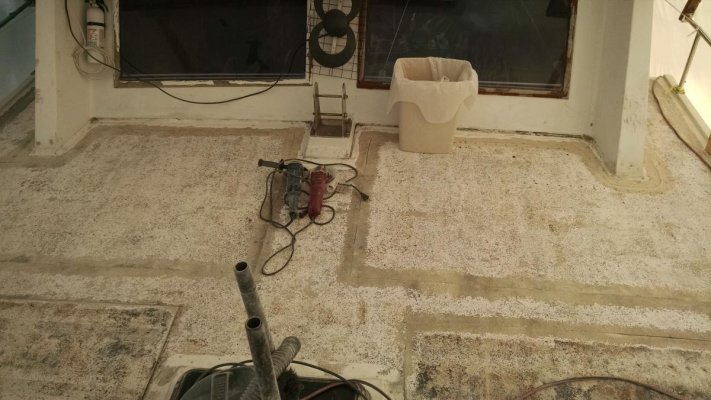
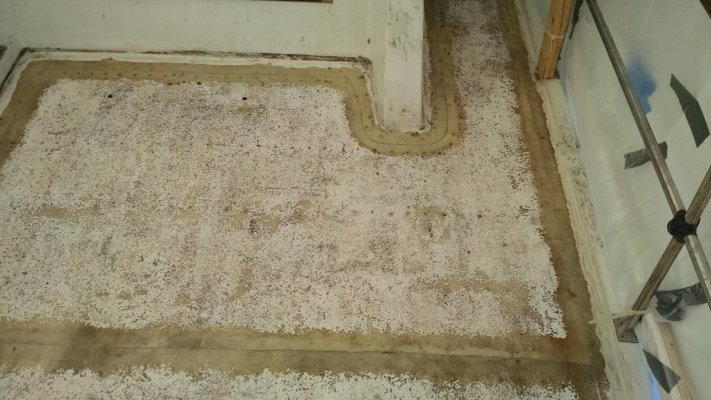
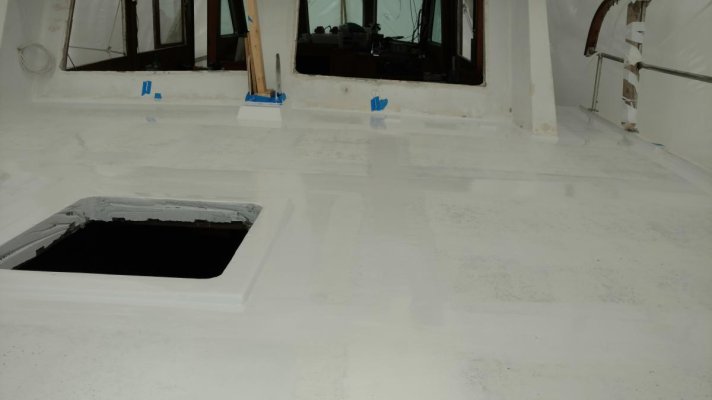
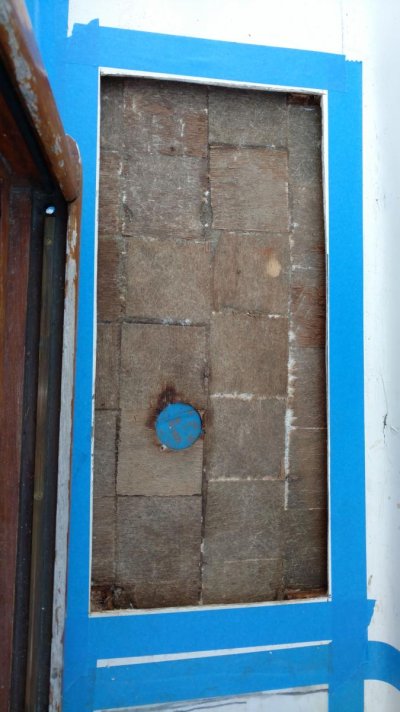
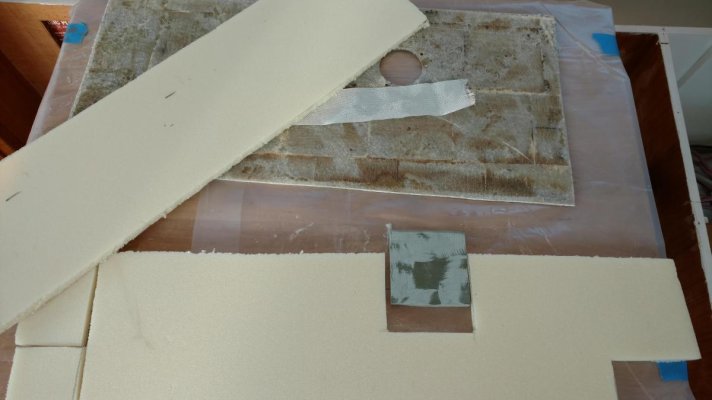
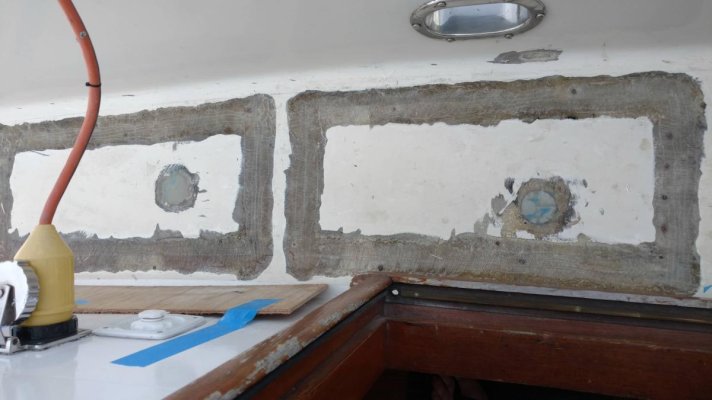
@Polaris: Yeah, I really should pick up a moisture meter, especially as I will be continuing on to the side/fwd and upper decks over the next two seasons. My "field of holes" was meant as exploratory but will ultimately give me more strength overall bonding the top and bottom of the deck together. I have been "cooking" the deck for the last few weeks with a baseboard heater in the underside (watching the electric meter spin...) so the deck, at my sample holes is pretty dry. Question is, is it intact. In the area where I had mush, or nothing left, I will be dropping in some more holes to define the extent of damage, which seems mainly to be around the emergency tiller access port. I do have quite a bit of good/solid so not looking to go as wide as you went. Quite a job there! Do you have additional photos of glass over and ultimate finish?

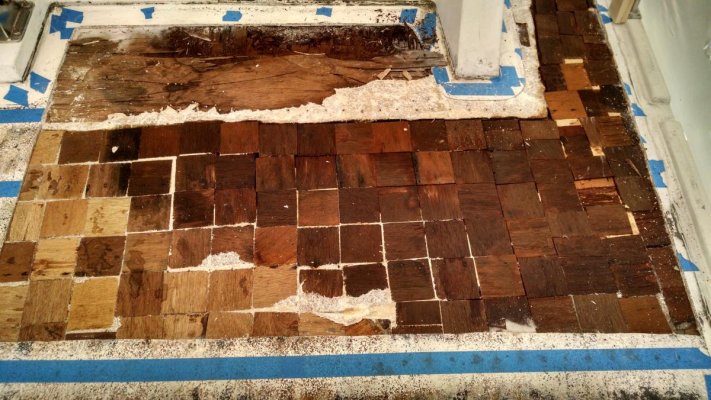
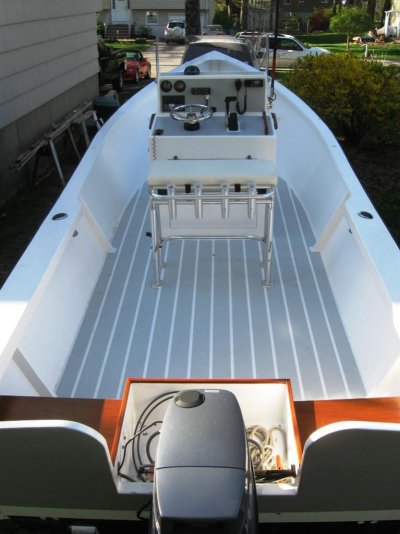
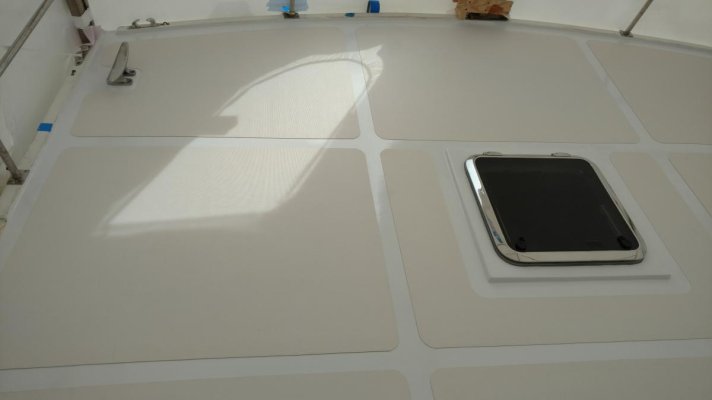
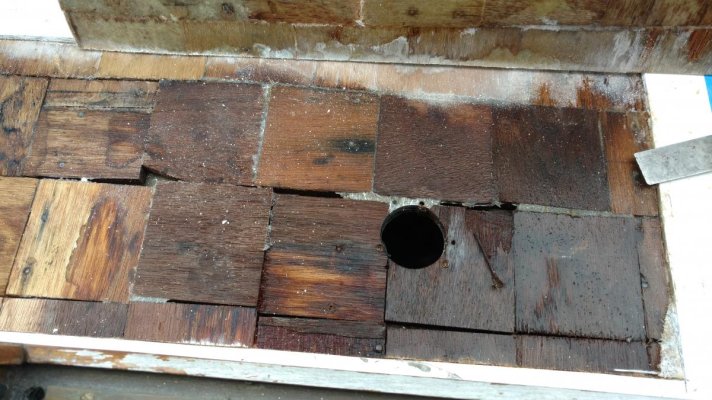
@CharlieO, @Comodave, The decking was installed piece by piece, glued and screwed then caulked but would have essentially come off in one entire piece if I had not cut it up to make removal easier. The caulking kept the boards together but the glue between decking and subdeck was shot... only screws were holding the boards down and being that 90%+ of my bungs were gone, it made for fast work of removing the screws...

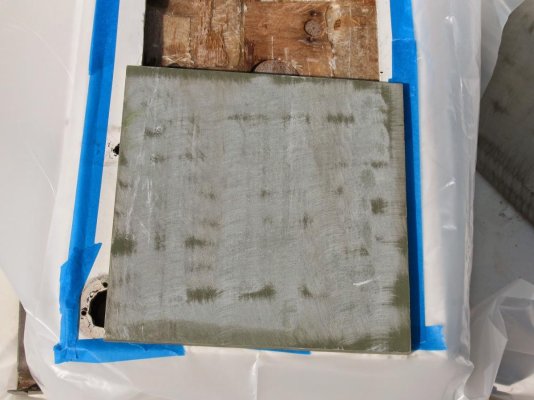
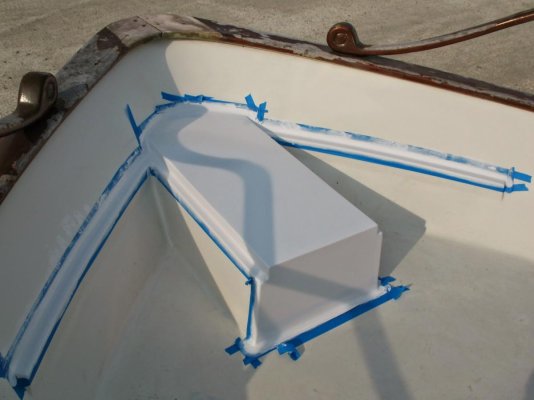
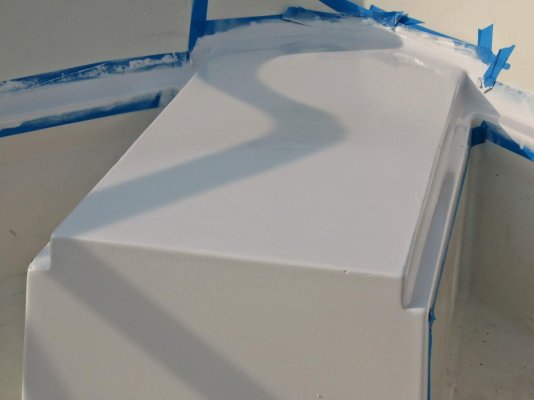
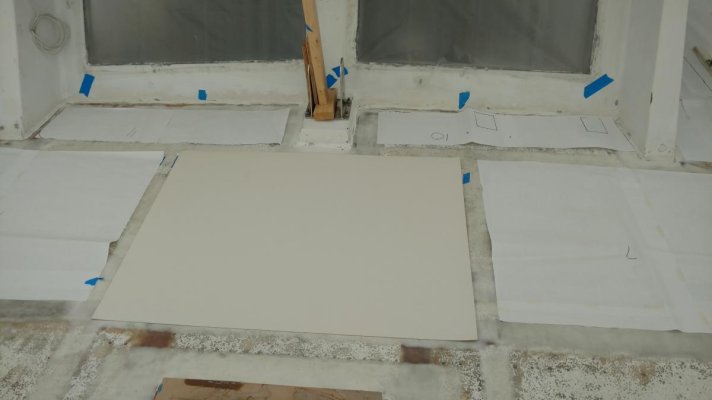
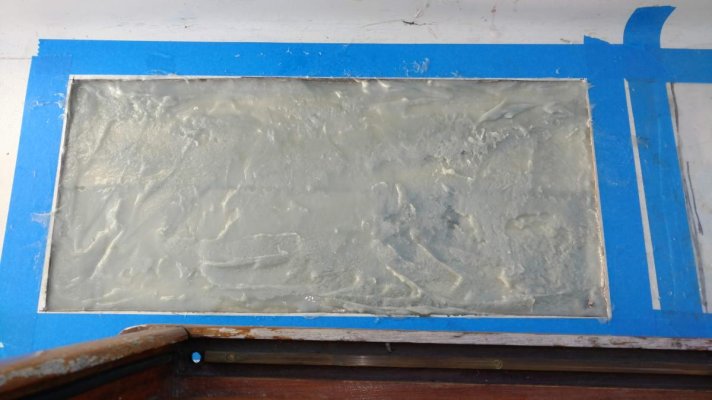
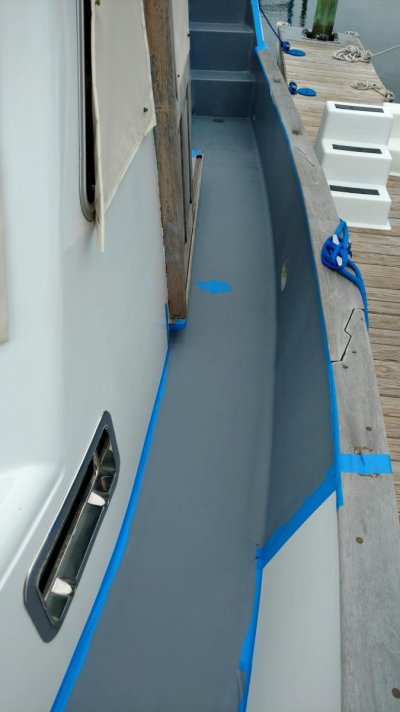
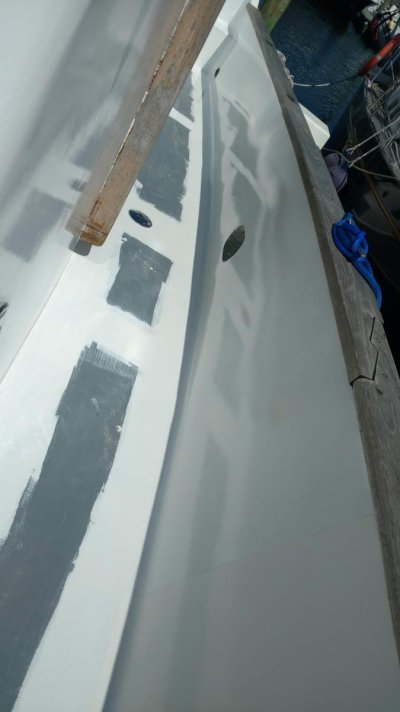
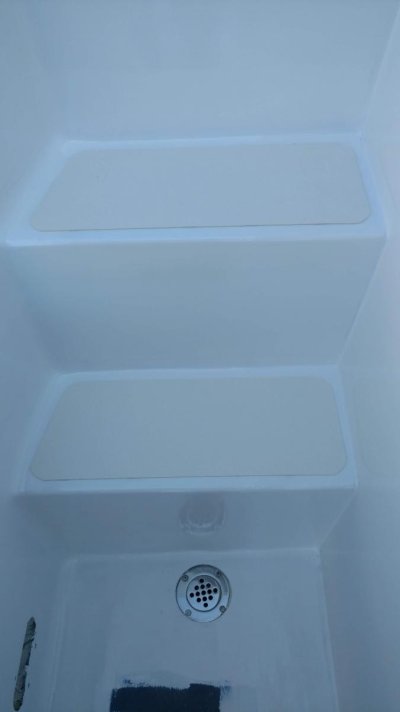
I will keep "cooking" the aft deck as I have the hatches in my basement for proof of concept of whatever will be the final finish.. will post progress.
 
CharlieO,


These were individual teak strips screwed and glued.


bowball,


The blocks are approximately 4" X 4" squares of 5/8" plywood not balsa.


Patience,


I could bore you to tears with my tail of woe. I'll try to post the highlights.
 

Attachments

  • wet core removed.jpg
    wet core removed.jpg
    124.1 KB · Views: 24
  • Skylight?.jpg
    Skylight?.jpg
    86.4 KB · Views: 20
  • Prepped for core.jpg
    Prepped for core.jpg
    123.6 KB · Views: 21
  • Corecell A500.jpg
    Corecell A500.jpg
    109.3 KB · Views: 22
  • Grinding seams.jpg
    Grinding seams.jpg
    131.9 KB · Views: 19
  • glassed seams.jpg
    glassed seams.jpg
    150.7 KB · Views: 22
  • treadmaster templating.jpg
    treadmaster templating.jpg
    51.4 KB · Views: 22
  • fairedand awlgripped.jpg
    fairedand awlgripped.jpg
    43.3 KB · Views: 20
  • aft deck.jpg
    aft deck.jpg
    36.1 KB · Views: 19
  • upper helm.jpg
    upper helm.jpg
    39.4 KB · Views: 18
@Polaris: Very, very nice job there. Great work and a real nice finish with that Treadmaster. Photos much appreciated. What is that tan material alongside/on top of the ply squares?
 
Last edited:
Patience,


Thank you for the kind words. I think your referring to the core material.


This is Core-cell A500.
 
Ah, gotcha. Now I see the images named! Love the skylight...
I hope to get close to your results.
 
I have a recently acquired 1973 glass GB 32. Ninety percent of bridge deck plugs have been gone for years and I suspect a total re-coring will be necessary. Even through the teak decking some sponginess can be detected. In preparation of spring thaw and the melting of meter high snow banks, what are your best guesses for thicknesses of core and top laminate?

BTW, I have enough experience rebuilding decks that this project does not intimidate.
 
TF,


My experience is limited to my Sea Ranger, but i would guess 1/4" fiberglass with 1/2" or 5/8" plywood coring in 4" X 4" blocks.
 
GB32 Deck Replacement

Hey Trawler Fixer! Currently my aft deck is on a small back burner at this point as I am pushing a few other projects down the road (Fuel Tank remove and replace, Engine exhaust elbow and manifold replacement (finding a mainfold is a bear...)), etc. with the deck continuing to dry out in the meantime.

Regarding the deck thickness, I cant vouch for the flybridge deck but here are a few shots from my cockpit. Sorry, tough to get the measure angle on the Tape but essentially full deck thickness is approx. 3/4" per water fill hole and the top glass thickness at 1/4" and the bottom glass thickness approx. 1/8", core approx. 3/8".

The "sponginess" of the deck may not be the core but basically the teak "floating" above the core with my core to teak bond essentially nil but very wet. Approx. 80-90% of my Core was still serviceable, but the aft part of that upper deck is very exposed so it could be pretty beat up. Will be interested to find your report as that is my next season endeavor...


Here are a few shots... hope the orientation works as I pre rotated to 90 degrees! Good luck with your projects! You might want to look up "Giddy II" in our neighborhood, a glass GB32 of 73 vintage as well! (wooden mast)

Deck Core 1.jpg

Deck Core 2.jpg

Deck Core 3.jpg
 
Guys,
In the process of re coring the bow of my Mainship. I was being towed last season and the towboat attached to my windlass. I noticed the windlass moving more that I thought was acceptable. I know the tow guy probably should have given me a bridle and attached to my fore cleats. But, regardless the deck is soaked and mushy. The moving windlass was my cue to deal with this like a grown up. I first need to open it up and get the rot out and based on my moisture meter readings its a good part of the entire deck area short of the areas close to the edges. Yes the deck is crowned and pitched to the sides.


I am wondering do I do long narrow strips of marine ply running in the bow to stern direction? Or do I utilize the Polaris method? What are the benefits of the squares method aside from the maintaining the crowned shape? Wouldn't the long strips offer more strength? Especially where the windlass is attached?
 
Just getting a feel for your environment, I would vote for multiple core strips, 2"? fore and aft to follow the curvature of your deck followed by some substancial back up pads, glassed in (in the chain locker?) below the mounting of the windlass to go rock solid on that mounting, tying it into the rest of the vessel.
 
JH,


I used corecell A500 to re-core my decks and added solid fiberglass where the penetrations were located. I believe the corecell can be shaped using heat although I didn't have to. I hedged this deck work by leaving sections of original primary built fiberglass in place and used a mutiltool and small pry bar to remove coring underneath. The sections of coring were joined while maintaining the strength of the original top skin.
 

Attachments

  • 7-aonther-section.jpg
    7-aonther-section.jpg
    160.1 KB · Views: 20
  • 8-ready.jpg
    8-ready.jpg
    106.6 KB · Views: 17
  • 9-pieces.jpg
    9-pieces.jpg
    70 KB · Views: 21
  • 10-filled.jpg
    10-filled.jpg
    83.1 KB · Views: 18
  • 11-cure.jpg
    11-cure.jpg
    108.6 KB · Views: 21
  • 12-sections.jpg
    12-sections.jpg
    80.9 KB · Views: 21
  • 13-awlgrip-primer.jpg
    13-awlgrip-primer.jpg
    65.6 KB · Views: 21
  • 14-awlgrip.jpg
    14-awlgrip.jpg
    56.2 KB · Views: 20
  • 15-sundeck-steps.jpg
    15-sundeck-steps.jpg
    25.8 KB · Views: 19
  • 17-treadmaster.jpg
    17-treadmaster.jpg
    148.8 KB · Views: 22
Polaris, I too have to redo side decks and probably will follow your lead on the Corecell. I am envious of your work and can only hope to get the results you did. I am starting at the bow as the Admiral is making noise about a V berth redo and I think all my water is getting in at the bow and them flowing downstream thru my side decks as well as dripping into my below deck areas. What are those raised pads on your side decks?


Patience, I was planning on reinforcing the windlass with aluminum on the underside running side to side with spacers to maintain the crown. When your in the water are you on the north shore or south shore?


John E
 
The whole idea of coring is to separate two skins and thereby create a stiff, light panel. The greater the separation, the greater the stiffness. Under stress, one skin stretches while the other compresses. One of the challenges then is to keep the three layers well adhered without shearing.
Besides economy, balsa is a coring king due to its massive compressive strength and lightness but it lacks tensile strength. Under a windlass I would definitely use marine ply but balsa elsewhere. It follows contours really well. However, having said that, I think it prudent to use longitudinals fore and aft of the windlass as tensile loads are dominant. The oversized aluminum backing plate is a really good idea to spread the shock loads of stressed chain etc. Be sure to oversize all fastener holes and surround them in epoxy. Also, bevel the tops of the fastener holes to achieve greater stretch and forgiveness in the caulking.
 
This brings up another hurdle. The front deck is where this all starts. Moving aft on the side decks the stanchions have over the years suffered as well. Each one has 4 x 1/4 thru deck bolts that need something to really hold onto. Im thinking I treat those areas like I did the windlass and use plywood to absorb the forces that they are typically subjected to.

My first order of business is the fore deck because I don't want to spend all season cutting and glassing. But I'm pretty sure the whole deck is Plywood. What is the benefit of using balsa the areas that are not subject to hardware or forces aside from feet?
 
JH,


Thank you for the kind words. The pads are the steps up to the aft deck. I think our boats are built a little differently at the windlass. I have a small raised structure that hosts the bow pulpit and windlass. Yes, I had to rebuild that as well. I used solid fiberglass plate from McMaster Carr given this is a high stress area with multiple penetrations. With the core opened up it seemed easier to use solid glass and omit wood or foam coring. I oversized the plate so the seams would not line up under the cut seam. I understand you have some curvature to work around so solid plate might not work for you. A couple photos.
 

Attachments

  • 1-starting.jpg
    1-starting.jpg
    135.9 KB · Views: 19
  • 2-remove-blocks.jpg
    2-remove-blocks.jpg
    116.2 KB · Views: 19
  • 3-fbg-sheet.jpg
    3-fbg-sheet.jpg
    116.2 KB · Views: 20
  • 4-epoxy-fill.jpg
    4-epoxy-fill.jpg
    125.3 KB · Views: 19
  • 5-finish.jpg
    5-finish.jpg
    77.1 KB · Views: 17
  • 6-finish-2.jpg
    6-finish-2.jpg
    51.8 KB · Views: 18
Agreed,

Beautiful work Polaris!

A good benchmark to strive for.
 
Teak deck replacement in the Home Stretch!!!!

OK! This has been, and will continue to be a very useful thread regarding deck replacement and all great inputs and progress appreciated.
Just an update here on "Patience" progress.. interesting and a bit of a long story with great interface and contribution from SeaDek, Permateek and Flexiteek with respect to our direction (kudos to all).
We ended up going with Permateek for a balance of economic, availability and quality product rationale. It was an extremely difficult decision as any of the above would have provided a quality solution. Can follow up with additional rationale for those in this line of thought but just wanted to post a few images from today as after 9 months of research, communication, removal and preparation of the underlying decking... here we are... Hatches still to cover, and not without a few moments of terror... my wife and I installed a one piece aft decking component from Permateek... nice and solid product... will follow with completed project!

IMG_4801 2.jpg

IMG_4802.jpg
 
OK... thought I had the hang of this.... try these!
IMG_4801 2.jpg

IMG_4802.jpg
 
I give up... going to complete the decking!
 
GB32Patience,
Very nice result on your deck project! All your research, planning and hard work paid off. Interested in this as an owner of a 1978 Mainship
with no teak on decks.

For those considering a deck re core using a paint/non skid finish, here is an idea. I did this to a 21' scratch built center console. Just a bit of layout work and rolls of good automotive masking tape. Paint used was Benjamin Moore Superspec Urethane Alkyd ( currently $42/gal), with poly beads mixed in for non skid.
 

Attachments

  • IMG_1136.jpg
    IMG_1136.jpg
    84.4 KB · Views: 22
Skiff Builder, that looks nice too. I need to repaint my aft cabin roof and side decks. I already did the flybridge deck in white and it is too bright so need to coat it again with a color. I used Valspar non skid deck paint from Lowes and am happy with the durability so far.
 
I will be following this thread as I believe the decks on our soon to be ours '81 36' GB should be replaced. Engine survey today and full survey and seatrial tomorrow. Great info. Thanks all!
 
@skiff builder, very nice look on that deck approach. Beautifull job on that Skiff as well! We may be looking the paint route next year for balance unless the market turns around... economics of our current route, although an awesome finish were a bit tough.
@CharlieO, Yep, still getting the hang of "prerotating" those images, until then, just rotate your monitor! Sounds like you are charging forward with your projects as well... nice to hear.
@old sea dog, yep, we will post (properly oriented!) images of finished project shortly. Still have to cut in water fill, emergency tiller and hatch hinges.... almost there!
Thanks all for contribution and support on this thread.
 
@old sea dog, Good luck and best wishes to you on your new family member!
 
Back
Top Bottom