How to keep salt water inlets clear of growth?

The friendliest place on the web for anyone who enjoys boating.
If you have answers, please help by responding to the unanswered posts.

Kit_L

Senior Member
Joined
Mar 12, 2016
Messages
476
Location
Australia
Vessel Name
Suu Kyi
Vessel Make
Custom 40' catamaran
We came down from the marina the day before yesterday in moderately confused seas, so we decided on semi-planing mode for comfort (3,250 rpm and around 15kn), and 40 minutes into the journey, we noticed that the starboard engine was running at 195°F, and the port at the usual 175°F. We slowed to 2,250 rpm, and temps stabilised.

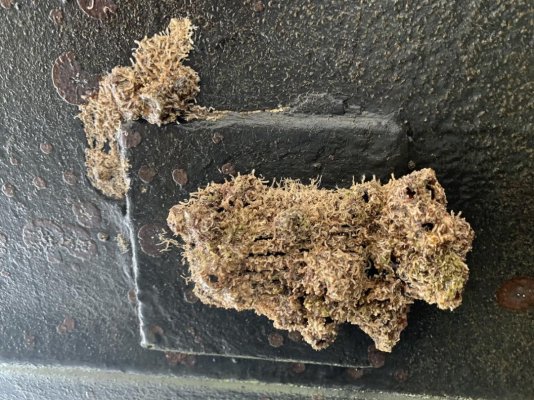
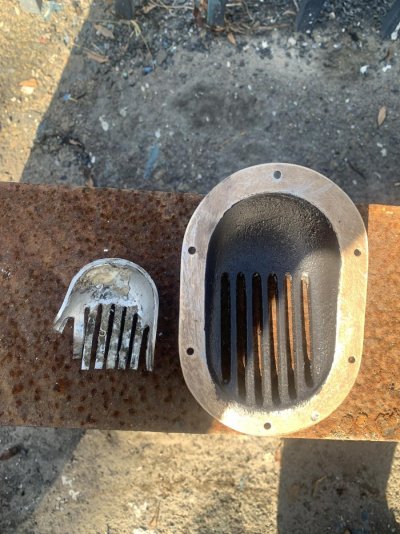
We slipped yesterday and we found that a mixture of creatures including coral had almost completely covered the starboard engine's intake. You can just see a few of the slots that these strainers have (arranged longitudinally along the hull lines, so left to right in this image), but this one was almost completely blocked. We'll definitely be replacing the impeller on that side...

The reason for slipping is to replace all the through-hulls and sea-cocks and eliminate an extraneous one, but the question remains:

is diving on the hulls and making sure the slots are clear the only way to make sure they are clear?

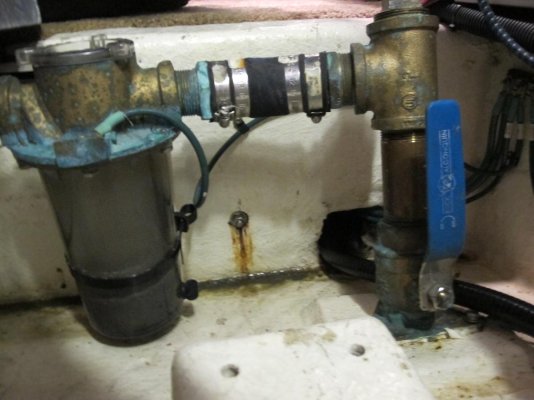
We will be anti-fouling the insides of the new strainers (and the insides of the internal parts of the skin fittings), which was something we could not do with the present ones—they are one-piece, with the internal parts screwing into the strainers; terrible design.

All suggestions appreciated!
 

Attachments

  • IMG_9307.jpg
    IMG_9307.jpg
    205.9 KB · Views: 28
Don’t like external strainers or scoops. Rather be able to paint up to the seacock. Prefer that function to be inside the boat and with a finer mesh.
Other choice is a seachest with a butterfly valve at the bottom or standpipes but would think that’s a very expensive retrofit.
We carried plastic putty knives and ss dental tools to clear external strainers but it was a chore. So would dive and take them off. That allows cleaning inside where a massive amount of stuff was. Also cleaning the strainer was easier with it out of the water.
 
I also like the idea of being able to clean things from inside, but I don't necessarily mind the Groco ASC style scoops when a scoop inlet is appropriate. They've got a big slotted area so they're harder to clog (especially if you use an oversized one), and there's an access door you can open to allow cleaning out the thru hull itself and to paint inside the strainer.
 
That strainer set-up looks a mess!

My preference is for a simple through hull with something like a 1" hole diameter. Prime the metal and antifoul. Have the strainers inside the boat and cleanable after closing the seacock.

Back in 2013 during my refit the guys used a bronze T to enable a "bottle brush" of some kind to be run through from inside the boat provided the seacock was open. Not that I've ever done it....
 

Attachments

  • Groco Engi strainer 1.jpg
    Groco Engi strainer 1.jpg
    97.5 KB · Views: 19
I prefer the outside strainer with holes as opposed to slots. I switched to stainless perforated sheet metal with significantly larger holes and coat everything with antifouling paint. My luck is poor with open seacocks that can suck in all sorts of debris ( plastic bags, seaweed, and other human garbage). The large area of my screen allows things to slide by without getting sucked to the opening. I also have an internal strainer after the seacock, with smaller holes. Marine growth is prevented with antifouling paint and a pass with the scrub brush when not actively cruising.

20231107_160438.jpg

Ted
 
That strainer picture looks eerily similar to what I have experienced here in the PNW except that barnacles and mussels are the offending creatures.

I haul my boat every 2 or 3 years (it depends on what other work is required) for a bottom job. Each time any metallic component, trim tabs, struts, external strainers and bow thruster housing are covered with hard growth while the glass hull itself including the glass rudders are largely clear and are only slimed with light soft growth.
Both of these types of immersed materials are painted with the same antifouling, Micron CSC, with the metallic components removed, then stripped to clean bronze or stainless, primed and topcoated, 3 coats.

The surface profile of the bronze components is certainly rougher than the smooth glass, but that does not explain the growth when I get a colony of mussels on the flat smooth painted stainless trim tabs.

Sunlight exposure is minimal as the boat lives in a house and while the quantity of mussels on the bow thruster's bronze housing could feed a family of 6, the thruster's 12" glass tunnel is clean.

So, any ideals as to what am I doing wrong, and whats the fix?
 
We cut the very small integral strainer–scoops off the outside of the hull, and pulled the rest of the fittings including the sea cocks out from inside the hull today. One of the problems of the small integral scoops is the narrow slots mentioned above (that, and the fact that you can't paint anti-foul on the inside of the scoop, nor up the rest of the fitting). That all changed today.

We pulled the old units out, and they will be replaced by standard fittings and sea cocks that have only a slightly raised flange outside the hull. The ID of each sea cock is 1/1/4", so plenty of flow. And the new gorgeous phosphor bronze scoop–strainers that will be attached to the outside of the hull are about four times the area, and slots are twice as long and wide. I'll show an image tomorrow. They will be anti-fouled inside and out, as well as the skin fittings up to the ball valves.

Presently the generator inlet is fitting only, no strainer–scoop, and I have a length of hose that allows me to run a stiff wire through the fitting from above, to clear any blockages. I will be able to do that with the engine inlets too, as I have an additional piece of hose that is long enough to allow the same clearing process from inside the hull. And I will invest in a hookah breathing unit to allow me to clean the engine inlets from the water. More to come.
 
All skin fittings in. Here's a comparison of the old, integral-to-fitting scoop–strainer, and the replacement phosphor bronze ones:

I like OCDiver's solution the best, but not possible in our application. I will definitely go the sea chest route if the next boat is a monohull.

In the meantime, these will work. Feels good to have all-new skin fittings and sea cocks.

Tomorrow, the fittings in position, and some inside-hull picks.
 

Attachments

  • IMG_9319.jpg
    IMG_9319.jpg
    188.7 KB · Views: 16
Last edited:
I would check to make sure your bonding wires are still good. I had a very similar issue as I would get crazy growth on one inlet but not the other side. Found a broken bonding wire, fixed it and zero growth on both sides. It may not be your issue, but it's a very task to check of the trouble shooting list!
 
@BlindHog: this is an excellent point, and one of the grounding wires was not connected (though from casual inspection, appeared to be), so I agree very likely to be part of the problem. All grounding wires replaced and re-fastened to the sea cocks.

And new handles fabricated at a local shop (J K Engineering; a big shout-out) and fitted yesterday. These handles allow open and closing of the sea cocks from deck level, via custom rod.
 

Attachments

  • IMG_9353.jpg
    IMG_9353.jpg
    128.7 KB · Views: 21
@BlindHog: this is an excellent point, and one of the grounding wires was not connected (though from casual inspection, appeared to be), so I agree very likely to be part of the problem. All grounding wires replaced and re-fastened to the sea cocks.

And new handles fabricated at a local shop (J K Engineering; a big shout-out) and fitted yesterday. These handles allow open and closing of the sea cocks from deck level, via custom rod.

A few points:

Seacocks usually have a flange that is bolted to the hull to protect the thin tube that secures the water passage. The flange helps to protect the tube should the valve be struck.

Typically a seacock is bronze to reduce or eliminate corrosion should the bonding system fail. That ball valve looks to be stainless steel which deteriorates more quickly if the bonding system fails.

The red grounding wire seems substantially undersized. Limiting resistance through larger wire size is necessary as the voltage to the anode is incredibly small. While it makes no difference in functionality, bonding system wire is usually green so as not to be confused with the positive or negative in DC wiring.

I apologize for being picky about this stuff, but there are good reasons for following best practices.

Ted
 
Please Ted: be as picky as you can—seriously. This stuff is all about protecting our most important asset, after all.

The bonding wire on our last boat was that yellow and green earth wire. I will take the red wire off and examine its gauge and report back.

Cheers, and thanks, KL
 
@O C Diver: I have examined the bonding wire, and it is heavy gauge multi-strand wire (heavier than all the other wiring in the boat, apart from the battery to starter motor wirings). I will take a pic. soon and ask for your comments about gauge suitability.
 
Back
Top Bottom