Found a fuel leak...

The friendliest place on the web for anyone who enjoys boating.
If you have answers, please help by responding to the unanswered posts.

Tom.B

Moderator Emeritus
Joined
Jul 30, 2009
Messages
5,839
Location
USA
Vessel Name
Skinny Dippin'
Vessel Make
Navigator 4200 Classic
Hey y'all,

Went down to the boat this weekend to find about a pint or so of fuel in the bilge. After nosing around for a while, I found that it's leaking from the throttle linkage input shaft on the injector pump. It's a slow leak as it took two weeks to lose the noted pint. The mechanic I called wanted to figure out what was behind that shaft before we pulled it out. Smart move. A quick Google search has found that it seems to be a common problem and is due to the new 'low sulfur' fuel mixture and is an easy fix. However, the procedure for that 'easy fix' seems elusive.

Any ideas on what to do or where to find the solution?

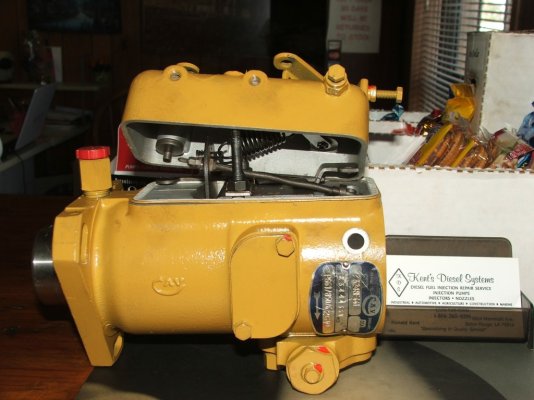
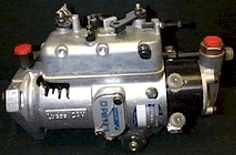
It's a 1986-era Perkins 6.354 with a CAV DMP injector pump.

*and as always--- Thank you for yer support.
 
My suggestion would be to seek a mechanic that is familiar with this problem instead of one that wants you to seek the solution on the web for him. If it is a known issue, a mechanic familiar with and experienced on Perkins will know exactly what to do. That is the guy you want working on it. Chuck
 
"Any ideas on what to do or where to find the solution?"

Exchange. There are lots of rebuilt/exchange pumps around.
 
*
Just a heads up.* I dont know about the our Perkins but our DD 671 fuel pump seal between the fuel and the oil pan leaked, allowed diesel directly into the oil pan, which dilute the oil and if enough diesel fills the pan the engine can run away.**

So make sure you check the oil level to make sue its not TOO FULL and/or diluted.* * **
 
Gonzo,I would suggest you locate a local fuel system rebuild shop. Most mechanics remove a failed component and bring it to this guy. The knowledge and tooling for repair is not within what most mechanics would take on. Having said that, I am pretty sure that replacing the shaft seal could be done without removing the pump- which would be much simpler. I can get you in touch with my repair shop if you need me to.
mechanical_fuel_injector_pump.jpg
 
My mechanic (Chuck Courtney) has directed me to remove the pump and take it to Coastal Diesel for repair. He said they can do it for ~$100 and it is because of the new low sulfur mix of fuel that causes it. Going to pull it this weekend and take it to them.

Any pointers for pulling it?
 
Haven't yanked one but getting it out wont be hard , how the engine is timed is the question.

I would very carefully scribe the block and housing, and on getting it out mark the position of any gears.

you MUST have Da Book to know how to install it.

Some times it is easiest if #1 cylinder is cranked to TDC, firing, before removal.

FF
 
I have just finished fixing the exact same problem on my CAV fuel pump on my HD 6354 Perkins.
I pulled the pump, but,having to fly back to Canada, got a mechanic to pull the injectors and, find a rebuild shop and reinstall.
to pull the pump, take ALL of the fuel lines off; I tried loosening the high pressure lines and wasted an hour and lots of skin trying to slip the pump past the hi pressure lines.
The injectors were in good shape apart from carbon.
Rebuild of pump was $900 ( I was quoted $1900 for an exchange from an online company in Philly) Injector removal and reinstallation of pump and injectors was almost 10 hours of the mechanics time (and I was back to the boat when it was reinstalled).
I could not have done it any quicker
 
A few further thoughts.
I took photos at every removal point - saved the day for the mechanic when we were trying to figure out the spring attachment points.
The scribe line is on the aft side of the pump between the pump and the adaptor plate. Make sure you can see it before you remove the pump.
The aft inside hold down bolt is a nightmare - figure on only a couple of degrees of movement so lots of flipping of a flat wrench.
Caution when you remove the throttle attachments - the spring will propel the little linkage plate an incredible distance.
I've ended up with a small oil leak/weep between the adaptor plate and the engine block (none of its bolts were touched) so I'm going to try cleaning it and using a fillet of Permatex.
Have fun
 
Good tips! Thanks Jon. Going to pull the pump on Sunday and see what there is to see.
 
Gonzo,
The pump is driven by a gear inside the front cover. The gear is held on by 3- 5/16 NF threaded bolts and t

has a short roll pin that aligns the pump shaft and gear. As scary as it sounds, I suggest you pull the round access cover on the front cover to get to these 3 gear retaining bolts. Pull the bolts out and the gear will drop down slightly , but it does not have enough room to fall out of the mating gear.
What this means is that you don't need to take the time to line upcrank gears, find TDC or even pull the timing cover off the pump to see the timing marks. It will only go back one way. As mentioned,before starting, locate the 2 timing marks on the pump housing and the front cover where it attaches. These marks should be aligned. As long as you spin the pump shaft when going back together to match your gear placement, then be sure that you put the pump housing timing marks in the same location- your engine will run exactly as it does now. Good Luck!
Steve
 
I had to read that 5 time to make any sense of it, but it sound simple enough. Line up the marks and you are good to go. Got it.
 
Any idea what the part number is to fix it? Can it be replaced easily? (yes, I'm a pretty good mechanic)* Heck, I'd be happy with a blowout drawing of it.


-- Edited by GonzoF1 on Wednesday 25th of November 2009 05:37:41 PM
 
I have the original engine repair manual, but minimal *detail on the injection pump. I could not find an exploded diagram or parts list. If anyone can locate them I would like a copy.I didn't take off any front covers. I have the hydraulic version (or so I'm told).
After reinstalling the injection pump, I now have a small oil leak on the adaptor flange.I tried Permatex gasket compound but it didn't set up so I removed and have tried black silicone. I also got a bag of 10 - 18 lb disposable diapers so I guess we're en route to Kemah tomorrow.
Jon

Jon
 
Jon's right, the manuals I have don't cover the injector pump in any more detail than to treat it like it was a single part.

We've decided to wait for a couple of weeks to repair it. We are going up on the hard on the 4th to paint the bottom and do some other below-the-waterline stuff. With my crappy luck, I'd somehow get stuck not being able to get it back together in time. She runs right now, I'll deal with the leak for a while and change the diapers ;o)

I don't suspect the throttle shaft it one of the highly machined and delicate parts of the injector pump that takes a clean room and a PhD. to fix, so I will snoop around for the o-ring when I get the pump off. Shouldn't be a huge deal. Skinny Dippin' is a single Perkins and I do have some wiggle room in the engine bay to pull the pump off. Besides, looking forward to trying as this is my first diesel.
 
Gonzo-
So sorry. It seems I have fallen off of my turnip truck again. I ASSumed that your engine set up was the same as I am familiar with. Perkins 4.203, 4.236 and 4.2482 all use the CAV pump -all gear driven and bolted to the front cover. Just a 4 cylinder version. I dug up some great service info this afternoon that I was going to scann and post on the forum. I jumped on line to research your engine and realized that your engine has an injector pump that mounts vertically, driven by a gear in the middle of the camshaft. Anything I suggested on removal should be considered offered in a vacant empty moment:). I did find a nice exploded view I can scan and post if you are interested.
 
That would be awesome! Thanks Steve. I think it would at least give me enough info to go on.

Now I understand why I didn't understand your post very clearly. I don't have the front cover you were talking about. But hey... you get an "A" for the effort.
 
Please copy me on the exploded view
Jon
My black silicone reduced the oil leak slightly - but the diaper is coping
 
OK,Lets call this a detailed drawing. It is for a 4 cylinder engine, but the 6 cylinder should be the same on the details we are concerned with. There is good detail on the spring location under the cover. If the view gets too blurred when enlarged, I will try to rescan larger. Let me know.
 

Attachments

  • picturer.jpg
    picturer.jpg
    22.3 KB · Views: 15,360
Steve
too blurry when I tried to enlarge.
Does anyone have a better idea than black silicone as an external seal for a small low pressure weep of oil. I don,t want to remove the pump whilst at anchor and then try making a gasket for the adaptor flange.
Jon
 
One interesting concept from the S. Dashew board to fix oil leaks is to shmeer the outside with silicone and apply a vacume to the engine.

Seemed to work for his J Deere marinization , but don't know how you could vacume a fuel injection pump?
 
Oil leak is not on the fuel pump, but*between *the adaptor plate and the block. Concept of vacuum sounds interesting but I have some concerns on what it might do to all of the other 37 year old gaskets.
I found some "Waterweld" by J_B Weld, so, since I'm now up against a bulkhead in New Iberia, waiting out some crappy weather,I may try that.
Jon
 
Jon,
I am going to try to get by my Diesel shop and take some real CAV pictures thursday with the cover off. A suggestion on repairing your leak. First I would clean the area thoroughly with brake cleaner. It washes all of the oil and then evaporates. We use this all of the time to locate and confirm leaks. Wash from top to bottom. Run your engine again and confirm where the leak is coming from. Clean it back up. If the leak is at the adapter you should be able to loosen the bolts 2-3 turns. I would then GENTLY pry the adapter up from the block while watching the gasket with a flashlight. It is possible torn- either way you need to be careful not to tear it more. If it is still stuck to the block I would lift the adapter up the 1/8" you now can and wash the gap thoroughly with... You guessed it- brake cleaner. Keep it lifted, could use wooden kitchen matches, and allow to dry. The cleaner will not hurt anything internally.
Now I would apply anarobic sealer (Loctite 518), use a toothpick to be sure it covers all areas, pull the matches and tighten back mown. Anarobic sealer gets hard when squeezed- we use it often to seal machined areas on transmissions and critic applications. The gasket already in place will not be affected and if it is torn this can fill and seal the tear.
I hope I am giving you advice that applies:). Without a picture I am making my best guess. Good luck!
 
Steve,
Many thanks.
That sounds like a workable solution. I'm en route now but will get necessary materials once I get to a marina near Galveston.
I'm monitoring oil consumption and pick up by the diaper and it truly seems to be a weep only.
Jon
 
OK Jon,I went by me diesel shop this morning (which I shamelessly plugged with his business card) and Ronald gave me the low down on the CAV pump. The 4 and 6 cylinder pump is the same housing, and the top cover is the same on all of them. Pump 3 shows an end view where your gear would attach on a 4.236- driven by gearing in the front cover. Pump 4 is an example of a "Cover Kit" that Ronald sells. The o rings are 2 different covers- but he told me that any quality o ring you could purchase would work fine. Pump 5 is an over flashed pic of the data plate, but you may be able to see the bottom line of the tag reads PS61/850/6/2640. The important number here is the 6. It is the governor setting code. Pump 6 is the chart that shows how to use the code. On the unit in our picture we are in location 3 on the throttle shaft link and location 2 on the governor arm. If your spring were to come loose you will know where to reinstall it I added this information for Charles:)This may not help you now- but hopefully you can use it on your next reseal job.
 

Attachments

  • pump 1.jpg
    pump 1.jpg
    153.3 KB · Views: 165
  • pump 2.jpg
    pump 2.jpg
    145.6 KB · Views: 145
  • pump 3.jpg
    pump 3.jpg
    145.3 KB · Views: 110
  • pump 4.jpg
    pump 4.jpg
    155.8 KB · Views: 127
  • pump 5.jpg
    pump 5.jpg
    158.5 KB · Views: 137
  • pump 6.jpg
    pump 6.jpg
    149 KB · Views: 173
Closing the loop on my oil leak - the oil leak from the adaptor flange below the fuel injection pump was increasing, with the diapers getting soaked after 30 hours, so I decided to pull it apart and see what I had.I could not find an exploded view of my HT 6354 so didnt know if i was dealing with a paper face gasket or something else. Pulled off the injection pump(which doesnt look anything like Steve's pictures ) Made up a puller plate from an old Fortress fluke and when I got the adaptor out, it was fitted with 3" o-ring which was hard and out of round. Sourced and fitted an new ring, cleaned up the faces with brake cleaner and used Permatex ( formerly Loctite) anaerobic gasket, reassembled it, fitted and bled the pump - Bob's your Uncle -seems to be fixed
Jon
 

Latest posts

Back
Top Bottom