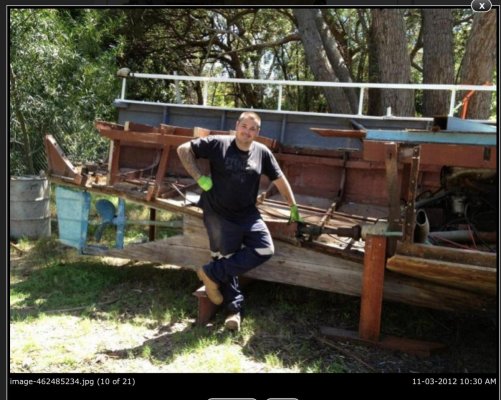
Hendo's Randall 35 Cray Boat complete rebuild, Perth, Western Australia

The friendliest place on the web for anyone who enjoys boating.
If you have answers, please help by responding to the unanswered posts.
When you put it in the water, take a crayon or magic marker. once you get the boat level, mark where the water actually sits. Haul it, let the hull dry, level the boat again on blocks, string a chalk line, snap it and begin painting the waterline about one inch or inch and a half above the crayon mark. Put it back into the water, load it up and see where the water mark is. You may have to adjust the water line with the boot top.
Try to be conservative. We dont want you sinking at the dock. LOL
 
Last edited:
Right so earthing the driveshaft. I was thinking of using a braided flat cable like this wrapped around the shaft and have the earth cable attached to one end. What’s your thoughts on this? Dumb idea?
IMG_0606.jpg
IMG_0607.jpg
IMG_0608.jpg
 
MATT - Just getting ready to shave aboard SOLSTICE! lol

 
MATT - Just getting ready to shave aboard SOLSTICE! lol


Ah ha, wife got fed up with you and threw you out of the house? That will motivate you to work faster. LOL
 
Right so earthing the driveshaft. I was thinking of using a braided flat cable like this wrapped around the shaft and have the earth cable attached to one end. What’s your thoughts on this? Dumb idea?
View attachment 75037
View attachment 75038
View attachment 75039

The AT has a metal arm under tension with a carbon or copper pad riding on the shaft. The arm is tied into the bonding circuit.
I cannot endorse that but, it seems to work.
I cannot remember how the Norhavn shaft was bonded.

Remember to put a zinc on your shaft too.
 
My shafts have a piece of spring steel (flat) with a brush on the end connected to the grounding system.
 
Carried on with the interior works. Did some routering and joinery work this afternoon and of course some sanding. The internal passage doors are now ready for primer and paint so took them downstairs to the painting department lol. Looks like it is almost time to bring the completed helm down to the boat so will do that next week. Very exciting times and I’m sure Flic is happy to get that thing out of the house haha.

IMG_0647.jpg
IMG_0648.jpg
IMG_0649.jpg
IMG_0650.jpg
IMG_0651.jpg
IMG_0652.jpg
IMG_0653.jpg
IMG_0654.jpg
 
Haha I’m getting in early. I spent most of my 30’s building this. I’m 40 this year and plan to enjoy using it.

You have We have all been following you for years soon after I joined TF, several months after you started this thread.

would love to be there for the launch!!!
 
What a change a few Thousand posts can make. She is looking Great. I’ve enjoyed the trip so far and look forward to your next update.
 

Attachments

  • 2E21C0AB-B2B3-4980-BD95-52C1CF6ECFE7.jpg
    2E21C0AB-B2B3-4980-BD95-52C1CF6ECFE7.jpg
    166.9 KB · Views: 58
Look like captain Morgan
IMG_0842.JPG
 
Captain Matt, has a ring too it
 
Well that’s another week done and another step closer to the boat finishing. This afternoon I cracked on and epoxy coated the fwd hatch reveals and the edges of the fwd hatches. Once that was setting up I built the kitchen cabinets for the kitchen. Pretty happy with the size. Not too big as to hinder or make things too tight but still pretty big for a boat of our size. Nice space next to it for a 220L upright fridge to go next to it with a TV on top. Will bring the helm next week and work out the helm seat/cupboard set up. Pretty happy with how it’s turning out.

IMG_0671.jpg
IMG_0672.jpg
IMG_0673.jpg
IMG_0674.jpg
IMG_0664.jpg
IMG_0665.jpg
IMG_0667.jpg
IMG_0668.jpg
IMG_0669.jpg
IMG_0670.jpg
 
I am not now nor have I ever been a carpenter, shipwright nor cabinet maker. In fact, I dont pay any of those on TV either. Permit me to make one observation. Remember you may need access to things between the back of the cabinets, without disassembling the boat. My Nordhavn was a prime example of 'hidden stuff'. The first owner put a 20KW generator in the aft starboard part to the ER. IF anything needed to be repaired outboard of that gen, it would have involved cutting a hole in the hull. There were no organized wire ways.... I cannot tell you how many 'extra wires' I pulled out over the years nor how many pounds of wire ties I pulled out. I think his mind set was, 'Let's add another wire tie to secure the bundle.', without removing the no longer needed wire ties.
On my AT, they used PVC (?) pipe as wire ways, neat and orderly.... fantastic. You may consider cutting panel openings in the back of the cabinets now for access to that mystical dark space between the cabinets and the hull.
ALSO, draw up the wire diagram and a separated piping diagram. Tag the wires at both ends so they can be identified. All those red, black, white, yellow and green wires all look a like. Document, document, document now, while it is easy. You are putting a herculean efforts in your rebuild. This boat will be around long after your 'final voyage' soooooo, make it easy on the next owner(s). Yea yea, we all know, such documentation may not 'follow' the boat beyond the next owner but, you tried. You might consider 2 copies, one for onboard and one at the house. That way, you wont forget and leave it at home. I hope you can draw better than I can. Let's just say, my drawings are rather "artistic" and even with a straight edge there seems to be a wiggle or two in my straight line. (SIGH) We wont go into my 'chicken scratching' labeling.
At one final 'observation'. Just because you have the boat leveled on the blocks does not mean the 'in the water' level will be the same. Dont ask me how I know, please.
NOW, I will go sit in the corner, shut up and continue to be amazed with your effort and skill.
 
Last edited:
I am not now nor have I ever been a carpenter, shipwright nor cabinet maker. In fact, I dont pay any of those on TV either. Permit me to make one observation. Remember you may need access to things between the back of the cabinets without disassembling the boat. My Nordhavn was a prime example of 'hidden stuff'. The first owner put a 20KW generator in the aft starboard part to the ER. IF anything needed to be repaired outboard of the gen, it would have involved cutting a hole in the hull. There were no organized wire ways.... I cannot tell you how many 'extra wires' I pulled out over the years not how many pounds of wire ties I pulled out.
On my AT, they used PVC (?) pipe as wire ways, neat and orderly.... fantastic. You may consider cutting panel openings in the back of the cabinets now for access to that space between the cabinet and the hull.
ALSO, draw up the wire diagram and a separated piping diagram. Tag the wires at both ends so they can be identified. All those red, black, white, yellow and green wires all look a like. Document, document, document now, while it is easy. You are putting a herculean efforts in your rebuild. This boat will be around long after your 'final voyage' soooooo, make it easy on the next owner(s). Yea yea, we all know, such documentation may not 'follow' the boat beyond the next owner but, you tried. You might consider 2 copies, one for onboard and one at the house. That way, you wont forget and leave it at home. I hope you can drawer better than I can. Let's just say, my drawings are rather "artistic".
At one final 'observation'. Just because you have the boat leveled on the blocks does not mean the 'in the water' level will be the same. Dont ask me how I know, please.


Thanks for your comment mate.

The only wires in that wall are the 240v wiring running through a pvc pipe to allow replacement.

My auto and marine electrician is drawing up a wiring plan ;-)

The level isn’t being used to check for level mate. It is only being used to ensure that it is running parallel with the floor

Good observation tho mate ;-)
 
Back
Top Bottom