Farrell Trawler Rebuild Project

The friendliest place on the web for anyone who enjoys boating.
If you have answers, please help by responding to the unanswered posts.
koliver, my engine tag says 41B, and yet it's definitely turbocharged and after cooled, which I thought for sure that makes it a TAMD41B. Any ideas?

View attachment 80187

I call mine TAMD41s, as they now power a shaft drive, though when I bought them, they were called AD41s, as they had powered a Commander 30, with outdrives. My mechanic (Volvo guy) explained the terminology that way. Perhaps yours came from an outdrive boat too?

Have you the history on the exhaust elbow? I replaced both of mine a couple of years ago, at 6000 hours and 36 years. One was definitely shot. The other likely not far behind.
 
PNW, curious what sort of materials you are considering for rebuilding the house/cabin?
 
Love the questions! Curiosity is a virtue!

toocoys, I will be changing the layout to a raised pilot house, hopefully looking like this North Pacific 28.
NP28 side view.jpeg

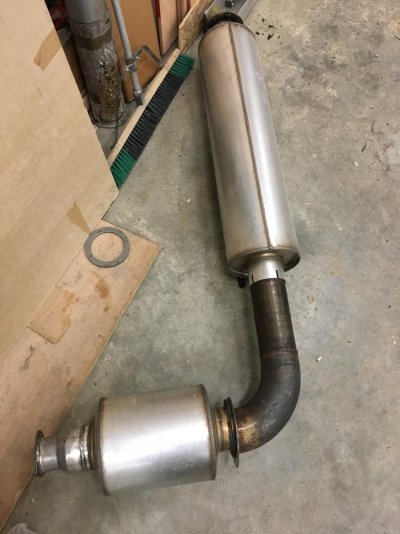
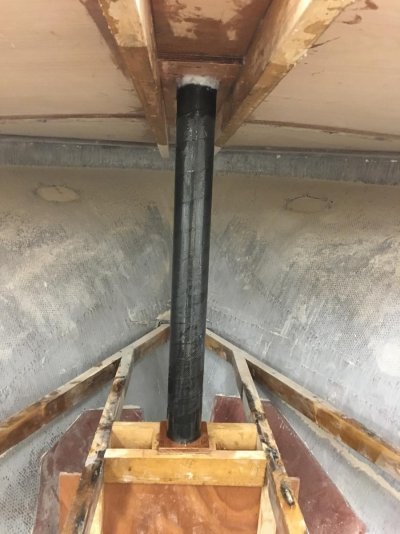
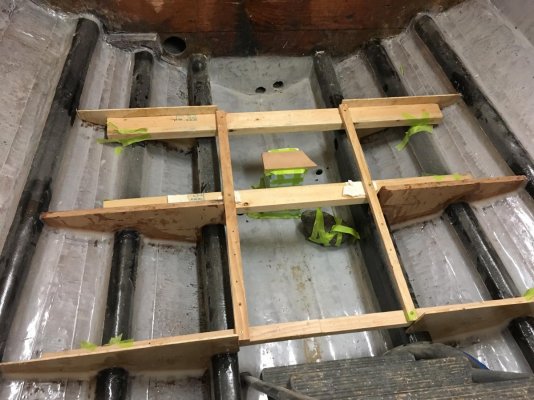
koliver, i'm most likely repowered, so your theory has merit. My exhaust was dry stack, so my exhaust elbow isn't supplied with raw water. I am re-using the elbow (stainless). Mock up pictured. I considered a wet exhaust but costs and advice from a boatwright was against it. For fishing, a dry stack is better than a wet exhaust for keeping low speed fumes away from the back of the boat.
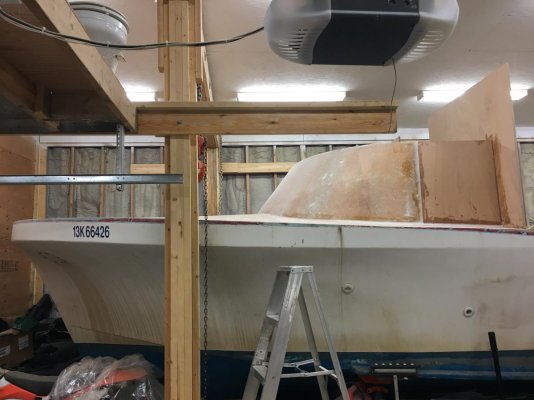
IMG_0997.jpg

GoneFarrell, materials will be Joubert branded Okume marineply, filet with fumed silica, carbon fibre tape, glass fibre tape, and System Three SilverTip epoxy. Also will be using some Innegra/Basalt hybrid fabric.

One thing I hadn't mentioned yet is that there will be no/zero/ziltch permanent metal fasteners used in construction.
 
Last edited:
This is what ~$1000CAD of carbon fibre looks like. Engine beams fully reinforced. No more flex. In this picture I'm putting more fibreglass tape on either side of, and overlapping with the carbon fibre stringers. In hindsight, this was probably unnecessary.

IMG_0363.jpg

I repacked the stuffing box, and changed the fluid in the VelvetDrive. Helms now removed. My steam engineer friend says new copper pipe for the hydraulics as old pipe becomes brittle and thus difficult to work with.
 
One thing to watch for and try to avoid is structural creep which leads to a heavy boat. You said you glassed the sides of your carbon fiber stringers unnecessarily.

That and a dozen other things is what happened when I was building a 14' Sailfish from plans and marine plywood many, many years ago as a teenager. I put gussets in that weren't on the plans, twice as many fastners (yes I used brass nails), made the keel twice as thick as the plans, etc. The boat ended up stout, but heavy!!

David
 
Whew! You really can't get much deeper into the disassembly portion of your rehab, I guess! The projected plans sure do make for a nice looking finished product. Having a building available makes a huge difference. We spend an ungainly amount of time covering and covering our boat each time we work on it, and that's on days when we can work on it. Between the extreme heat and heavy rains we've been having, our work opportunity's have been limited. You're very fortunate!

Boy that's the truth! A good work spot out of the weather, the bugs and earshot of neighbors makes any job more enjoyable... This is a nice project!
 
Update:

IMG_1274.jpg

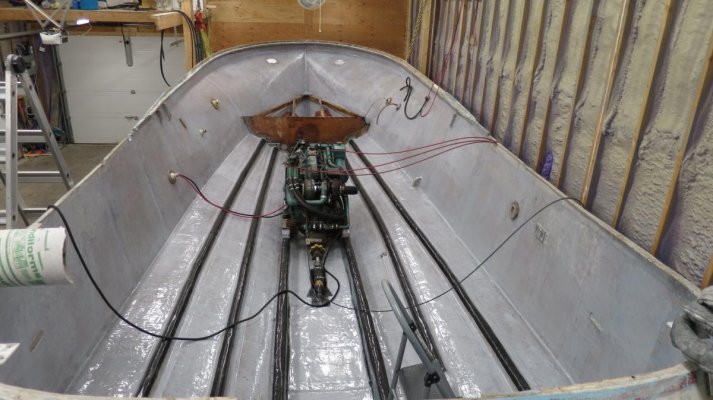
Epoxy coating on the inside. Quite possibly an unnecessary step?

But aesthetically it helps it look/feel like new. At the very least it should kill any remaining "old boat smell". hahaha...... :ermm:

The blank canvas is ready.

The real fun is about to begin.....:dance:
 
I love gut and build jobs. Gives me the itches think about the fiberglass and epoxy. No matter. 3M makes Tyvek jumpsuits. :thumb:
 
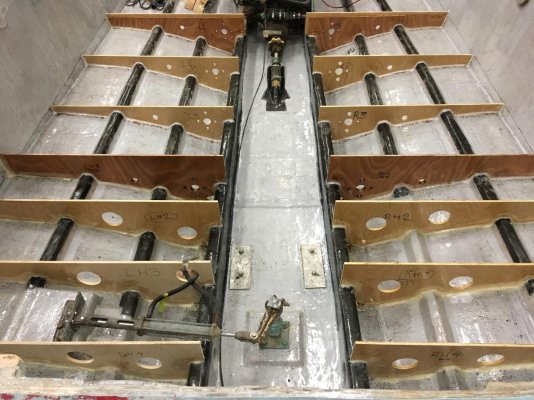
setting up supports to hold templates for floor timbers
IMG_0788.jpg

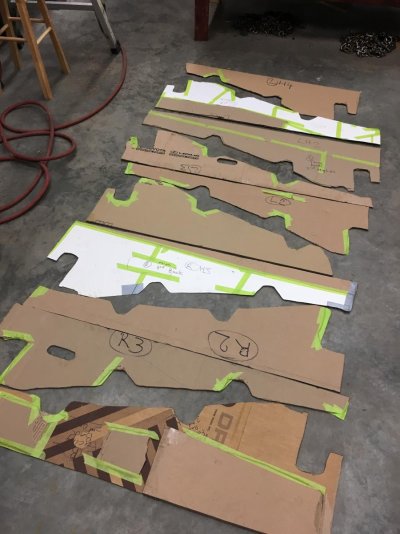
templates - Tried OSB first, but then used cardboard
IMG_0590.jpg

lining them up to maximize use of a sheet of plywood
IMG_0787.jpg

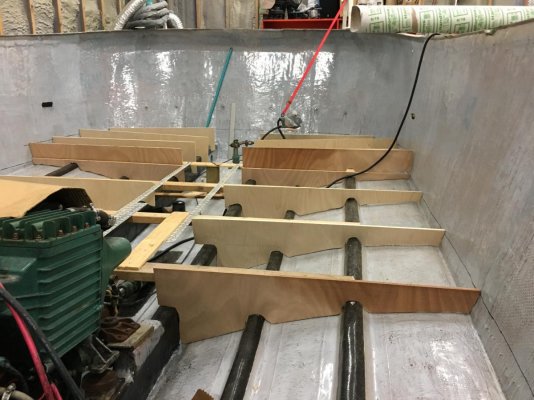
"floor timbers"
IMG_0808.jpg
 
Good work. I assume you will brace between them and use a center hatch cover to access the mechanicals.
 
Epoxy filleted into place. All bare wood is getting epoxied. My filleting skills will get better....

The holes are just to look cool.... :lol:
IMG_0855.jpg
 
I'm putting insulation in only because for under the floor it's my only chance to do so, and its not a big effort/cost. I'm not sure if I actually would insulate the rest of the boat.
IMG_0860.jpg

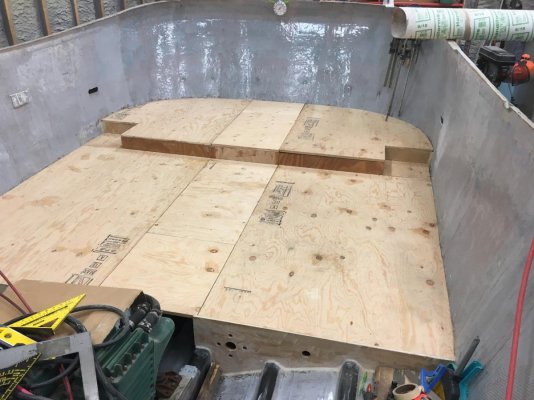
After reviewing how much marine plywood I ordered from WestWind, it was clear that I didn't have enough, and I cheaped out and bought "normal" (not marine) plywood for the main cabin and back deck floors. A bit of a regret maybe (oh, the shame!), but I justified to myself that it wasn't that big of a deal as true (and nice looking) marine plywood isn't really needed for these two applications. By buying local plywood, I could progress further before needing another order (and costly shipping), and would be able to better assess my needs as I would be further along....

Cardboard templating in progress!
IMG_0865.jpg

I have deck.
IMG_0867.jpg

Hatches. Simple. Removable. Easy access.
IMG_0895.jpg

Gunnel tanks
IMG_0606.jpg
 
Hi there,

Are you going to keep it in the water over winter when you're finished, or are you going to haul it back to your shed for the winters?

I ask because when winter temperatures drop to -15C or so in Kitimat, the warmth of the Pacific Ocean compared to the air radiates quite a bit of heat through the hull into the engine room. So much so that the PO of our boat said he never heated the engine room in winter...I thought that was way crazy, so have put heat down there, just in case.

It seems the areas which radiate the most cold are hull sides above the water, and decks.

Nice to have a blank slate where you can do what you want!!

Wonder how they insulate boats in Iceland or Norway...
 
Last edited:
Hi MurrayM.

Good question. I'm thinking I would get a trailer and haul it back every winter. The issue is that the boat is big enough that it may not be a straightforward process of just backing the trailer into the workshop. Also, a trailer for this size boat isn't cheap - not sure if this is the direction I want to go, but we shall see.

My crystal ball calculations are starting to show that I may need to do strange things to get the completed boat out of the workshop. But being able to fuss over a boat in the winter whilst in a warm dry environment is tempting. :smitten:


I have had this boat (prior to this project) moored over the winter (at Port Edward), without a heater (and no shore power either!) . If I did moor it over the winter now, I'd certainly consider some heat/dehumidification.
 
front deck

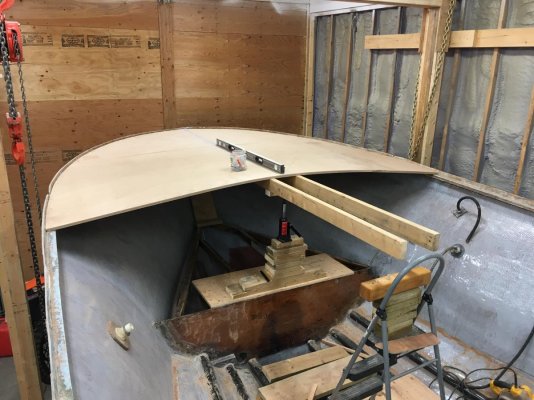
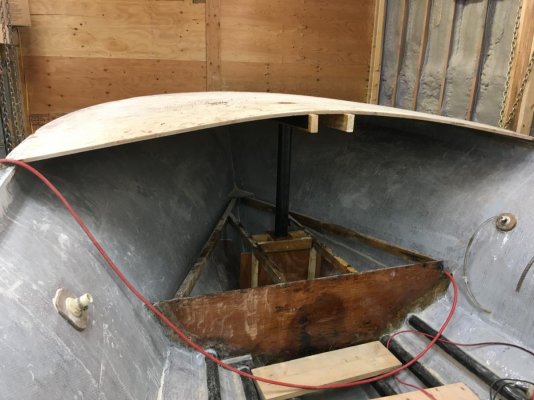
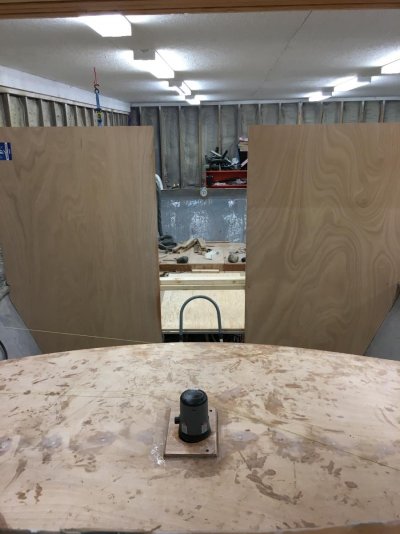
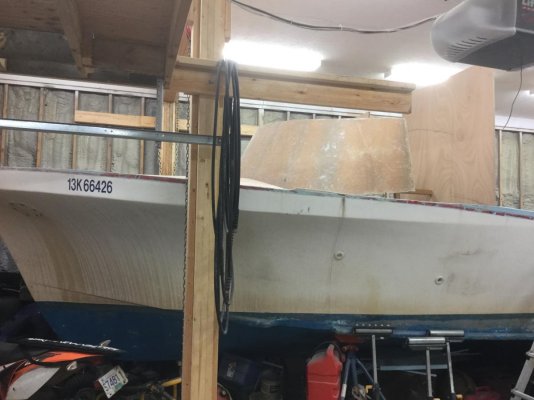
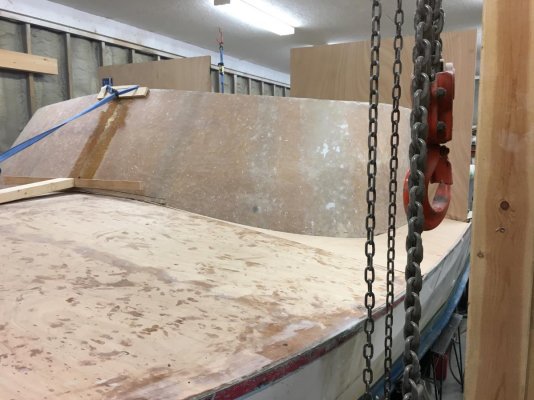
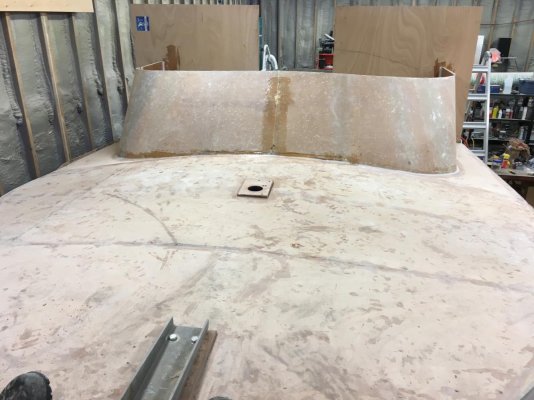
The original deck was flat, and poorly secured by the center post. The deck flexed/wiggled when walked on, and the flexing prevented a watertight seal by the centre support (anchor line) post.

Arching the deck gives better rigidity, strength, provides more headroom, and of course, curves look boaty/sexy.
IMG_0927.jpg

IMG_0961.jpg

IMG_0733.jpg

IMG_0960.jpg

There was still some very slight deck movement (rotational on boat long axis), so I put additional bracing. More support will be provided by additional work progress.
IMG_0650.jpg
 
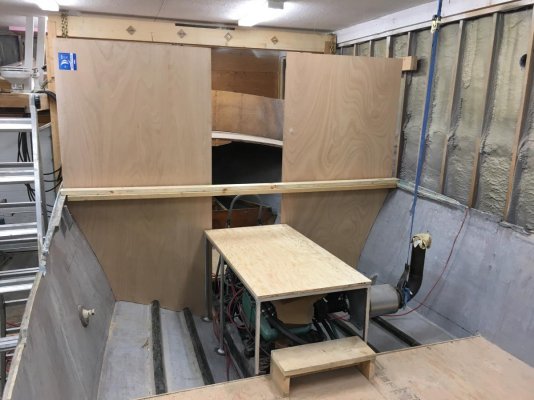
Aluminum frame for the engine. This will allow me to work around it (and walk over it) and might be a good thing to attach sound damping to as well.
IMG_0649.jpg

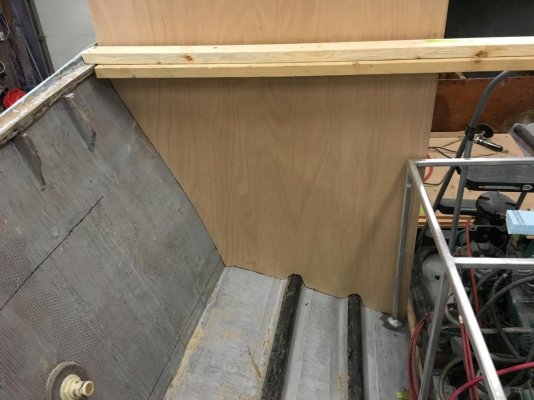
Template of the side of the boat for the front bulkhead.
IMG_1008.jpg

Fitting
IMG_1004.jpg

IMG_1002.jpg
 
update #x

This fibreglass piece was recycled/repurposed from the old version of the boat, and now is the front of the fore cabin. Still not quite in the right place, but getting there.....
IMG_0686.jpg

What you can't see is a frame holding this in place until it gets epoxied into place.
IMG_1029.jpg
 
Anchor and windlass mounting pads.

In hindsight, these could and should have gone on after the foredeck had been glassed.

IMG_0667.jpg
 
Pretty happy with how this is coming together. Not enough crown on the peak tho. I'll add something to have more curve for the roof....
IMG_1181.jpg

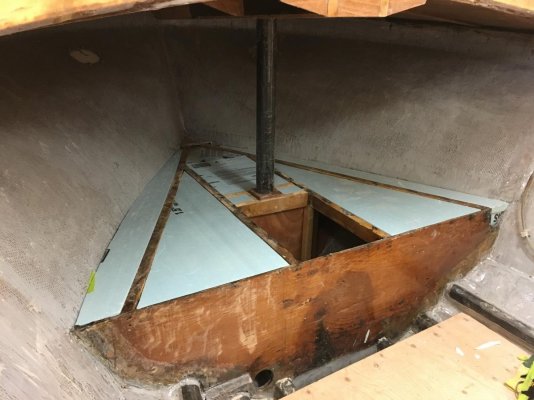
This is some insulation which I can only get to at this point, so there it is.
IMG_1112.jpg

Covering it with cabinet maker pine plywood. Weak, but light. Aft of the post is a hatch to access anchor rope and a possible future bow thruster.
IMG_1117.jpg

Front cabin floor timbers....
IMG_1121.jpg

...are coming along nicely....
IMG_1184.jpg

...and getting insulation.....
IMG_1186.jpg

And getting a nice Joubert Okume marine ply floor. The x-wise sticks are "clamps" to hold the floor hatch rails in place while the epoxy cures.
IMG_1187.jpg
 
Greetings,
Mr. PNW. Nicely done. The best is you're working with a clean slate and you don't have to work around other people's ideas/"improvements". My ONLY concern, at this point, is that you may not be allowing for enough ventilation in those sub-deck areas. Any pockets of damp stagnant air will be prime breeding spots for mold and mildew and if sealed, will be impossible to clean. Just a thought...
Good idea for the "clamps".
 
PNW,
Great effort so far, keep it up! I hate to see you lose valuable storage area’s with the foam and concur with Mr. RTF about ventilation.
Gonna make some popcorn and another cocktail, this series is getting good!
 
Hey RT and Crusty, thanks for your interest and comments. The positive feedback on my work so far helps further motivate me!

The concern of adequate ventilation is noted, and I will add some form of venting for the enclosed spaces. I've read that this is an often overlooked subject, particularly with engine room spaces, as engines need air to combust, and often engines can be starving for air.
 

Latest posts

Back
Top Bottom