The journey from rough to perfect...

The friendliest place on the web for anyone who enjoys boating.
If you have answers, please help by responding to the unanswered posts.

FryQ

Veteran Member
Joined
Sep 10, 2017
Messages
33
Location
Beautiful San Diego California
Vessel Name
Rendezvous
Vessel Make
1976 37' Californian Aft Cabin
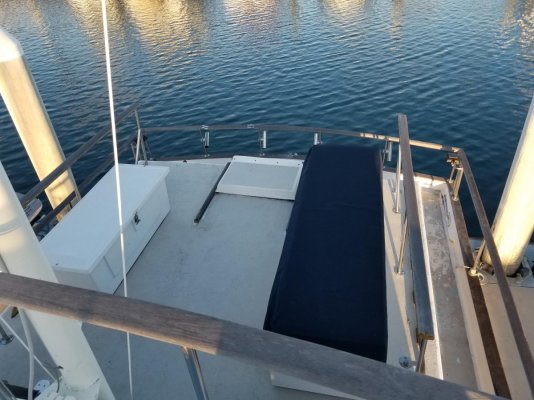
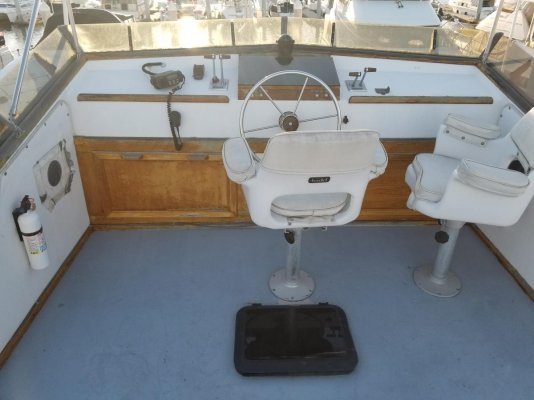
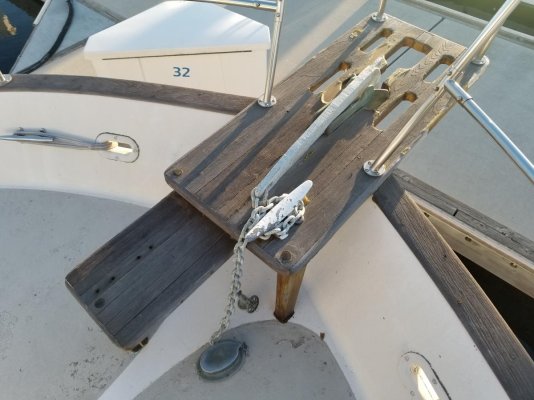
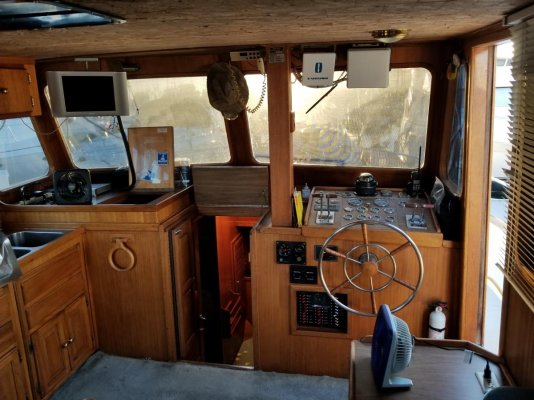
So, in order to prevent me from posting a thousand and one posts, and to better be able to track the massive quantity of work needed to restore this rough patch of water I've decide to call home, I have decided to use this thread as a trestle board of sorts.

The errata:
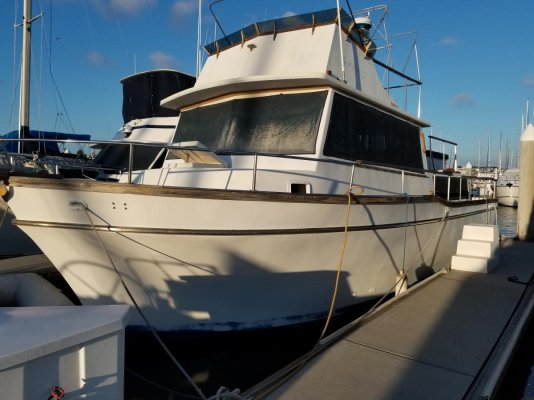
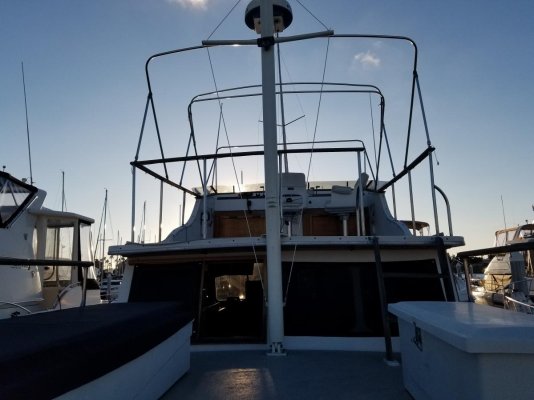
Vessel: Rendezvous ( a petition to Davey Jones, for the official changing of names is in route)

Make: 1976 Marshall 37 Aft Cabin Offshore Cruiser (aka Californian)

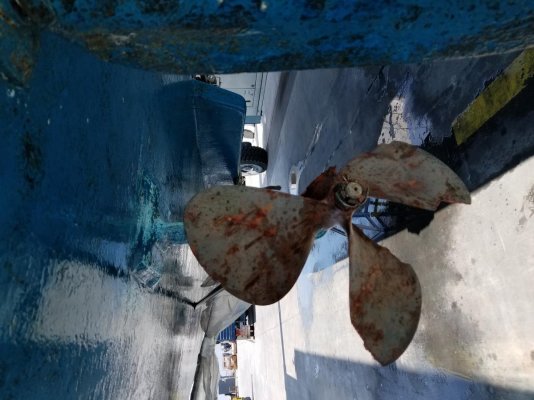
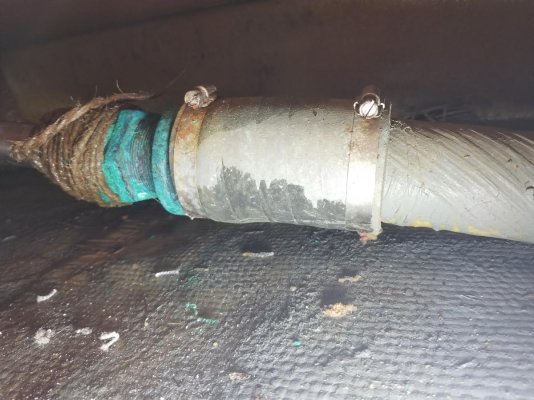
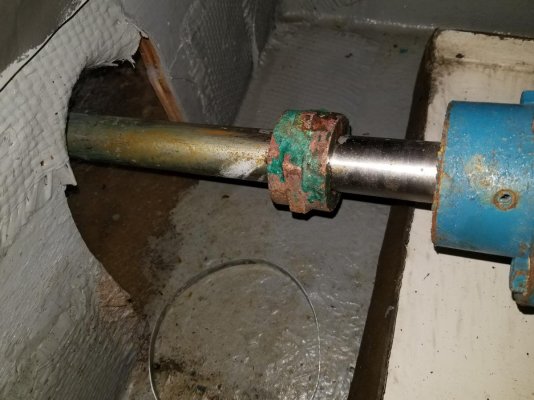
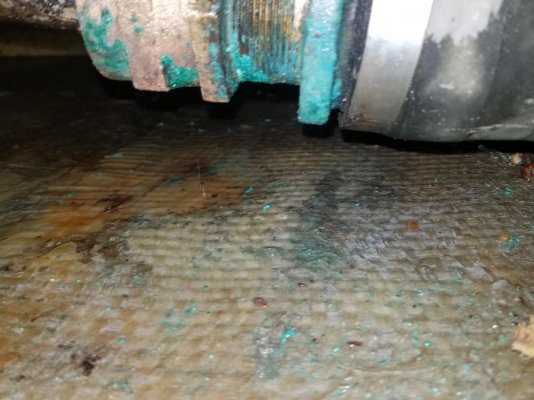
Propulsion: twin Perkins 4.236M w/ Borg Warner Velvet Drive Transmissions (build numbers 10-13-000-003 & -004; with 2.03:1 ratios), 1.333in drive shaft, and FUBAR propellers.

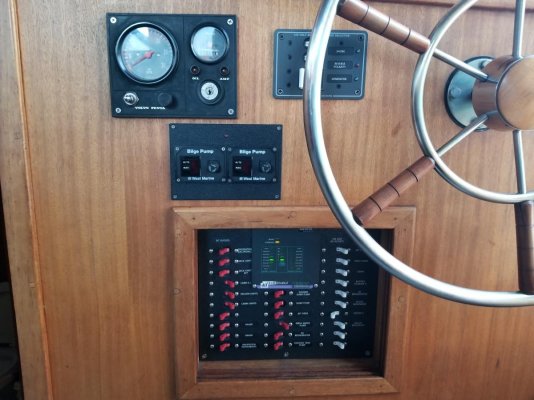
Power: Volvo-Penta MD7A 2-cylinder diesel, unknown generator (No label)

*if there are any specific items that come up in discussion (ie, what kind of .....) then I will update here as well.
 
Photos

Exterior (in water):
 

Attachments

  • 20170913_182129.jpg
    20170913_182129.jpg
    115.9 KB · Views: 208
  • 20170913_182148.jpg
    20170913_182148.jpg
    132.8 KB · Views: 207
  • 20170913_182209.jpg
    20170913_182209.jpg
    121.4 KB · Views: 200
  • 20170913_182244.jpg
    20170913_182244.jpg
    92.3 KB · Views: 206
  • 20170913_182254.jpg
    20170913_182254.jpg
    99 KB · Views: 210
  • 20170913_182259.jpg
    20170913_182259.jpg
    100.6 KB · Views: 202
  • 20170913_182327.jpg
    20170913_182327.jpg
    144.4 KB · Views: 204
  • 20170913_182335.jpg
    20170913_182335.jpg
    101.7 KB · Views: 209
  • 20170913_182356.jpg
    20170913_182356.jpg
    127.4 KB · Views: 202
  • 20170913_182406.jpg
    20170913_182406.jpg
    116.5 KB · Views: 209
Photos

Interior (please excuse the clutter) :
 

Attachments

  • 20170913_182757.jpg
    20170913_182757.jpg
    144.3 KB · Views: 198
  • 20170913_182811.jpg
    20170913_182811.jpg
    126.9 KB · Views: 195
  • 20170913_182843.jpg
    20170913_182843.jpg
    125.9 KB · Views: 202
  • 20170913_182831.jpg
    20170913_182831.jpg
    123.3 KB · Views: 207
  • 20170913_182858.jpg
    20170913_182858.jpg
    68.6 KB · Views: 208
  • 20170913_182928.jpg
    20170913_182928.jpg
    127.3 KB · Views: 196
  • 20170913_182934.jpg
    20170913_182934.jpg
    112.8 KB · Views: 200
  • 20170913_183208.jpg
    20170913_183208.jpg
    83.1 KB · Views: 214
  • 20170913_183230.jpg
    20170913_183230.jpg
    110.3 KB · Views: 194
  • 20170913_183308.jpg
    20170913_183308.jpg
    74.3 KB · Views: 202
Photos

Misc. Equipments:
 

Attachments

  • 20170913_183003.jpg
    20170913_183003.jpg
    177.4 KB · Views: 167
  • 20170913_182953.jpg
    20170913_182953.jpg
    129.3 KB · Views: 168
  • 20170913_182941.jpg
    20170913_182941.jpg
    197.8 KB · Views: 169
13 September

So, in an effort to "reduce" the amount of water POURING into the bilge...i decided took the opportunity to clean up the port shaft seal a bot and apply a little marlin. It didn't completely stop the flow of water, but it DID reduce it by 3/4ish.

Things to order: PSS dripless shaft seals and a new shafts (hmmm...wonder if I can get these repaired and kept as spares?).

Also, talked to a few prop people and the most knowledgeable sounding was the Michigan Wheel Propeller representative:

"Using 85 HP @ 2500 RPM with a 2.03:1 gear and an 8.5 knot vessel speed I'm coming out with a 19x16 4-blade DQX with a medium cup made of Bronze material. This should give you your best performance and get you right up to 2500 RPM @ WOT. "


*side note: looks like a little patch job under that there seal...didnt notice until looking at the photo. Le sigh.*
 

Attachments

  • 20170913_172153.jpg
    20170913_172153.jpg
    184.4 KB · Views: 184
  • 20170913_172910.jpg
    20170913_172910.jpg
    147.8 KB · Views: 178
  • 20170913_174726.jpg
    20170913_174726.jpg
    156.5 KB · Views: 173
  • 15053539373141252779431.jpg
    15053539373141252779431.jpg
    181.9 KB · Views: 185
  • 20170906_104556.jpg
    20170906_104556.jpg
    127.3 KB · Views: 186
  • 20170906_104548.jpg
    20170906_104548.jpg
    149.6 KB · Views: 192
Looks like great fun!
 
Greetings FryQ, you have a lot of company on this path!
Best of luck on your project.
 
Fry,
Yup, for sure you found a hole to throw your $$ into! Me too.

No worries, you will be proud of it when accomplished and wonder openly why you did it and if you would ever do it again. Of course you'd do it again, just at the next level.

Like my best personal assistant said, "we take our lessons, sometimes over and over until we get the lesson, and then we move on to the next lesson."
 
an inviting offer...

"we take our lessons, sometimes over and over until we get the lesson, and then we move on to the next lesson."

I like that! lol...

So, had a chat with the gentleman that performed my survey, and the interest is rather high enough in the cause of the previous owners failed propellers that he has found a metallurgist/chemical analyst to take a look at them (once I get the new ones installed of course). Furthermore, he has offered to do an electrical analysis to verify any stray current issue and how it may have played a role in the prop failure. If the information is juicy enough, he is wanting to write an article on them (Im going to postulate that it will be a "this is why you should/shouldn't..." type of article). :whistling:

Didn't get much "work" done, but did manage to install all the very worn and shrunken (i'm assuming shrinkage and not poor manufacturing) rail skirting with the help of a great friend, but more importantly... got to have our first beer on board! woohoo! talk about a relaxing mile-stone...lol

(pictures forthcoming)
 
Yesterday's assistant with the Ill fitting rail skirtting.
 

Attachments

  • 20170915_220049.jpg
    20170915_220049.jpg
    120.5 KB · Views: 173
  • 20170915_220123.jpg
    20170915_220123.jpg
    116.9 KB · Views: 187
Looks like the props ran over a rock and came to a sudden and complete stop. Sheared a blade off each prop. Also, no packing on either shaft. You got a boatload of projects ahead of you. Hope you got the boat really cheap. [emoji854]
 
I have so much Sunbrella covering everything, I finally bought a Sailrite LS-1 sewing machine.

The final straw for me Fry, was when a canvas shop quoted me $1300 to make a new windshield covering. A single piece 14' long and 39" wide which covers both windshields and wraps around to cover the first window on each side.

My cost to make it $650 for the LS-1 machine, 5 yards (5 yd X 60 inch) exterior grade Sunbrella, 2 yards exterior Naugahyde, thread, 10 snaps $125 and my time. The materials are relatively cheap and compared to what a shop charges, an incredible savings.

Sailrite's website has a series of online "how to" demonstrations operating the machine, sewing materials and technique, it's very helpful. I started out using the old canvas as a rough template until I figured out how it was done.

Plus the enjoyment of learning another skill.

Best investment ever :thumb:

PS: Those props may of had some electrolysis, can't tell from the pics. But those bent and twisted blades scream contact with a rock bottom.
 
Last edited:
That was our initial assessment as well, but after looking at them further, it appears they sheared under load due to structural failure (the yard and the surveyor believe that so much material had leached out of them that they were compromised). They had zero metallic sound when tapped with a ball peen (like wood blocks) and the material at sight of the break was fresh exposed with zero oxidization. Also, there was no sign of bottoming out on the rudder's which sit just a bit lower than the screws...(still, always a possibility)


Edelweiss...I used to have a beautiful old singer capable of sewing heavy canvas and leather, but I gifted it a la madre de mi novia . I used it to make my own camping gear, car covers, hem my jeans, and sew all of my uniforms (and a good many of my friends), one of the best skills I ever learned was using a sewing machine!


Mcgillicuddy... I would say I got it for a song, and the more and more I learn about these boats, the better and better I feel about the deal (or the more and more guilty I feel, depending on the day). :whistling:
 
Ahhhh..tomar moma' para un paseo en barco. LoL
 
(Please don't sink...please don't sink...)

Finally received my gland seal packing from Amazon and time off work! Time to ease the burden on my poor bilge pumps. I must give thanks to Edelweis for the recommendation to just do them while waterborne.
 

Attachments

  • 20170923_112819.jpg
    20170923_112819.jpg
    153.9 KB · Views: 140
  • 20170923_113944.jpg
    20170923_113944.jpg
    141.4 KB · Views: 145
  • 20170923_114103.jpg
    20170923_114103.jpg
    126.2 KB · Views: 131
  • 20170923_114406.jpg
    20170923_114406.jpg
    101.6 KB · Views: 135
  • 20170923_114438.jpg
    20170923_114438.jpg
    147 KB · Views: 136
  • 20170923_120038.jpg
    20170923_120038.jpg
    138.1 KB · Views: 145
  • 20170923_110844.jpg
    20170923_110844.jpg
    185.3 KB · Views: 134
  • 20170923_115511.jpg
    20170923_115511.jpg
    118.6 KB · Views: 137
The port shaft Went from a steady 5 cups a minute, to 40 drops a minute with the marlin, and now its an even 50 drops a minute with the new packing. I don't plan on spinning shafts until new propellers are on, and will adjust the rate more at that time. (I still haven't received the new hose clamps...but that can wait)

Okay, beer break over...time for the other three seals!
 
The journey from rough to perfect...

Just remember, the journey from rough to working, safe and acceptable to the majority is a relatively short road but that extra journey to perfect can take a lot longer and cost HUGE in time and dollars.

Seen many boats overcapitalised and rarely if ever used as owners fell for the perfection trap.

Have fun :)
 
There is a poster on the forum with the best of sign off's: "I hope my wife doesn't sell my toys for what I told her they cost":banghead: 
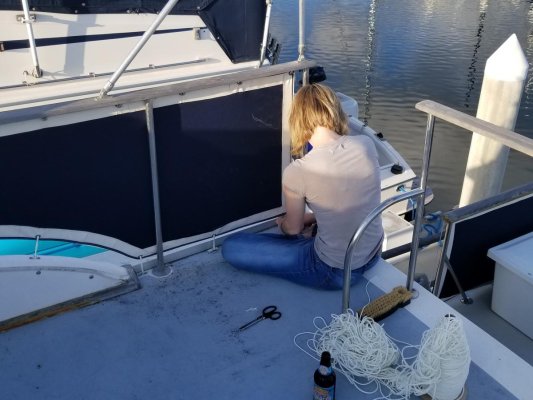
Or some such. Bear that in mind as your travel along with the rebuild, then on the other hand, she may not know of the "Good Helper":blush: pictured. Either way.:lol::hide:
 
With the boat out of the water, you might want to check the entire drive system. My experience repairing bigger boats with a similar accident usually revealed bends, twists and fractures in the shafting. Keys in couplings can become loose and the strut could have been forced out of alignment. Even the engines could have moved on the beds.
Having the shafting checked and the alignments verified could save a lot of trouble later.
 
Haven't hauled her out for the propellers yet, but when I do, checking the alignment is on the list of must does.

Lucky for me I've already had the experience of a spouse that is not understanding (cars instead of boats) ...and since I plan on living aboard this vessel until I upgrade and gift this to my son in a few years, the journey is less about the boat and more about myself. So far the current GF is understanding even if she hasn't really experienced it yet (hi babe! Yes I'm talking about you, because I know you're reading this!).
 
Just remember, the journey from rough to working, safe and acceptable to the majority is a relatively short road but that extra journey to perfect can take a lot longer and cost HUGE in time and dollars.

Seen many boats overcapitalised and rarely if ever used as owners fell for the perfection trap.

Have fun :)

I'd say, regarding boat owner categories: :dance:

- Less than 20% of TF subscribers fall into the perfection trap.
- Maybe another 25% do the near perfect dance.
- 10% play the must look damn good game.
- 15% work under the premise of use it or loose it.
- 20% say if it runs... good enough.
- 10% think maybe I'll actually get some time aboard it some day.

I/we occasionally fall into portions of at least three of those categories; usually depending on family and personal and business needs for the year as well as the season at hand. :D
 
Haven't hauled her out for the propellers yet, but when I do, checking the alignment is on the list of must does.

Lucky for me I've already had the experience of a spouse that is not understanding

Yeah, me too and I had the boat years before I met her. My wife told me, "It's either me or the #@$% boat!":mad:

Needless to say, I really love my boat. :hide:

PS: Thanks, but if you sink your boat while change the packing. . . . I know N-o-t-h-i-n-g!
 
Boat didn't sink...lol

So, late photos from this weekend. Replaced the stbd rudder packing and happened to discover that my FWD and AFT bilge pumps are labeled incorrectly, bit I guess it doesn't matter since they are physically right next to each other!

Is this a common thing?? On my 11m RIBs the 3 bilge pumps are actually located in the three separate bilge compartments (Not that this vessel is watertight subdivided AT ALL!)
 

Attachments

  • 20170923_125833.jpg
    20170923_125833.jpg
    129.6 KB · Views: 128
  • 20170923_132337.jpg
    20170923_132337.jpg
    120.9 KB · Views: 132
  • 20170923_132505.jpg
    20170923_132505.jpg
    131.7 KB · Views: 121
  • 20170923_164404.jpg
    20170923_164404.jpg
    141.5 KB · Views: 138
  • 20170923_164425.jpg
    20170923_164425.jpg
    174.1 KB · Views: 146
Everything drains to and accumulates in the bow as it's the lowest point in the boat hull.

I have two independent pumps in the bow bilge compartment and a third pump under the bilge plate just inside the engine room door. To my knowledge, the third pump has never run, other that testing it.

If it does come on, either the two bow pumps have failed or you have a real serious leak and need to abandon ship :blush:
 
I have 2 up front under 2 of the 3 the floor hatches fwd of the ER door. No third pump, but the two I have get no use either except for testing. My PSS logs keep the bilge bone dry. (knock on teak!)
 
I was looking at your pics of your propeller shafts at the packing, the close up. It looks like a lot of pitting, and with the looks of the props I would want the shafts checked out. I just read through here quickly you may of already covered it.
 
I wish I would have gotten a photo of the packing seating area before I put the rag on it, but I was rushing... there was no actual pitting on the seating area, and looking closely at the area of the shaft with all the corrosion it appears that a tool (vice grips most likely) was used to spin the shaft? Or hold it in place ? Because all the corrosion/pitting is uniform and looks similar to what I've seen on valve stems in steam plants. None of the pitting exceeds 1.5mm in depth. It meets requirements for continued use according to all my NSTMs. Now I just need to verify straightened (stbd shaft will probably be the death of me...seriously hard to access)
 
looking closely at the area of the shaft with all the corrosion it appears that a tool (vice grips most likely) was used to spin the shaft? Or hold it in place ? Because all the corrosion/pitting is uniform and looks similar to what I've seen on valve stems in steam plants. None of the pitting exceeds 1.5mm in depth.)

I thought it looked like an attempt to lock the shaft with pipe wrench or vise grips. Not everybody knows that with twin Velvet Drives, you don't have to chain or lock the shaft on the failed engine to run on one good engine.

But usually they lock the shaft in the engine room just before the coupling and the shaft will be all galled up like that if it's not done right.

Those 1 3/8" shafts are surprisingly short though with just the one cutlass bearing. Probably won't break the bank to replace one if it's bent or twisted.
 
Finally arrived!

As much as I love cars and car parts, and that feeling you get when you receive a new *insert part*...

This...this somehow seems more joyful!

New propellers! Woohoo!


(Now where did those diver's go...?)
 

Attachments

  • 20171003_195537.jpg
    20171003_195537.jpg
    133.3 KB · Views: 109
  • 20171003_195608.jpg
    20171003_195608.jpg
    95.8 KB · Views: 108
  • 20171003_195602.jpg
    20171003_195602.jpg
    98.3 KB · Views: 106
Back
Top Bottom