improving and maintaining Albin 33

The friendliest place on the web for anyone who enjoys boating.
If you have answers, please help by responding to the unanswered posts.
Greetings,
Mr. s. There is a very simple reason the USA does not use the metric system. They have to keep up with the other two countries who still use the "other" system-Myanmar and Libya. (1mm=.040")

Regarding the "funny talk". Well, my friend, you'll just have to learn to "listen funny."

emin.gif
 
Just found out 1/8 inch is 3.17 MM
why do you use that oddbal meassurement system and talk funny.. makes it al so hard for me:rofl::lol:

I think it's because Obama urged the kids to learn science, but never did his own homework for 8 years.
 
due to bad weather, I have made no further progress with the masthump.
because there is still plenty to do I continued making ventilation in the porthole.
First I made a cardboard template. Then I sawed a piece of plexiglas. I had to thicken it at thebottom so I could use the existing wing nuts.
after I was sure it fitted wel, I drilled holes in the plexiglass. Finally I put a trimmed down grid on the inside and a stock grit on te outside to prevent rain comming in.
after testing with the old dutch test method (throw a bucket of water against it) found out that i had to use foamtape for a waterproof seal around the edge of the porthole.

going to see how it holds up after a few day's. maybe i make some more
 

Attachments

  • 20160404_183740.jpg
    20160404_183740.jpg
    93.5 KB · Views: 198
  • 20160404_183744.jpg
    20160404_183744.jpg
    121.5 KB · Views: 192
  • 20160404_203734.jpg
    20160404_203734.jpg
    63.5 KB · Views: 197
  • 20160405_180744.jpg
    20160405_180744.jpg
    50.7 KB · Views: 199
  • 20160405_172104.jpg
    20160405_172104.jpg
    80.6 KB · Views: 195
  • 20160405_180805.jpg
    20160405_180805.jpg
    52.6 KB · Views: 207
  • 20160406_181201.jpg
    20160406_181201.jpg
    43.7 KB · Views: 201
it has been a while since I've posted something.
after a lot of rain, the repairs i have made to the masthump are working out. dit not even have seen a drop of water at the ceiling.:dance: will post some pictures of the end result soon.

so up to the next task: electics, 12 volt system.
for starters i was planning to replace the batteries. When I pulled out the old batteries I wanted to check the cables. due to the complete chaos i had to call a electrician. He checked the cables and told me it was good, but very complex. when I asked him to look at the control panel/switchboard he started to laugh and I thought I heard him pray to god a little :socool:

after I asked him if it looked like spaghetti or a bird's nest, he answered: spaghetti sir. because in a bird's nest there is at least some structure!!
He gave me some advice for batteries and advice to clean the controlepanel/switchboard.
have bought 3x 200ah lucas batteries and placed them. started the cleanup of all unnecessary cables and then I began to understand some things in the chaos. I found out how the previous owner had made some circuits (and which now were not properly connected anymore) after remaking some circuits, things such as fuel gauges, refrigerator, several lamps etc. etc. suddenly starting to work when you press the button. finally I put in a new battery charger (victron IP22. 12/30) and a batteriemonitor (victron bmv 700)
 
some before pictures:eek:
 

Attachments

  • P1010024.jpg
    P1010024.jpg
    195.4 KB · Views: 200
  • P1010025.jpg
    P1010025.jpg
    196 KB · Views: 206
  • P1010026.jpg
    P1010026.jpg
    162.4 KB · Views: 206
after a cleanup and instaling victron parts it look like this
 

Attachments

  • P6021183.jpg
    P6021183.jpg
    120.6 KB · Views: 186
  • P6021187.jpg
    P6021187.jpg
    100.7 KB · Views: 212
  • P6071191.jpg
    P6071191.jpg
    114.6 KB · Views: 204
  • P6031190.jpg
    P6031190.jpg
    110.1 KB · Views: 202
After much thought, I decided that I was going to remove the back to back seats at the flybridge.
I started removing the teak trim on the inside and found out that the flybridge was hovering 2 cm above the deck and hold togetter by glue on the salon roof. In my opinion it must be properly secured So before I started I had an additional task

I was also afraid that the walls would be very unstable without the solidity of the seats, therefore, I first thought yet again before I started sawing.
finally I took the gamble and started with the first cut.

afterwards the walls are very stable without the SB seat, but to be sure i will strengthen them anyways by adding trusses.
 
Last edited:
which walls do you think would be unstable?

I removed my FB seats 5 years ago when I pulled my real decks up.
 
After cutting the starboard seats I had some good space to smooth out the gap with epoxy. later on i will reinforce it with glass fiber.

I will try to fit the short side of the seat into the sawn hole in de flybridge wall.
 

Attachments

  • 20160927_180716.jpg
    20160927_180716.jpg
    68.6 KB · Views: 139
  • 20160927_180730.jpg
    20160927_180730.jpg
    61.9 KB · Views: 145
  • 20160927_185510.jpg
    20160927_185510.jpg
    79.6 KB · Views: 136
  • 20160927_185618.jpg
    20160927_185618.jpg
    87.8 KB · Views: 148
  • 20160927_185637.jpg
    20160927_185637.jpg
    91.5 KB · Views: 149
  • 20160929_182014.jpg
    20160929_182014.jpg
    104.2 KB · Views: 161
  • 20160929_170215.jpg
    20160929_170215.jpg
    78.9 KB · Views: 138
  • 20160929_180933.jpg
    20160929_180933.jpg
    98.4 KB · Views: 141
  • 20160929_182126.jpg
    20160929_182126.jpg
    71.1 KB · Views: 144
which walls do you think would be unstable?

I removed my FB seats 5 years ago when I pulled my real decks up.


the side walls on the FB, because the seats are gone and there are major gaps in it.:confused:
 
well good luck with it, can't really picture why it is different.
 
I thought the seats gave a lot of structural rigidity to the side walls. but they dont. so there is no problem when removed.
and maybe I was worried to much
for me it's quite a big operation, because I have almost no experience in fiberglass.


By the way, this is the epoxy that I use
 

Attachments

  • 20160929_182156.jpg
    20160929_182156.jpg
    103.2 KB · Views: 152
Last edited:
a couples day later..
filled in the gap and sealed the seams.
fiberglased it all together and smoothed with filler.

tomorrow i can start sanding.:dance:

I'm quite satisfied with the results so far.
 

Attachments

  • 20161008_141223.jpg
    20161008_141223.jpg
    58.8 KB · Views: 149
  • 20161009_131847.jpg
    20161009_131847.jpg
    59.3 KB · Views: 155
  • 20161010_173644.jpg
    20161010_173644.jpg
    72.9 KB · Views: 143
and, of course, also did the other side
 

Attachments

  • 20161009_164559.jpg
    20161009_164559.jpg
    74.5 KB · Views: 146
  • 20161012_163428.jpg
    20161012_163428.jpg
    74.8 KB · Views: 146
  • 20161016_142202.jpg
    20161016_142202.jpg
    69.9 KB · Views: 151
  • 20161021_170547.jpg
    20161021_170547.jpg
    87.1 KB · Views: 142
  • 20161022_162012.jpg
    20161022_162012.jpg
    66.5 KB · Views: 158
on the inside of the flybridge cabinet, I also used fiberglass for added strength
 

Attachments

  • 20161024_111519.jpg
    20161024_111519.jpg
    82.2 KB · Views: 143
the raised edges in the middle off the deck are also removed and sealed with fiberglass
 

Attachments

  • 20161026_103755.jpg
    20161026_103755.jpg
    68.3 KB · Views: 146
  • 20161026_164557.jpg
    20161026_164557.jpg
    77.4 KB · Views: 145
in order to get the deck Smooth, I filled up the low areas with fiberglass.

later I will make it plain with west system 407
 

Attachments

  • 20161031_093511.jpg
    20161031_093511.jpg
    61.8 KB · Views: 151
  • 20161031_094628.jpg
    20161031_094628.jpg
    52 KB · Views: 141
  • 20161031_092959.jpg
    20161031_092959.jpg
    55.9 KB · Views: 147
  • 20161031_145241.jpg
    20161031_145241.jpg
    67.1 KB · Views: 158
Have you finished the sides where the seats were yet?

I just filled where the seat back was and left the rest open.

Put removable black plexiglass panels there and use that area to store fishing rods. Perfect use of space on my boat.
 
As you can see on the lates pictures, the sides are in and ready for painting.
i wil finish the rest off the deck and paint the deck and sides in one go.
 
Nice job...brings back memories.....also while I miss the storage having a huge wide open area up there is GREAT!
 
finally I filled the deck with putty and got it real smooth.
After a paint job it looks great already.
Now I'm waiting for a new deck. it will be a teak lookalike.

meanwhile I'm sanding all the wood down and getting it ready to be varnish
 

Attachments

  • 20161103_132521.jpg
    20161103_132521.jpg
    64.1 KB · Views: 144
  • 20161104_145516.jpg
    20161104_145516.jpg
    86 KB · Views: 160
  • 20161108_124648.jpg
    20161108_124648.jpg
    99 KB · Views: 151
  • 20161221_103736.jpg
    20161221_103736.jpg
    64.7 KB · Views: 155
I had a problem with the drainage channels. the holes are too high, so there always remained a bit of water in the gangways. filled it up with epoxy filler and give it a paint of white.
 

Attachments

  • 20161228_115548.jpg
    20161228_115548.jpg
    60.6 KB · Views: 144
  • 20161228_162555.jpg
    20161228_162555.jpg
    83.4 KB · Views: 142
  • 20161228_162818.jpg
    20161228_162818.jpg
    79.9 KB · Views: 145
  • 20170102_162721.jpg
    20170102_162721.jpg
    60.6 KB · Views: 144
thanks, but I must hurry...at the end of April she should be back the water:hide:
lots to do very little time
 
finally found a good supplier for flexiteak so I can make a mold of the upper deck. let it manufacture for me and lay it down myself.
When measuring I found out that the mast hump was not in the middle or square. They had ask me to put as much information as possible on the mold so I did.

photo #1
roughly translated:
mast foot not in the middle!
because in 1978 it was allowed for Carpenters to drink during work
 

Attachments

  • 20170122_145204.jpg
    20170122_145204.jpg
    68.4 KB · Views: 132
  • 20170122_145153.jpg
    20170122_145153.jpg
    70.7 KB · Views: 136
Last edited:
Also started to refresh the hatch of aft cabin.
by a bad sealant joint moisture has come under the wood.

after removing the old wood I attacked a sheet of plywood with a router.
now I only have to finish the edges and put the fan back into place.
 

Attachments

  • 20170104_094324.jpg
    20170104_094324.jpg
    107.2 KB · Views: 133
  • 20170104_095302.jpg
    20170104_095302.jpg
    108.1 KB · Views: 140
  • 20170104_095658.jpg
    20170104_095658.jpg
    84 KB · Views: 139
  • 20170104_124554.jpg
    20170104_124554.jpg
    88.3 KB · Views: 136
  • 20170104_131832.jpg
    20170104_131832.jpg
    76.5 KB · Views: 133
  • 20170105_110105.jpg
    20170105_110105.jpg
    68.3 KB · Views: 135
  • 20170105_120527.jpg
    20170105_120527.jpg
    78.1 KB · Views: 134
  • 20170106_103418.jpg
    20170106_103418.jpg
    81.1 KB · Views: 137
  • 20170110_112336.jpg
    20170110_112336.jpg
    102.9 KB · Views: 135
  • 20170119_132730.jpg
    20170119_132730.jpg
    103.7 KB · Views: 141
I do not know where to start but I have serious difficulties with painting. probably I suffer from a silicone contamination. I use the same brand of paint for years, and always have a professional end result. except for this boat.
the paint will not adhere to the vessel or paint tray as you can see in the picture, so the supplier added an anti-silicone. now the paint adheres well but will not spread out evenly on hull or upper structure.
I'm working with Akzo Nobel on a solution...:ermm:
 

Attachments

  • 20170122_170315.jpg
    20170122_170315.jpg
    34.5 KB · Views: 144
  • 20170307_162651.jpg
    20170307_162651.jpg
    70 KB · Views: 136
  • 20170307_162728.jpg
    20170307_162728.jpg
    72.1 KB · Views: 135
a couple days later...

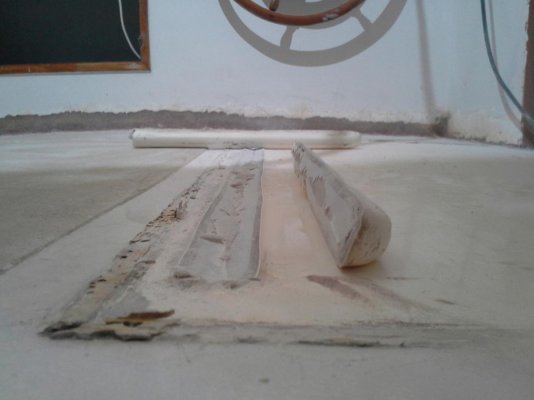
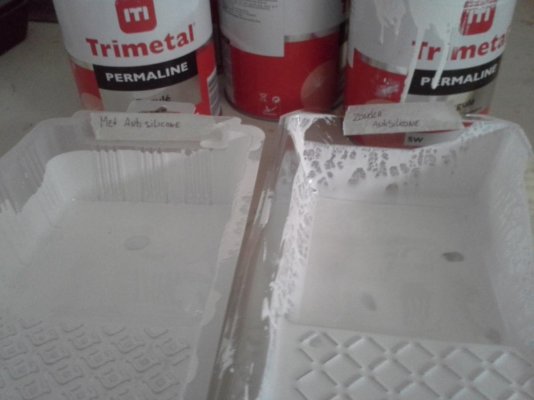
I did several tests with my paint and I think the paint is not good.
if I use an old can of paint, all goes well. when I use the new batch it looks terrible. When I use the old paint can again it also looks terrible because I used my infected paint brushes and rollers.
I bought a liter Sigmarine 49 and a new brush.... all goes well on the unpainted surface. and terrible on the contaminated paint.

Akzo wants to help me but refers me back to the supplier.

my supplier helped me initially but when I showed my test results the conversation started to be hostile.
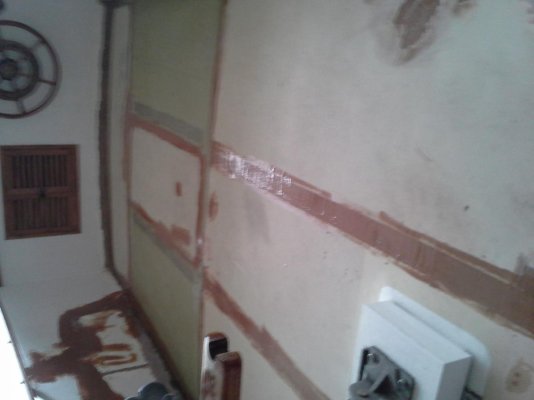
they wanted to do there own tests so I brought back my 12liters of paint. he took all the lids of all the paint cans and I noticed a color difference :confused: He could not deny it
A test surface was painted (i told him to mark the paint can he just used) and i was asked to leave the building. about three days later (he should call me he said) i walked back into the store for some results.

the first thing i saw was a different test surface?? and the marking on the can was removed??

The paint on the test surface was in excellent condition. the other test was just the same he said and already tost it in the bin. :confused:

again a hostile conversation.

the only thing i want is a solution to the problem..
so far it had cost me about 800 euros of paint and supplies and his solution is to invest another 1300 euro in paint of an other brand i don't want..?

i told him i have to sand down the hole ship again so how fast can you get your 1300 euro solution in store?? he began to doubt himself and only wanted to sell me a liter to do some tests..?? He has no confidence in its own products i guess.
I was not planning to buy any products from him anyway... ever!! i think he is trying to screw me over big time
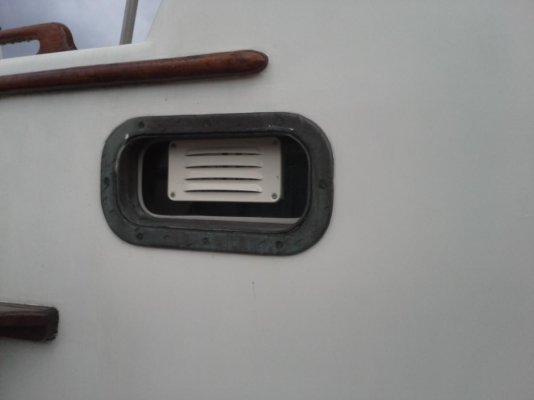
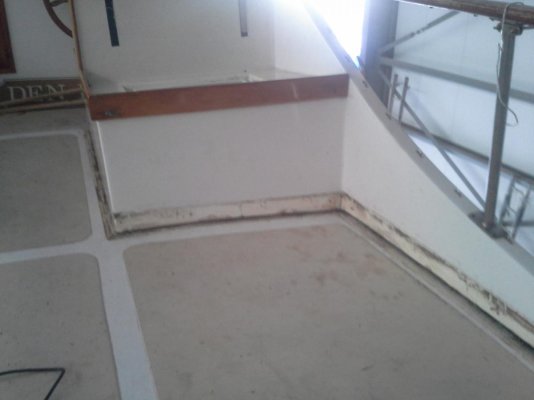
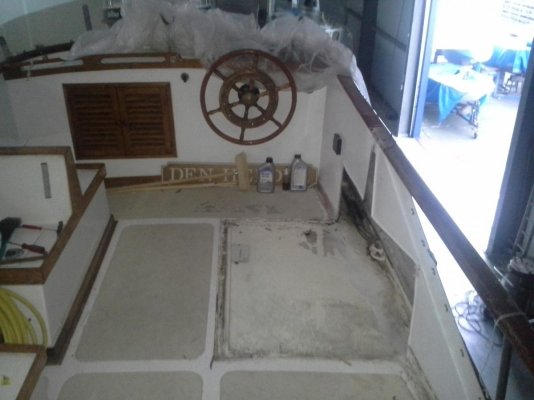
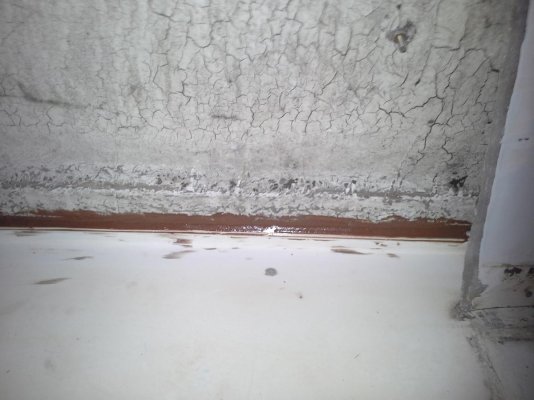
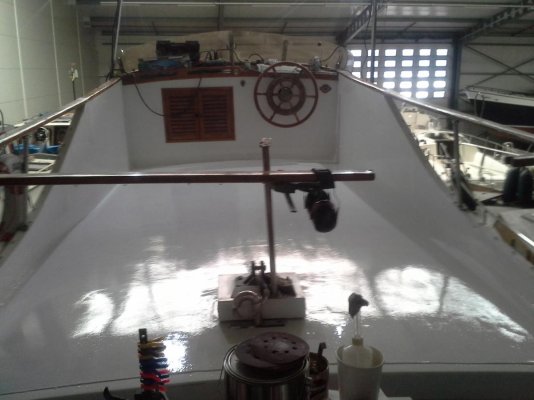
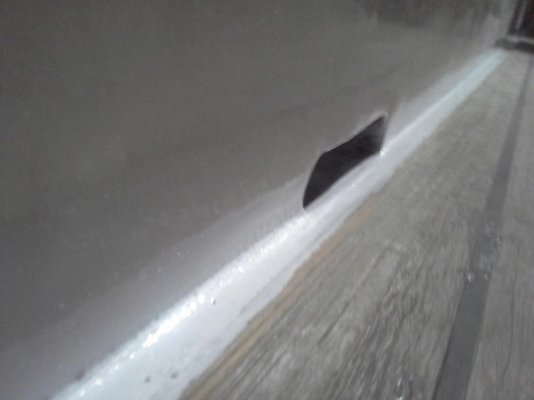
 

Latest posts

Back
Top Bottom