Scuppers on a KK42

The friendliest place on the web for anyone who enjoys boating.
If you have answers, please help by responding to the unanswered posts.

JDCAVE

Guru
Joined
Apr 3, 2011
Messages
2,910
Location
Canada
Vessel Name
Phoenix Hunter
Vessel Make
Kadey Krogen 42 (1985)
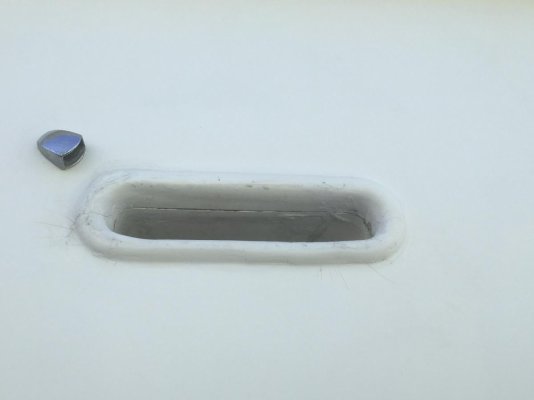
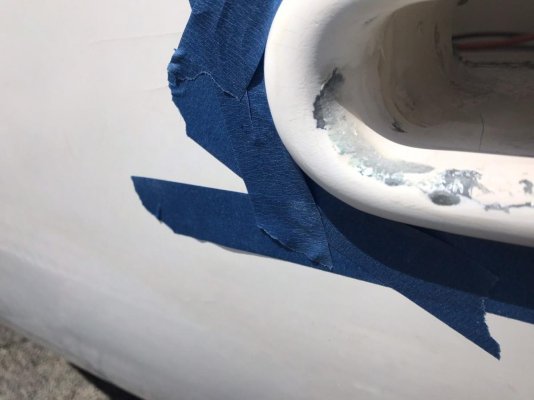
I’ve got one scupper, on the port side-deck near the entry door that has a significant crack on the upper surface and crazing where it joins to the hull. Has anyone have experience with this issue?

I wonder if it is related to lifting the boat out of the water. I notice there is some flex when the boat is removed and replaced into the water.

Jim
 
Jim: If you’re talking about the exterior radius around the scupper, we’ve had a few cracks there also. I repaired them by using a Dremel tool to open the crack, filled and then painted. My observation is it was a poor layup. It’s a tight radius and the gel coat was either too thick or there was a void.
 
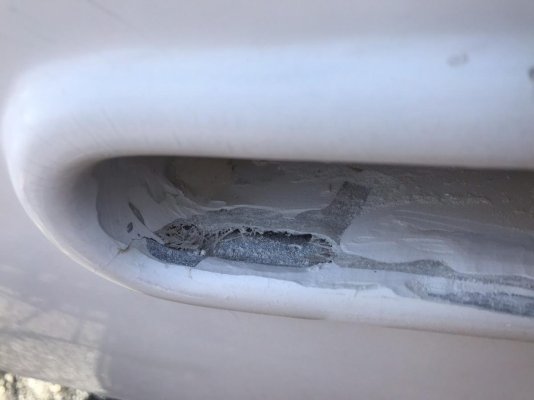
Larry: I’ve got that as well, but I also have a significant crack inside the scupper. I may have to go in there and carefully grind it out, with some sort of a sanding attachment, and then go with epoxy with fibre glass. I agree with the poor layup!

Jim
 
Jim

Look into a Fein tool - they have some pretty amazing attachments for getting into tight spaces.
 
I have a flexible extension probably about 24” for my Dremel tool. It makes it easier to get into tight places than with the bit directly in the tool.
 
Thanks John, Comodave. I have the Dremel equivalent of the Fein tool, but the sanding attachment won’t fit in there. I will look to see if there are others that might work. I’ve also got a regular dremel tool and that will fit in there but it’s a bit small to do major “reduction” but it might have to do.
 
Greetings,
Mr. JD. I've also found a Dremel tool to be quite useful but up to a point. For heavier duty "sculpting", an air powered die grinder with an assortment of carbide burrs is just the ticket. Failing access to an air compressor, carbide burrs for Dremel, while taking longer due to their small sizes may do the job.


https://www.victornet.com/subdepartments/Carbide-Burrs---1/8-Shank/2170.html


This was the first hit in a VERY quick search and I'm sure a more suitable bit could be found with a bit of research.
 
I (gently) use a cutting disc on the Dremel, the fiber-reinforced discs seem to last pretty long. I also have the 90 degree attachment for the end if necessary. If used carefully it seems to make about the right width cut to refill with epoxy for repairs. I haven't noticed cracks on the scuppers, but I have several elsewhere that I didn't notice before our trip up. I'm thinking this boat hasn't been used hard in a while so we may just be loosening things up again.
 
I used my Dremel to open up maybe 100+ stress cracks on my boat. It did very well and I actually only used 1 grinding bit. In one area the old gel coat was so thick I finally got out my belt sander and used it to get down to bare glass. But the Dremel did well in a lot of areas. I have freeing ports in each toe rail that were leaking down into the teak around the hull to deck joint. No way to get a tool into them without the flex extension. I used sanding drums on the extension to sand the freeing ports and then laid thickened epoxy in to seal them followed by black Sika caulk to protect the epoxy from the UV.
 
I’ve sanded the upper surface with a dremel flap sander tool. The process opened up a hole and it’s all void in there. The fibreglass for the upper surface is paper thin, little more than 1/16” and substantially lacking in glass reinforcement. It looks to be very poorly made. Owners beware! They are quite vulnerable to damage during any hard docking that might strike the raised outer lip of the scupper.

IMG_3078.jpg

I had considered just using epoxy and glass mat, but I’m reassessing how to best deal with this. I’m thinking I may use some epoxy to attach a piece of FRP backing up inside the void. When that’s set, I’ll epoxy some glass mat around the affected area, putty that up and fair it smooth and then epoxy paint. At least that’s where I’m kind of going with things.

I’m just viewing it as a drywall repair, except with fibreglass and epoxy, rather than mud and tape.
 
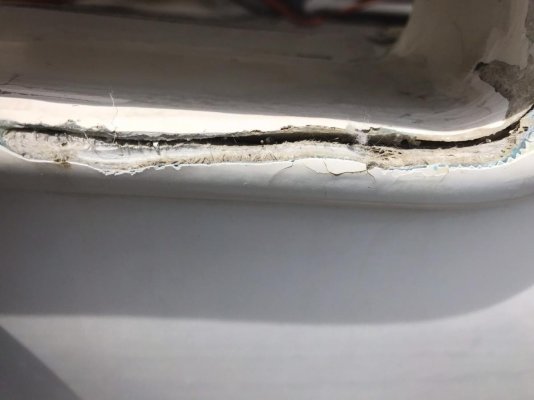
It looks like a crack running around the whole scupper. I would try to grind out some of the loose material around the crack and open it up so you can get the thickened epoxy down into the crack. Also it will give the thickened epoxy some more solid material to grab onto.
 
Dave: it looks to me the bottom surface of the scupper is pretty solid, which does make sense as I think it sits on the FRP deck. So it’s the upper surface and sides that will need reinforcement.

If someone was real frisky, competent and wanted a challenge, I suppose one could make a mold for new scupper inserts, mold up some new ones, grind the old ones out and insert the new ones. And then and fare and paint the whole hull.

Jim.
 
...

If someone was real frisky, competent and wanted a challenge, I suppose one could make a mold for new scupper inserts, mold up some new ones, grind the old ones out and insert the new ones. And then and fare and paint the whole hull.

Jim.
:eek::eek:
 
All of Salty Lady’s were in tough shape. I used a dremal and a heavy duty die grinder to get in and open things up. I was surprised at how thin the glass was there. I used epoxy thickened with silca to glue things back together
IMG_0584.jpgIMG_0586.jpgIMG_0593.jpgIMG_0594.jpg
I didn’t use any matt as I felt that the filler would make things more solid. If the crack again then I’ll add some. But two years later we are still good! No pics of them gel coated.
 
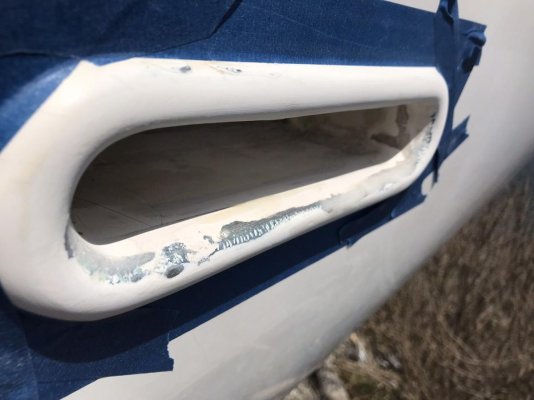
I should have updated earlier. I used two layers of mat, epoxy and epoxy putty in several steps and sanded smooth and then epoxy paint. It’s not a work of art, but you can only really look at it when the boat is on the hard.
 
We have scuppers but they are hard to paint or otherwise service.
The only water entering the cockpit is dealt with by the deck drains.
 
I should have updated earlier. I used two layers of mat, epoxy and epoxy putty in several steps and sanded smooth and then epoxy paint. It’s not a work of art, but you can only really look at it when the boat is on the hard.


...oh, and before all of this, I did epoxy a thin piece of FRP glass in place as backing over the void.

Jim
 
Back
Top Bottom