You are using an out of date browser. It may not display this or other websites correctly.
You should upgrade or use an alternative browser.
You should upgrade or use an alternative browser.
34 Clipper (CHB) Pilothouse Restoration
- Thread starter 34Clipper
- Start date
The friendliest place on the web for anyone who enjoys boating.
If you have answers, please help by responding to the unanswered posts.
If you have answers, please help by responding to the unanswered posts.
Redhook98
Senior Member
- Joined
- Jun 26, 2019
- Messages
- 365
- Location
- US
- Vessel Name
- Tatoosh
- Vessel Make
- 1979 49ft Marine Trader RPH
This is incredible! Great work! I love the pics. My 1979 49-ft MT PH went thru a similar resto. The only original bulkhead is the 1ft long wall next to the rear sliding door. Every deck, bulkhead, overhead, tank, wire, window, framing, joists, etc etc were removed with serious rot/damage and had to be replaced. (Boat was closed off completely for 10 years in the open weather in Virginia, leaked, rotted.) At one time, there was not anything from the main deck up. I have videos, but no still pics. You are doing a very similar job as the PO of my boat did, but much faster. His was an 18 year labor of love. Its fascinating how the scope of these small repairs escalates.
Thanks guys appreciate the encouragement. I’m just taking each issue one by one. I’ve decided to start at the bow and work my way back. I’ll keep the pics coming. Things have been a bit slow as I’ve had a lot going on with work etc.
next is to cut some marine ply to match the cardboard templates I’ve made and get the sides and ceiling on.
next is to cut some marine ply to match the cardboard templates I’ve made and get the sides and ceiling on.
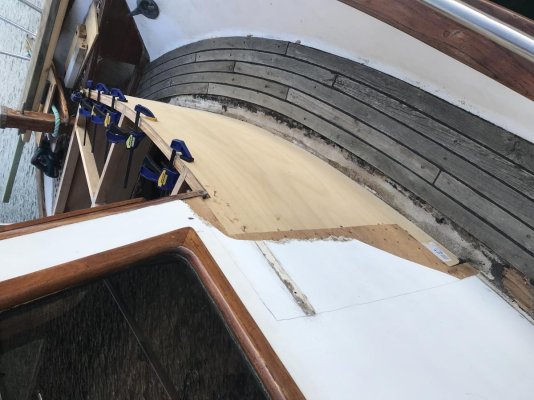
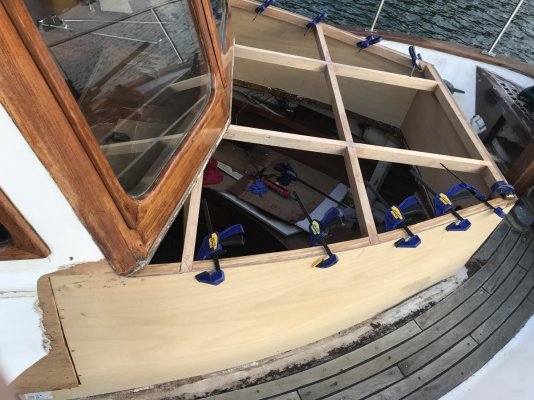
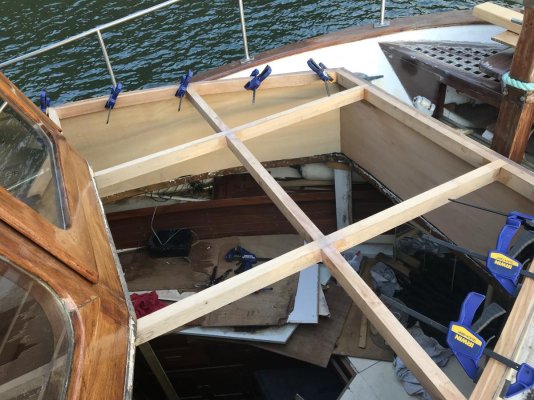
Today I was able to get the first layer of 6mm marine ply on the side walls. It looks like a fairly simple job, but it was quite time consuming. I cut the ply using the cardboard templates I had made up, and it took a few trial fits to get it right. I started with the starboard side first. I had to back block where I was joining onto the existing cabin walls to ensure it was strong enough and to reduce the chances of the fiberglass cracking later on.
I mixed up some thickened epoxy for the timbers, and applied a thick bead of the marine polyurethane along the fiberglass bottom lip.
Once it was in place it was clamped and a few temporary screws to help hold it in place.
I then repeated the process on the port side
My next visit will be to laminate a second 6 or 9mm layer over the same area.
Attachments
-
 AFEE435D-4699-4EA3-B5F5-98187F008A6F.jpg137.5 KB · Views: 71
 -
 66BE5634-4F05-4CA6-9501-B44D30E0CFE4.jpg159.8 KB · Views: 70
 -
 E64ACFFE-B2DD-432F-8F39-84EDEF93E3D4.jpg175.2 KB · Views: 66
 -
 815A7143-9C1B-493F-83AB-7B68B4CDE93A.jpg78.4 KB · Views: 67
 -
 1757F1AA-6BD0-4CE2-A16C-CBB5B2580C86.jpg172.7 KB · Views: 73
Comodave
Moderator Emeritus
- Joined
- Jul 2, 2015
- Messages
- 21,298
- Location
- Au Gres, MI
- Vessel Name
- Black Dog
- Vessel Make
- Formula 41PC
Looking good. Are you sealing the plywood with epoxy before installing it? Might help it last longer.
Comodave
Moderator Emeritus
- Joined
- Jul 2, 2015
- Messages
- 21,298
- Location
- Au Gres, MI
- Vessel Name
- Black Dog
- Vessel Make
- Formula 41PC
And you can never have too many clamps can you?
Could it have been an option to build the whole fwd house on shore and bring it aboard complete and ready to tab/glass in?Today I was able to get the first layer of 6mm marine ply on the side walls. It looks like a fairly simple job, but it was quite time consuming. I cut the ply using the cardboard templates I had made up, and it took a few trial fits to get it right. I started with the starboard side first. I had to back block where I was joining onto the existing cabin walls to ensure it was strong enough and to reduce the chances of the fiberglass cracking later on.
I mixed up some thickened epoxy for the timbers, and applied a thick bead of the marine polyurethane along the fiberglass bottom lip.
Once it was in place it was clamped and a few temporary screws to help hold it in place.
I then repeated the process on the port side
My next visit will be to laminate a second 6 or 9mm layer over the same area.
SYJOS- On the port side I used a few 18mm (3/4) ply offcuts and blocked behind the join. Glued with epoxy and screwed with stainless screws. It is in the cavity behind the cupboard that houses the switch panel so will never see the light of day again (I hope).
The join on the starboard side is on the wall in the lower head above the sink. I can’t block that up permanently as that wall is on show inside, so I have temporarily blocked it with ply to hold its shape. And when I fiberglass over it all I will go back and remove the block, epoxy the join and lay a thin 4-6mm sheet of ply over that whole area which will hold it all together.
It’s hard to explain but I hope you understand. I’ll keep the photos going as the work progresses.
COMODAVE - as the ply walls will be laminated to get to the desired thickness, I am covering the layers in epoxy to join them. I also lather up thickened epoxy into all the joins, cracks etc to make sure it really seals it. I will be using polyester laminating resin when I lay the glass, so I will be soaking the ply in that before I start. The final glass layer will be done with epoxy so that it adheres well to the original glass. I will also use epoxy to tab it into the deck. As I have learnt you can use epoxy over poly but not the other way round. The only part I’m not epoxying is the inside surface, as I don’t know what I’m doing in there yet. Haha yes I had to go and buy another 8 clamps. They aren’t expensive and always come in handy.
AQUABELLE - I had originally planned to do it that way, but there was no possible way it could happen unless the lee was nothing there from the windscreen up. As I was having to support the windscreen and flybridge, I had to work strategically and put it all together like a puzzle for it to be structurally sound. Bits had to be slid in sideways, some from above, some underneath. Also due to the fact that the boat (pretty much every boat) isn’t symmetrical I had to do a fair bit of trial fitting. It would amaze you how different one side is from the other even though you would barely notice by eye. Some parts were 10-15mm out. The curves were different on both sides too.
It would’ve been far easier, but unfortunately not possible.
Comodave
Moderator Emeritus
- Joined
- Jul 2, 2015
- Messages
- 21,298
- Location
- Au Gres, MI
- Vessel Name
- Black Dog
- Vessel Make
- Formula 41PC
My wife used to ask why I needed all of the clamps I have so I told her you can never have too many clamps. Sounds like you have a good handle on how you are doing the laminations. Keep up the great work.
H20Pirate
Newbie
Awesome job! I have the same boat in California I could not find another like it until I stumbled across this forum it's worth all the effort you are putting in I've been a liveabord on three different boats for the past nine years this one has been the best in comfort and maintenance cost lots of Rees restoration projects to myself mainly exterior fortunately I'll post some pictures here in the near future
SeaMoose
Senior Member
- Joined
- Oct 7, 2007
- Messages
- 360
- Vessel Name
- Sea Moose
- Vessel Make
- 1976 34' D/C Taiwanese Trawler
Thank you so much for sharing this. I have a '76 D/C version, rebuilt the cabin top last year, am starting on the forward house you've answered a lot of questions I had.
Apologies everyone for the long break, I have extended my studies and have yet another child on the way so things have been hectic.
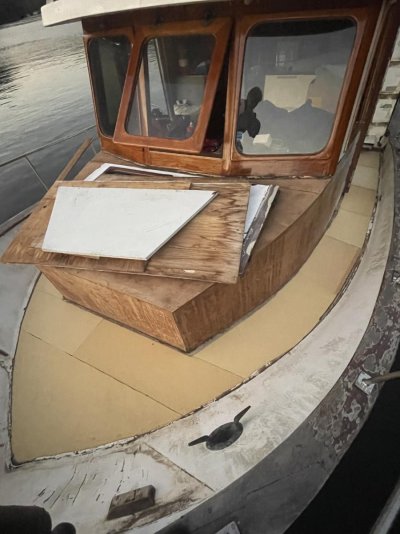
I have progressed further than my last post, but still not finished the front cabin.
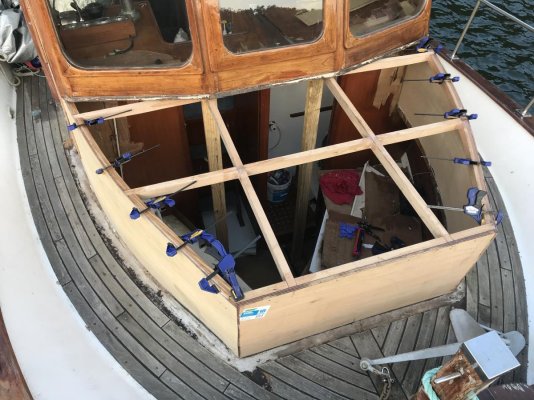
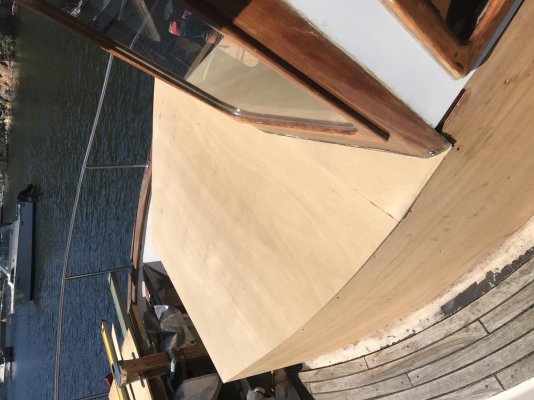
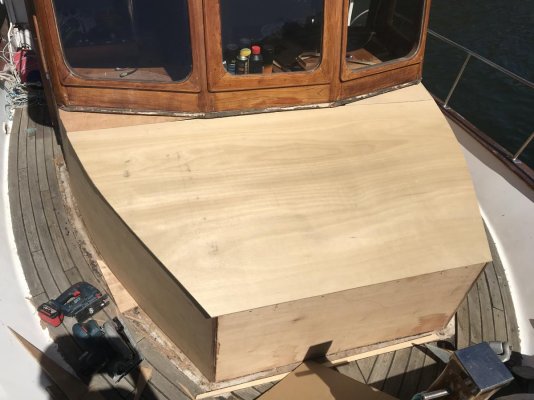
I managed to get the side walls on, in two layers of ply, one 6mm and one 9mm, and the cabin top which proved very difficult due to the shape and how it had to fit in with the existing structure. This was also done by laminating two layers of ply to achieve the curve needed and screwed together with stainless screws and a lot of epoxy.
It breaks my heart having it sit there for so long like this, but thankfully I have it 95% weatherproof with tarps and a canvas cover.
I did visit the boat every month to pull the covers off, let it air out, start the motor etc, but I just had no time to continue the work.
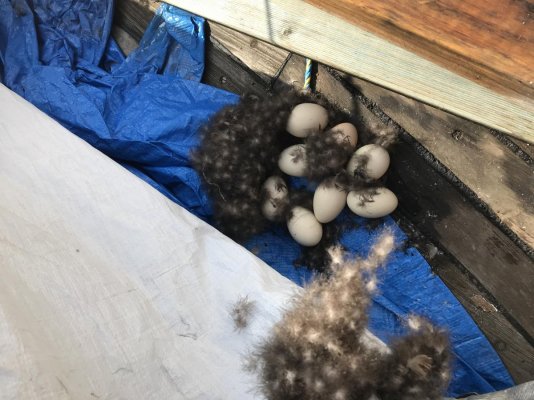
There was one time I did have a few spare days, but when I got there I discovered a duck nest with 7 eggs and the mother duck protecting them.
I decided to let nature take its course and wait until th3 eggs hatch and they leave the nest before I continue. I was to,d this wasn’t exactly the best decision and I should’ve got rid of them, but I didn’t have the heart to with the mother duck there looking at me almost begging me not to touch them.
I will attach some photos.
I hope to return and pick up where I left off a bit later this year.
I will certainly keep you all updated.
I have progressed further than my last post, but still not finished the front cabin.
I managed to get the side walls on, in two layers of ply, one 6mm and one 9mm, and the cabin top which proved very difficult due to the shape and how it had to fit in with the existing structure. This was also done by laminating two layers of ply to achieve the curve needed and screwed together with stainless screws and a lot of epoxy.
It breaks my heart having it sit there for so long like this, but thankfully I have it 95% weatherproof with tarps and a canvas cover.
I did visit the boat every month to pull the covers off, let it air out, start the motor etc, but I just had no time to continue the work.
There was one time I did have a few spare days, but when I got there I discovered a duck nest with 7 eggs and the mother duck protecting them.
I decided to let nature take its course and wait until th3 eggs hatch and they leave the nest before I continue. I was to,d this wasn’t exactly the best decision and I should’ve got rid of them, but I didn’t have the heart to with the mother duck there looking at me almost begging me not to touch them.
I will attach some photos.
I hope to return and pick up where I left off a bit later this year.
I will certainly keep you all updated.
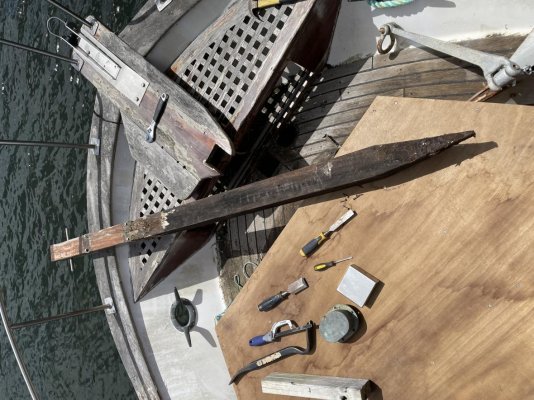
Pics attached...
(Good old phone pics wont upload the correct way up even if I flip them, I’ll have to edit them on the computer and re-post later)
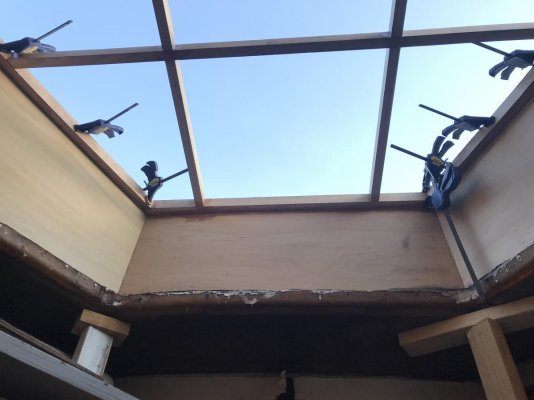
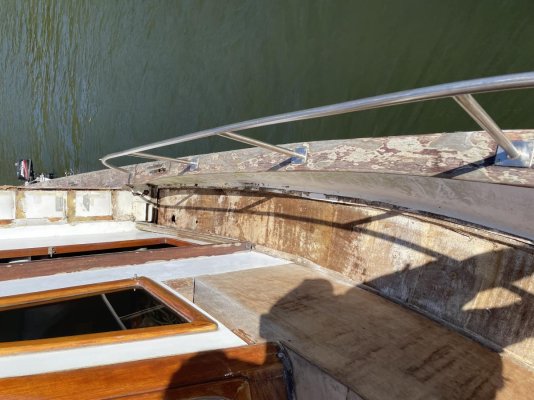
Although it looks to be completely flat, the cabin top is curved on both axis and at different amounts.
Very slight curve at the front to a more aggressive curve under the windscreen. Not very noticeable in the photos
(Good old phone pics wont upload the correct way up even if I flip them, I’ll have to edit them on the computer and re-post later)
Although it looks to be completely flat, the cabin top is curved on both axis and at different amounts.
Very slight curve at the front to a more aggressive curve under the windscreen. Not very noticeable in the photos
Attachments
Last edited:
RT Firefly
Enigma
Greetings,
Mr. 34. Good call on the duck.
I had a similar experience, years ago with chipmunks. I was doing the spring clean up and outfit and discovered 4 or 5 "puppies" in one of the lockers. BIG pile of fluff as nesting material. Discovered my 250' of nylon anchor rode was now in 3 pieces (fluff fodder). I was pretty miffed BUT, I carefully put the nest WITH the pups in a bucket and put it under the boat. The rest of the fluff was tossed in a garbage bag and also put under the boat.
Next weekend puppies were gone AND a "mom" sized hole in the garbage bag. I must have inadvertently garbaged one of the brood and mom rescued it.

I mentioned this to some yard neighbors and they said I should have dispatched the youngsters but that's not me, I suppose.
Mr. 34. Good call on the duck.
I had a similar experience, years ago with chipmunks. I was doing the spring clean up and outfit and discovered 4 or 5 "puppies" in one of the lockers. BIG pile of fluff as nesting material. Discovered my 250' of nylon anchor rode was now in 3 pieces (fluff fodder). I was pretty miffed BUT, I carefully put the nest WITH the pups in a bucket and put it under the boat. The rest of the fluff was tossed in a garbage bag and also put under the boat.
Next weekend puppies were gone AND a "mom" sized hole in the garbage bag. I must have inadvertently garbaged one of the brood and mom rescued it.
I mentioned this to some yard neighbors and they said I should have dispatched the youngsters but that's not me, I suppose.
Last edited:
I’m back into it!
Well after a long absence due to the Covid period and a few health issues I am back into the restoration.
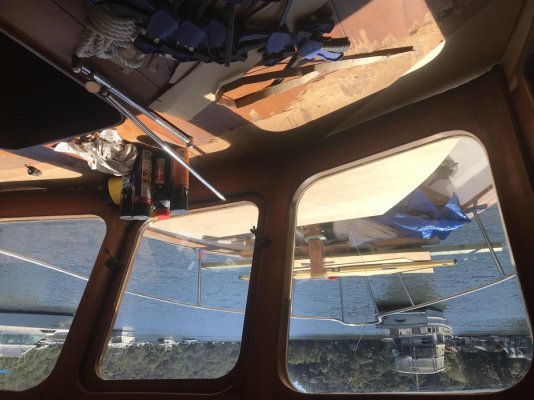
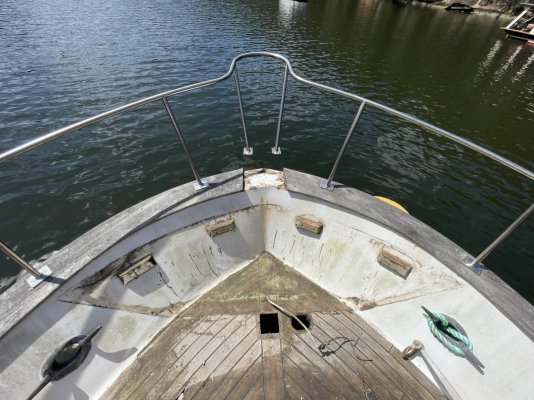
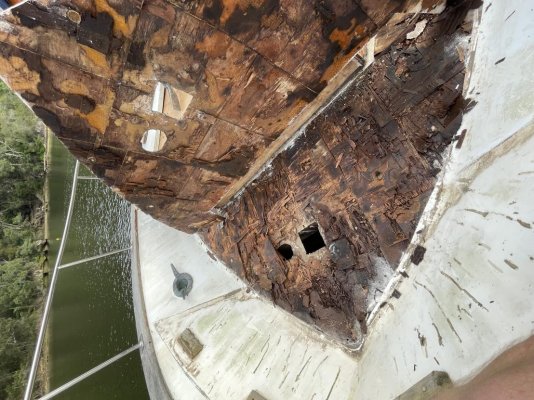
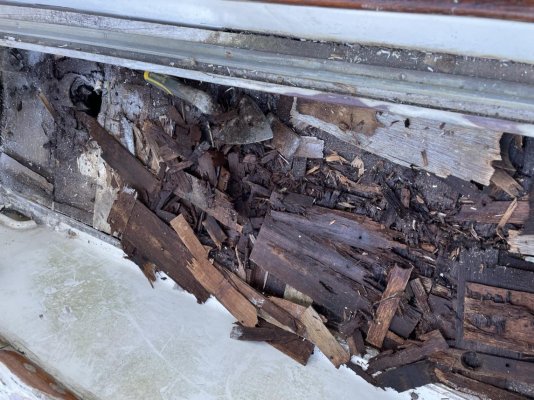
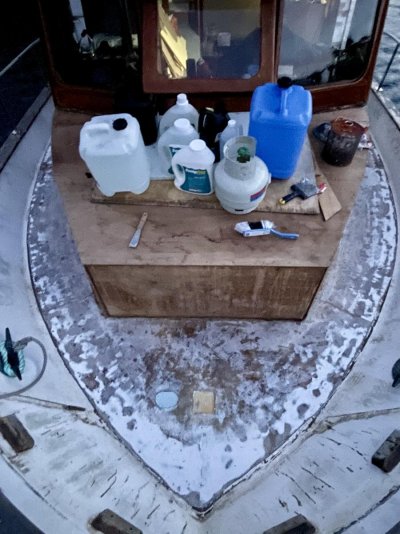
This week involved pulling up the front decks and re-coring. This time I have gone for a PVC closed cell deck core rather than marine ply.
No surprises the deck was saturated and completely rotted. Once again I cut up the top fiberglass layer, took it all home to clean off all the old adhesive that was left from the teak and will be using resin to stick it back down over the new core. Then it’s time to do further repairs on the main saloon. Once that’s done I will fiberglass the new front cabin, go over the new front decks with a few layers and should be sealed from any further water ingress.
Well after a long absence due to the Covid period and a few health issues I am back into the restoration.
This week involved pulling up the front decks and re-coring. This time I have gone for a PVC closed cell deck core rather than marine ply.
No surprises the deck was saturated and completely rotted. Once again I cut up the top fiberglass layer, took it all home to clean off all the old adhesive that was left from the teak and will be using resin to stick it back down over the new core. Then it’s time to do further repairs on the main saloon. Once that’s done I will fiberglass the new front cabin, go over the new front decks with a few layers and should be sealed from any further water ingress.
Attachments
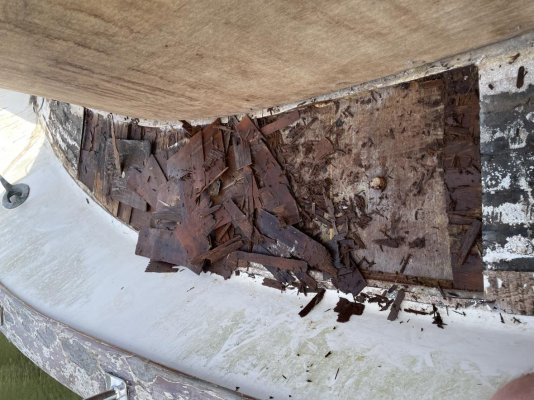
New deck core laid down with a 2 part core laminating adhesive, which was much thicker than regular resin and blue in colour. It needed to be put on with a spatula. I went through an entire 20L drum.
Once the core was down I came back the following day and started laying back down the original deck fiberglass skin. This was tricky as I had to weigh it down or the edges would lift up.
Anyway it was a massive week but the deck is now done and ready for fiberglass.
Once the core was down I came back the following day and started laying back down the original deck fiberglass skin. This was tricky as I had to weigh it down or the edges would lift up.
Anyway it was a massive week but the deck is now done and ready for fiberglass.
Attachments
Comodave
Moderator Emeritus
- Joined
- Jul 2, 2015
- Messages
- 21,298
- Location
- Au Gres, MI
- Vessel Name
- Black Dog
- Vessel Make
- Formula 41PC
Good work. Nicely done.
Similar threads
Latest posts
-
 Fixing boats in Exotic Places - are new boats really that bad?
- Latest: boating rich
-
-

-
-

-
-

-
