Door and Runner Upgrade

The friendliest place on the web for anyone who enjoys boating.
If you have answers, please help by responding to the unanswered posts.

Tom.B

Moderator Emeritus
Joined
Jul 30, 2009
Messages
5,839
Location
USA
Vessel Name
Skinny Dippin'
Vessel Make
Navigator 4200 Classic
Here is the next big thing on the list.

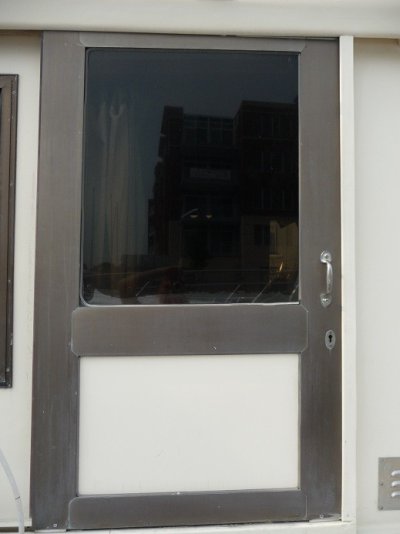
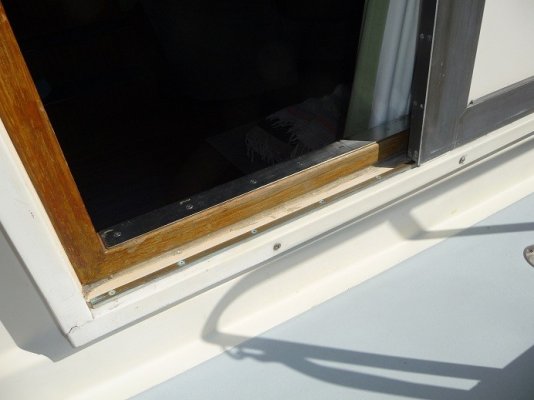
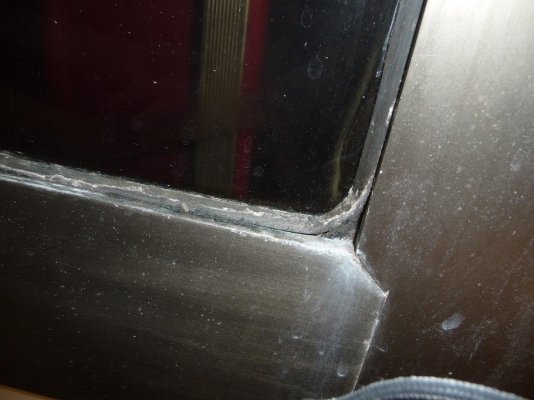
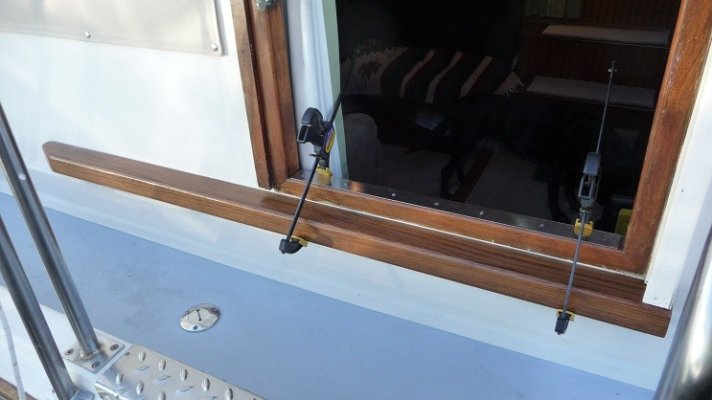
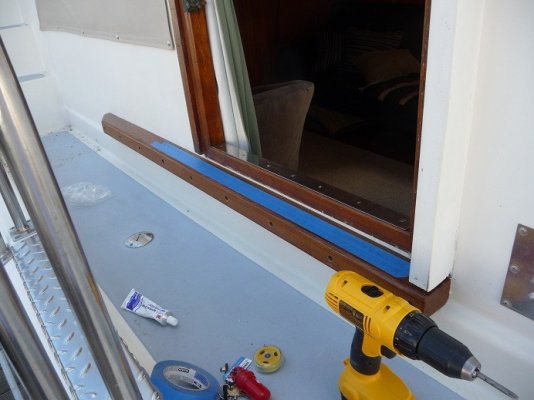
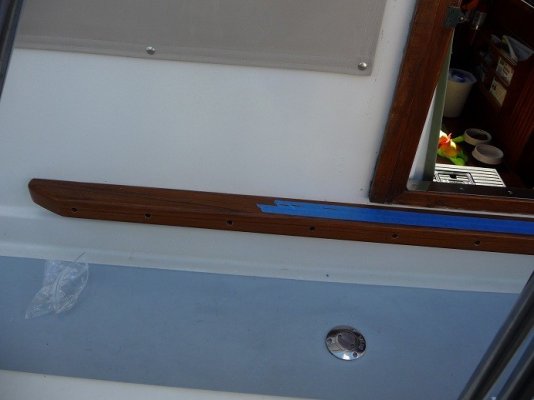
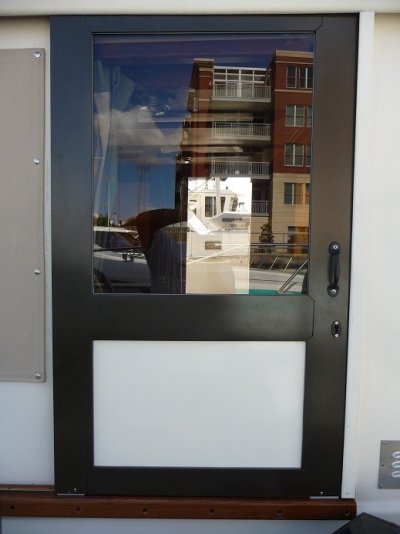
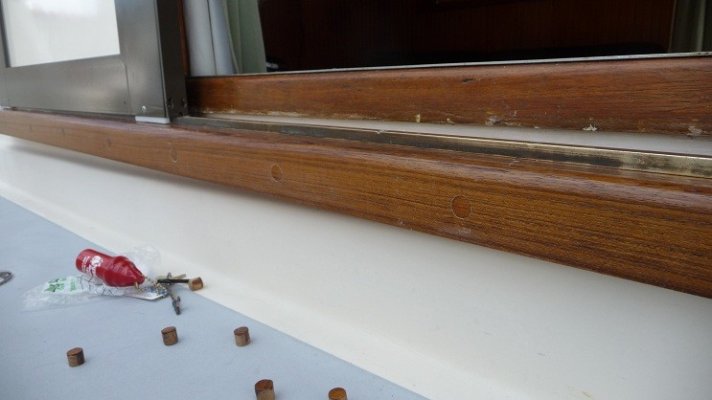
Thanks to Bess' keen eye, one day last month she noticed that the runner the sliding side salon doors are setting on had begun to fall apart. Upon closer inspection, it had indeed been invaded by water. luckily, it is a simple bolt-on piece. I had a couple of estimates done, but in the end, decided to try and fix it myself. I want to replace it with a piece of solid teak. At the same time, the aluminum anodized door was faded, the tempered glass is wicking water up into it, and the weatherstripping is shot (and was installed poorly). So the plan is to have the entire door media blasted and powder coated, new glass, and new weather stripping.

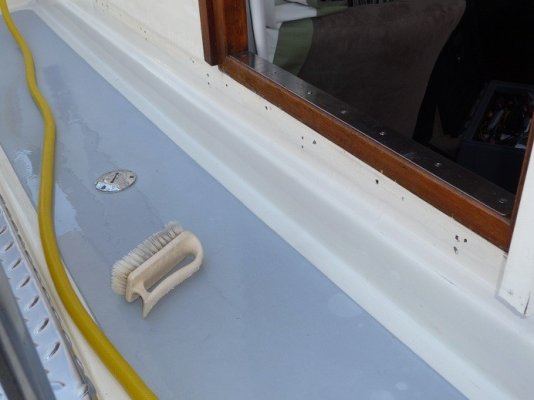
Since we live 125 mile from Skinny Dippin', this is going to take several weeks to do. But first things first... demolition time.

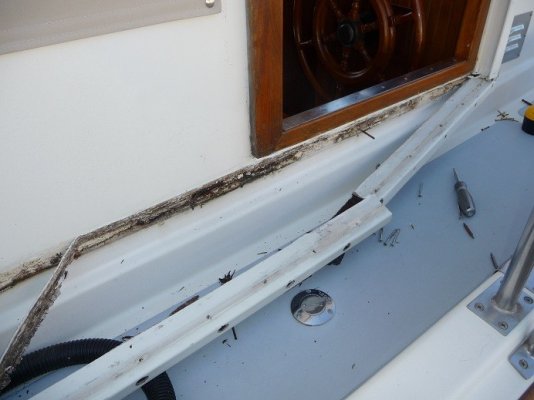
The runner is just two pieces of 3/4" plywood with what looks like gelcoat and epoxy encasing it. It has obviously been removed before, or at the very least, reattached with new screws. It was an absolute mess! The plywood was soaked to the core and no part of the wood was dry. It fell apart in my hands as I removed it.

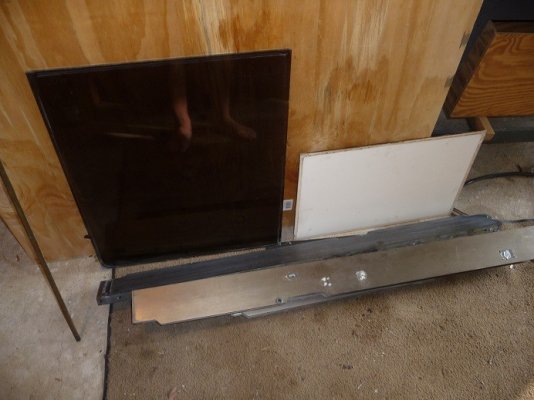
When we got back home I set to dismantling the door for the trip to the powder coater. I lost a few screw heads, but generally, the door came apart easily. I have a friend in the glass business and he is going to set about replacing the glass with new.

Here are pics of the progress as-of today.
 

Attachments

  • p1000710sm.jpg
    p1000710sm.jpg
    52.2 KB · Views: 66
  • p1000971.jpg
    p1000971.jpg
    69.3 KB · Views: 68
  • p1000972.jpg
    p1000972.jpg
    78.3 KB · Views: 61
  • p1000977.jpg
    p1000977.jpg
    81.8 KB · Views: 55
  • p1000978.jpg
    p1000978.jpg
    66.3 KB · Views: 59
  • p1000984.jpg
    p1000984.jpg
    97.5 KB · Views: 64
  • p1000987.jpg
    p1000987.jpg
    91.1 KB · Views: 52
I have a question... What bedding compound should I use when I remount the runner? It will be teak against painted gelcoat. I was thinking about marine grade silicone. But maybe 3M 4200 or 4000. ALso, will the same thing be ok for filling the old screw holes?


-- Edited by GonzoF1 on Wednesday 5th of October 2011 07:52:41 AM
 
It's as solid as I am willing to look for. The runner was just attached to the bulkhead with screws and every hole had a screw in it. Poking at it doesn't reveal any soft spots and there is no damage looking up from the bilge below it. There was a crack in the runner and poor sealant where it was attached. So it's unlikely that much water got into the screw holes. I hope that blocking the holes and stopping any MORE water from getting in there will be enough. Like I said, I am not going to look for it because I do not want to tackle that job or could afford to even if I wanted to. This will have to be enough.
 
Use anything but silicone to bed the runner. The only use for silicone on a boat is to bed some plastics that can be damaged by other sealants. I would use 5200 but everyone else in the world is afraid of it. It's adhesive properties have assumed mythical proportions. I would also clean the teak with denatured alcohol or acetone to remove the surface oils.
 
HopCar wrote:
Use anything but silicone to bed the runner. The only use for silicone on a boat is to bed some plastics that can be damaged by other sealants. I would use 5200 but everyone else in the world is afraid of it. It's adhesive properties have assumed mythical proportions. I would also clean the teak with denatured alcohol or acetone to remove the surface oils.
*+1** Silicone should be outlawed on boats.*

4200 would be my preference, but one of the polysuphides (boat life) could also work well.
 
This project is taking FAR too long. Living 125 miles from the boat for a project like this is TORTURE! Still, progress while slow and frustrating, is happening. One door is completely rebuilt, but getting it all to get back together like it came apart is driving me nuts.

Anyway, a pic of the new runner mocked up.
 

Attachments

  • p1010126.jpg
    p1010126.jpg
    69.3 KB · Views: 71
Tom,

It's looking really good! When you get done do ya want to come do my three doors?
 
Plywood with a 2x4 cross-brace screwed in from the inside with 2.5" drywall screws.
 
GonzoF1 wrote:
This project is taking FAR too long. Living 125 miles from the boat for a project like this is TORTURE!......
*Tom, my heart goes out to you.* I only live 33 km from my boat, a 66km return trip, yet I find doing projects on her frustrating at times.* It always feels like you are proceeding at a snails pace, doesn't it.* Particularly if you only have each weekend to do it.* It is so easy to forget some important bit of something you need.* Especially if that bit happens to be the keycard to the marina finger and boat, which has happened to me on occasion when I have used my wifes Outback the previous trip and forgotten to take my lanyard with these rather essential 'bits' attached out and put it back in my car.
 
Finally got to final assembly of door #1 this weekend. I made a few major mistakes the first time, but I figured out what I was doing wrong. It's not perfect, there are a few work-arounds I had to do to square the door to the opening and I still need to tweak the lock alignment, but I can live with those for now.

The first attempt mounting the runner was about 1/8" off and I thought I was screwed since the new holes would be so close to the old. I ended up filling the previous holes I made with a 2-part Loctite putty I saw on a Sailrite video. The stuff sets like steel in 45 minutes!

The second door should go more quickly... At least I hope so.

More pics...
 

Attachments

  • p1010156.jpg
    p1010156.jpg
    84.6 KB · Views: 62
  • p1010157.jpg
    p1010157.jpg
    62.2 KB · Views: 65
  • p1010159.jpg
    p1010159.jpg
    71.2 KB · Views: 61
  • p1010162.jpg
    p1010162.jpg
    62.8 KB · Views: 61
Back
Top Bottom